ORACLE PRIMAVERA UNIFIER
DOWNLOAD THE PDF HERE
As a Unifier administrator or developer, you may have the following questions in system design:
- How do I connect Unifier and P6 out of the box configurations?
- How do I create a Schedule Sheet in Unifier?
- How do I Send P6 Schedule Data to the Unifier Schedule Sheet from P6?
In today’s topic, we are going to explore these items and give you recommendations on how, where & when to use these design features in Unifier development and design.
Set Up the Unifier & P6 Connections
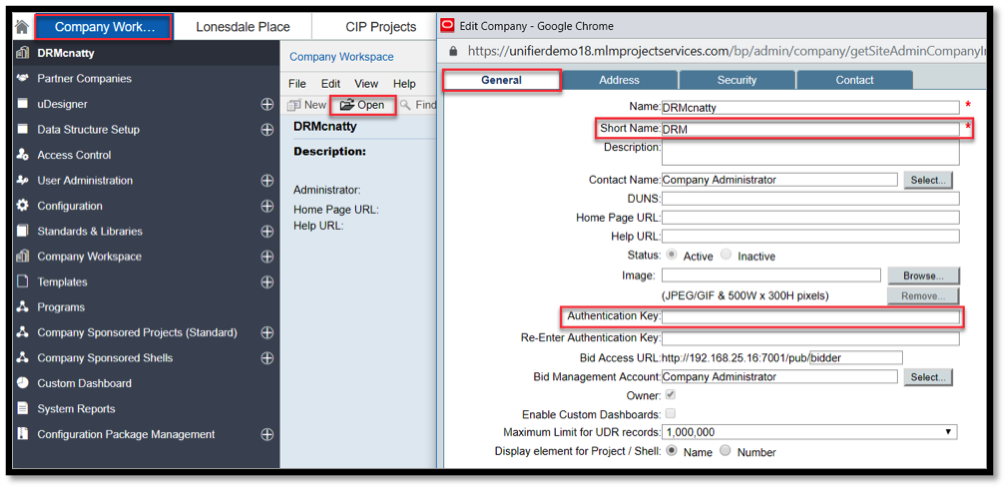
In Unifier navigate to Company Workspace > Admin mode > click on Open > On the General tab > record the Short Name and Authentication Key
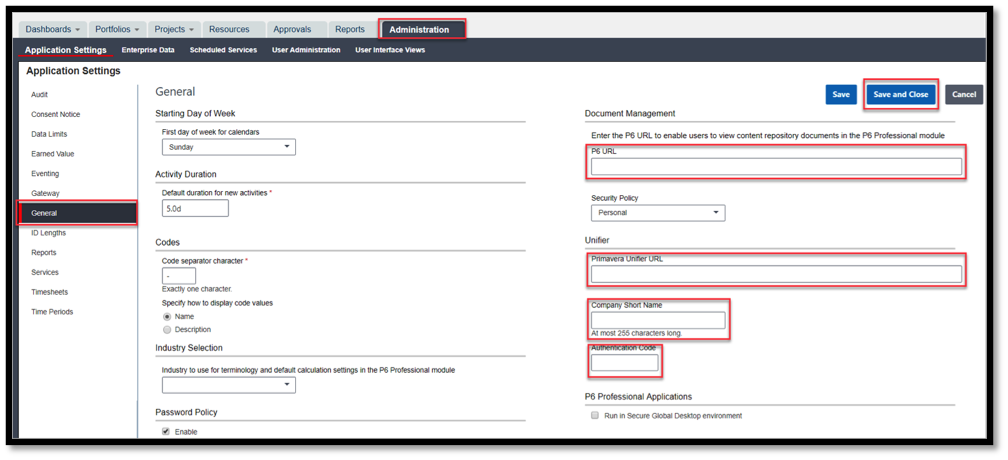
Navigate to P6 EPPM login & go to the Administration Tab
Within the User interface, navigate to Administration > General
- Enter in your P6 URL, Primavera Unifier URL, Company Short Name from Unifier & Authentication Code from Unifier > click “Save and Close” when finished.
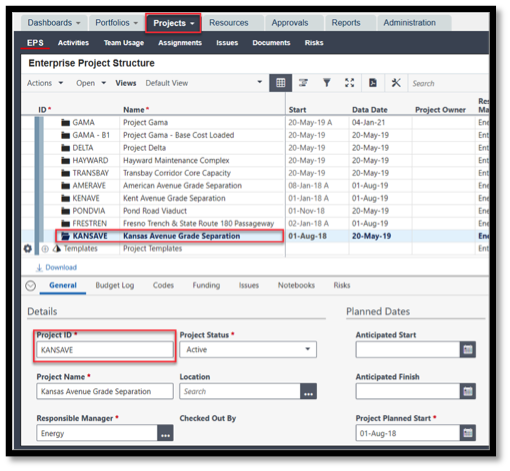
In P6 EPPM go to the Projects Tab
Within the User P6 EPS, navigate to Your P6 Project > General Tab > and Copy your Unique Project ID
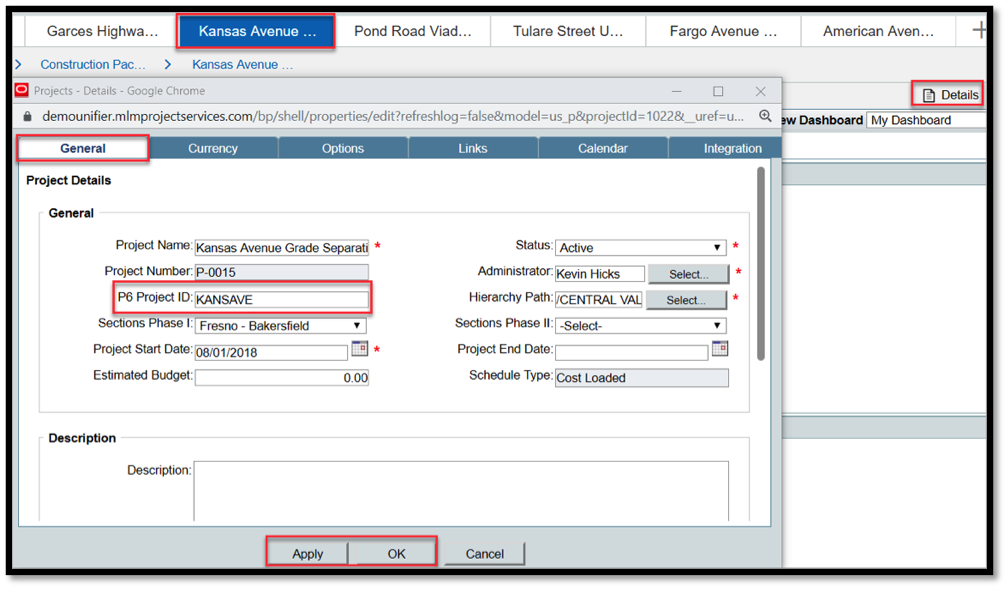
In Unifier Navigate to Your Project > User Mode > click on Details > General tab > and input your P6 Project ID from Project ID in P6 > click Apply & Ok
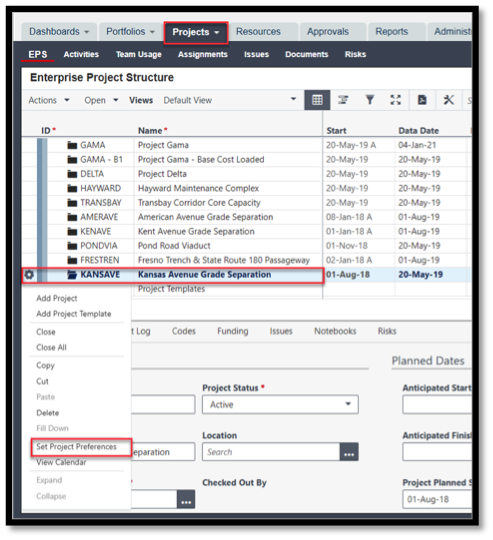
In P6 EPPM > go to the Projects Tab > Navigate to your “Project” > Select Set Project Preferences
Sending the P6 Schedule Data to Unifier
** Note This Integration assumes you have beforehand created in your Unifier Project a Schedule Sheet and a Data Mapping Sheet;
** If you have not completed this, jump to the next steps Under > Heading: Creating the Unifier Schedule Sheet and its Data Mapping Sheet
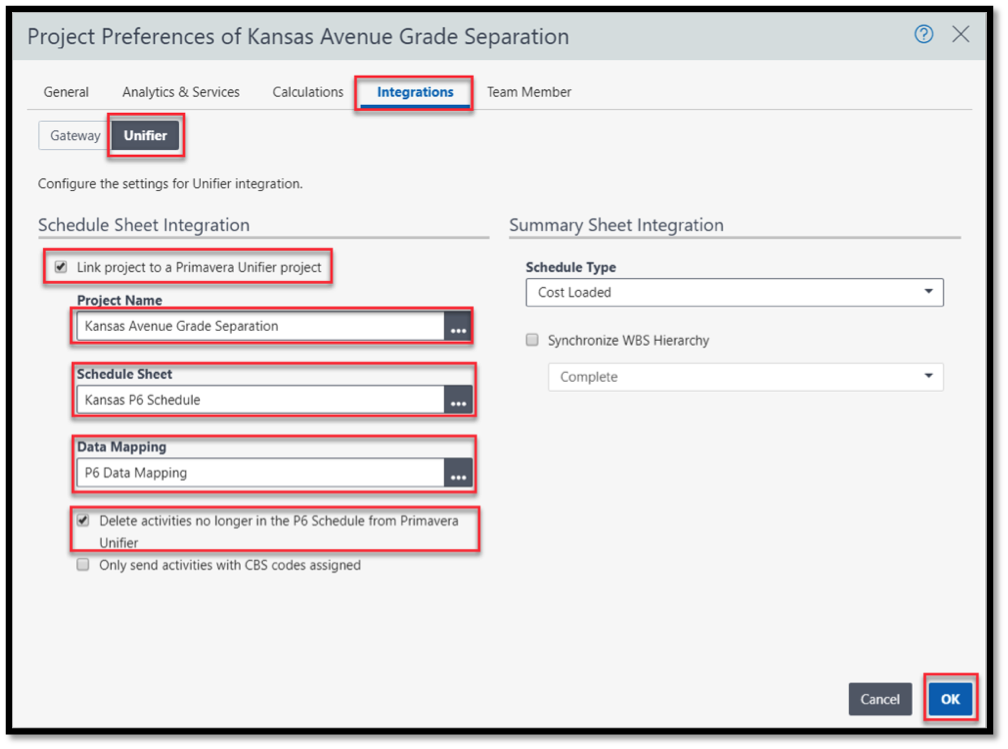
Go to the Integrations Tab > Click Unifier > Select Link Project to a Primavera Unifier Project > Select your Project Name > select your Schedule Sheet > Select your Data Mapping > click the Box “Delete activities no Longer in the P6 Schedule from Primavera Unifier” > Click OK
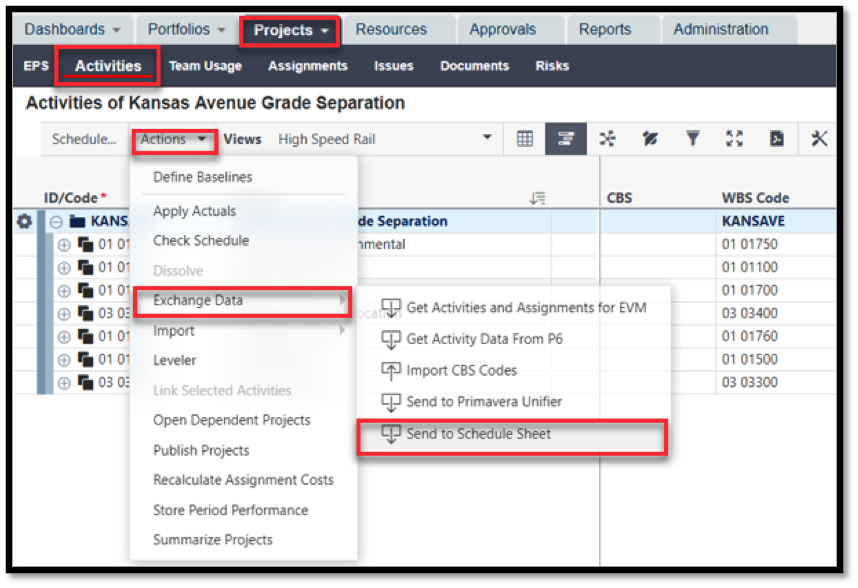
Next in P6 EPPM > With your “Project” Open > go to the Activities Tab > Actions > Exchange Data > Send to Schedule Sheet
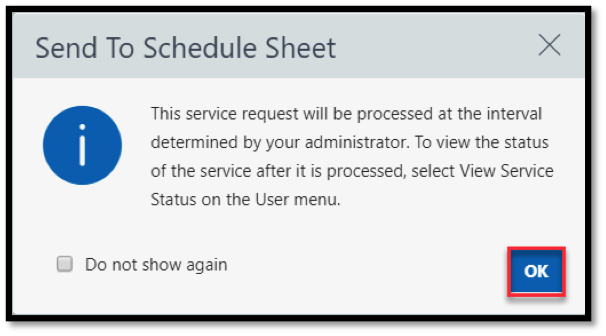
Click > OK
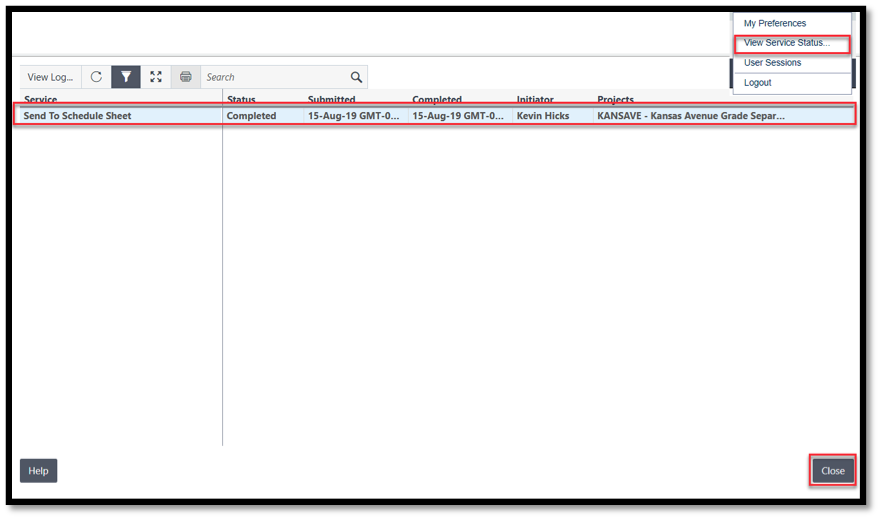
Under Your Username > Select View Service Status > to see the completed Service > Click Close
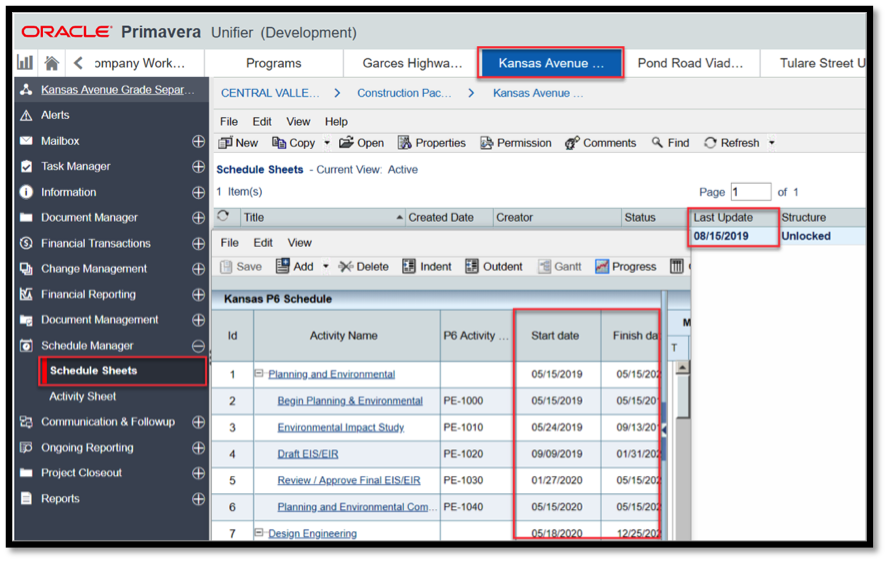
Next Navigate Back to Primavera Unifier > go to your “Project” > Schedule Sheets > Open and view your data and Verify your Project Schedule Sheet has been Updated
Creating the Unifier Schedule Sheet & Its Data Mapping
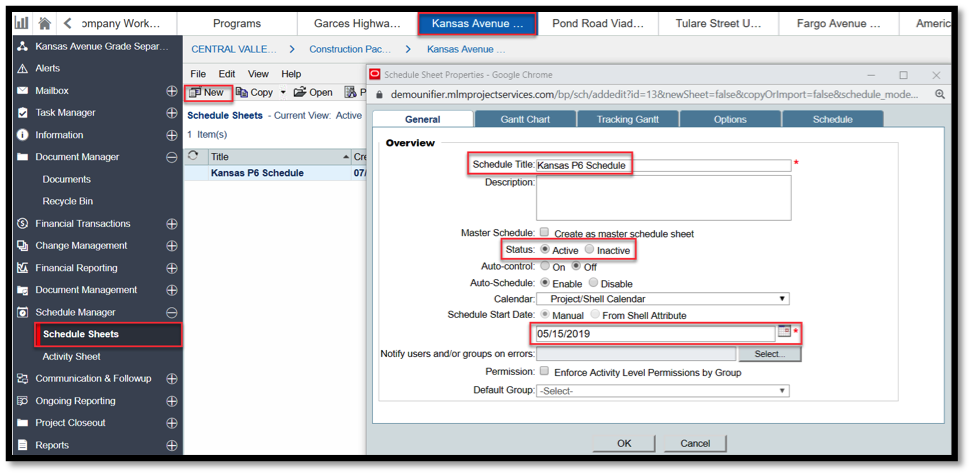
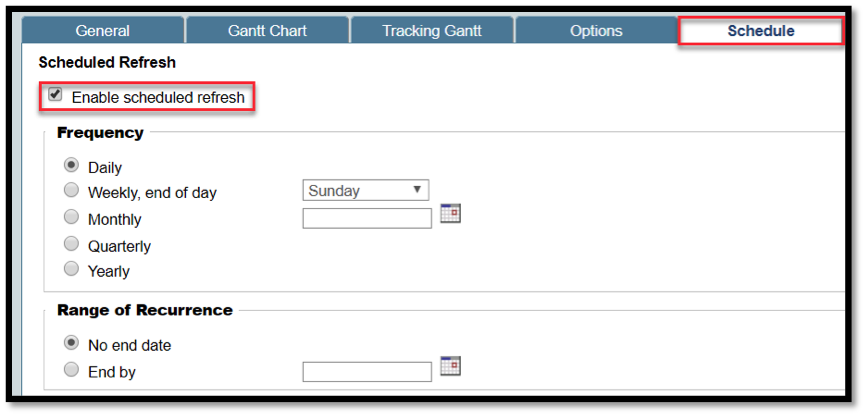
Follow these next Steps > In Unifier navigate to Your Project > User Mode > click on Schedule Sheets > New > On General Tab enter in your Schedule Title > Set Status to Active > Select a Schedule Start Date > On Options Tab – Select Activity Progress requires and Actual Start Date > On Schedule Tab – Select Enable scheduled refresh > Click OK

Double Click on your Created Schedule Sheet > Click File > Data Mapping
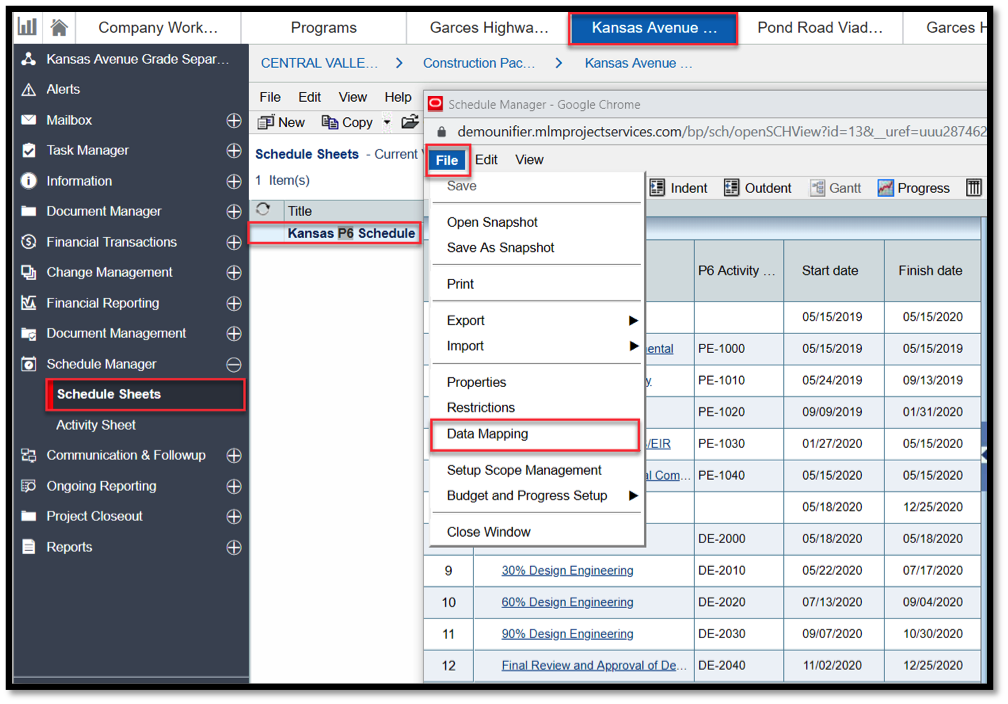
Click on Add > Name the Mapping File “P6 Data Mapping”
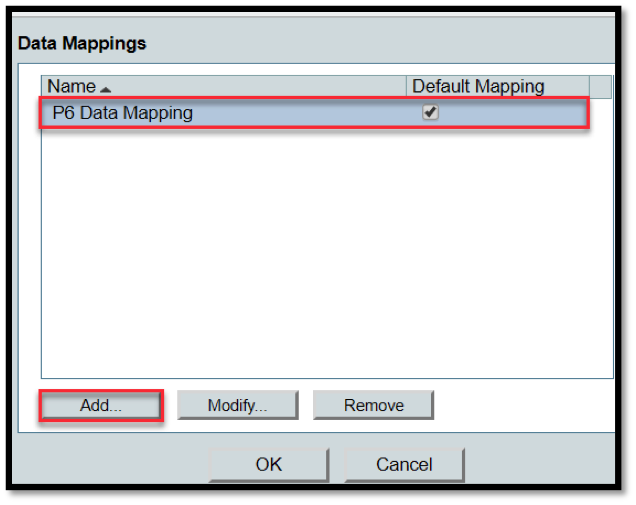
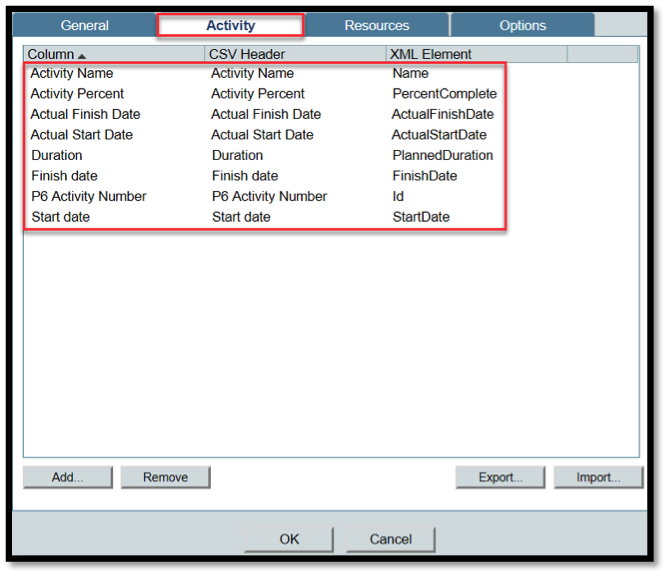
On the Activity Tab > Add these following Mapping Elements In the CVS Header and XML Element Columns
** Pay close attention to the Case Sensitive text and word spacing
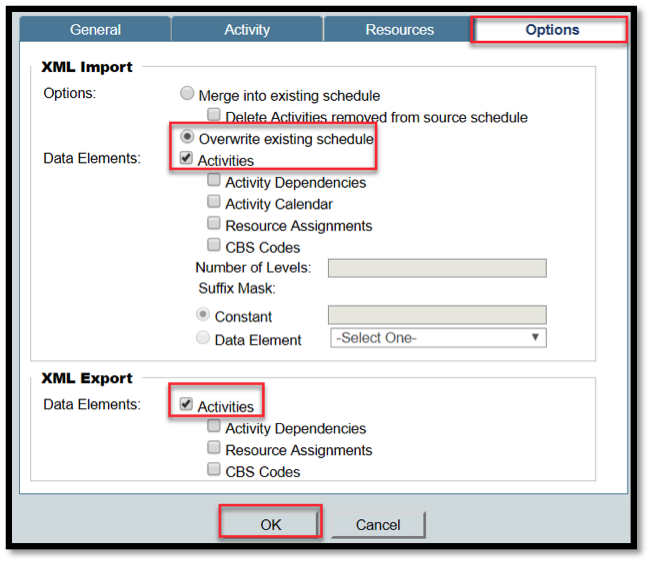
On Options Tab – Select Overwrite Existing Schedule and Activities Box in both places > Click OK
Next Open your P6 Schedule Sheet > Click Edit > Select Columns > Click New >
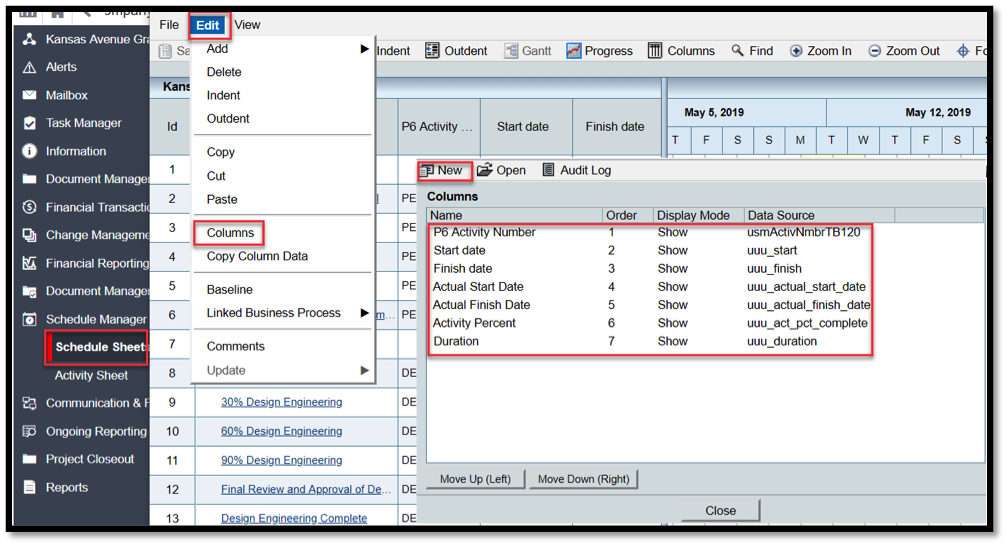
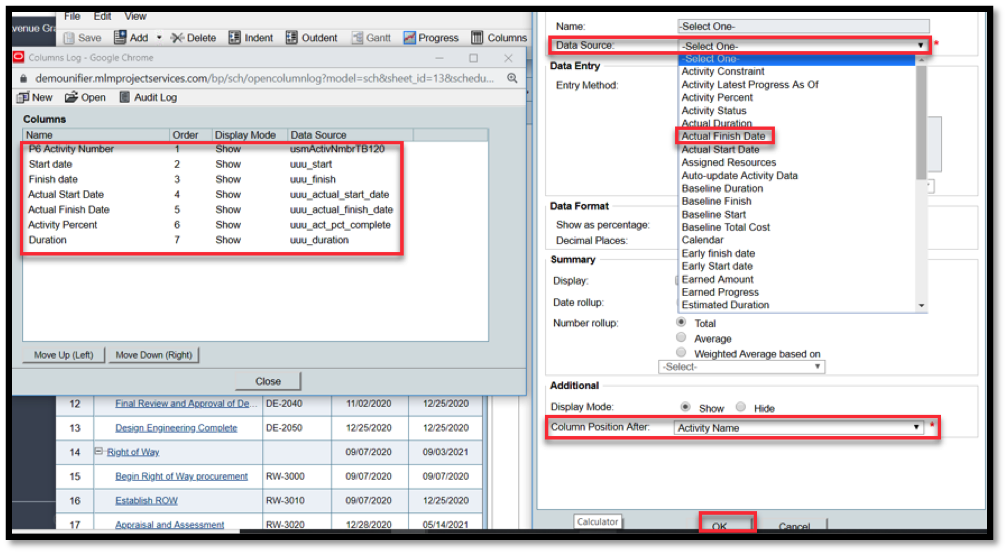
Select Your Column Data Source from the Dropdown Menu > Set the Column Position After > All columns in the Screen Shot > when finished click OK
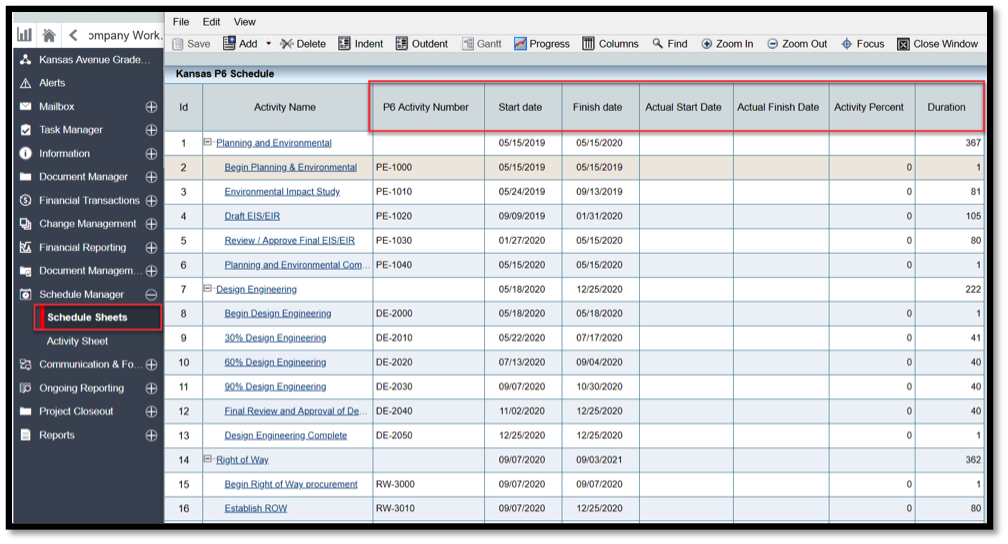
When you return to the Schedule Sheet, you will now see your columns mapped to P6 data in your Unifier Schedule Sheet.
Summary
Using Unifier’s out-of-the-box built in integration to P6 is one of the most efficient ways to manage and provide schedule visibility to users working in Unifier projects with P6 schedule components/needs. Schedule data being updated in P6 can be transferred to Unifier as long as you understand some of the aspects of its use and how it impacts your projects.
