
DEVELOPING REPORTS WITH CONDITIONAL DATA
Oracle Primavera Unifier & BI Publisher
Download the PDF HERE
This Tech Tip will outline conditional methods to developing reports.
Conditional methods include:
- BI Publisher: Conditional Region
- BI Publisher: Conditional Format
- Using IF THEN ELSE
Using the sample RTF design template and XML data set from the Filtering Data Tech Tip.

For Each DS record loop:
Placeholder F: <?for-each:DS?><?sort:RECORD_NO;’ascending’;data-type=’text’?>
Placeholder E: <?end for-each?>

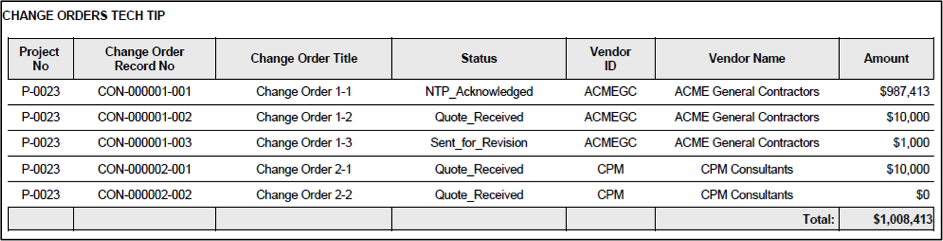
This is the data when previewed.
- BI Publisher: Conditional Region for a Table Cell or Row
BI Publisher Add-On allows the hiding of a specific area based on a condition. This example highlights the steps to do this for either a Table Cell or Row.
Place the cursor just before the Status placeholder and click Conditional Region in the BI Publisher ribbon. This example will display the Status value only if it matches (Equal to) ‘Quote_Received’. Enter the condition information in the BI Properties window. Note the different Data Field pulldown options. Since the operator required is for a character pattern, only ‘Equal To’ and ‘Not Equal To’ are feasible options.
The Conditional Region placeholder C is inserted where the cursor was placed but the placeholder EC is inserted in the next cell. This needs to be moved to the right of the Status placeholder.

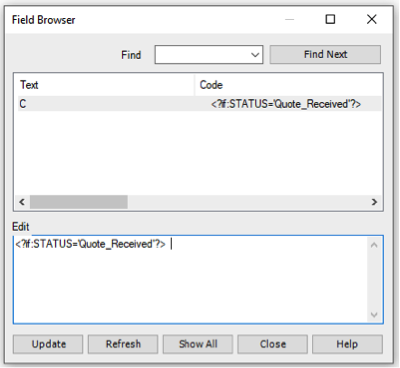
Using the Field Browser for each placeholder would display the following code. The IF condition acts on the Status values.
Placeholder C: <?if:STATUS=’Quote_Received’?>
Placeholder EC: <?end if?>
Click PDF in the BI Publisher ribbon to preview the output. Based on the Conditional Region only Status of ‘Quote_Received’ are displayed.
Including multiple conditions.
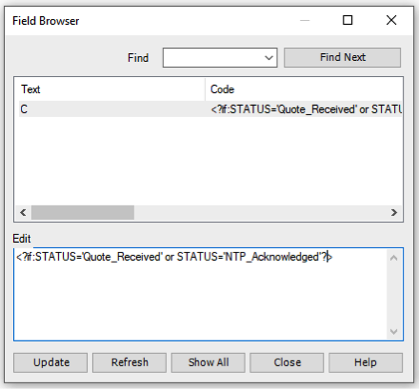
Using the operator OR allows one of multiple conditions to be satisfied. Expanding on the previous example, the IF condition will include if the Status is also ‘NTP_Acknowledged’.
The code now includes this.
<?if:STATUS=’Quote_Received’ or STATUS=’NTP_Acknowledged’?>
* Note the syntax is case-sensitive.
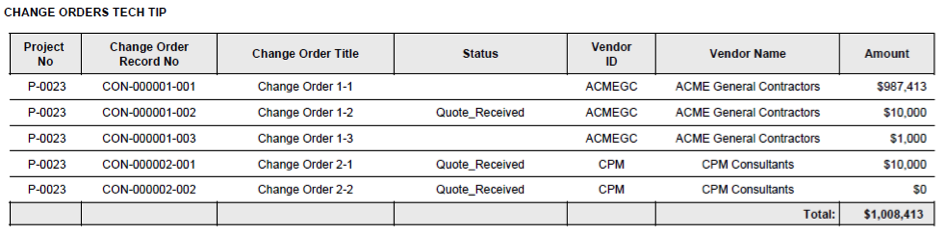
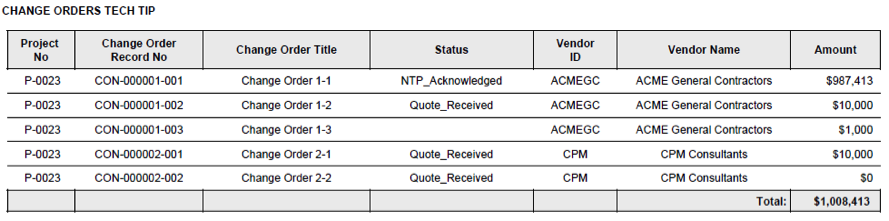
The output now displays either Status of Quote_Received or NTP_Acknowledged.
Using the operator AND means all conditions must be satisfied. Expanding on the original example, the IF condition will include the Vendor ID must also be ‘CPM’.
The code now includes this.
<?if:STATUS=’Quote_Received’ and VENDOR_ID=’CPM’?>
* Note the syntax is case-sensitive.
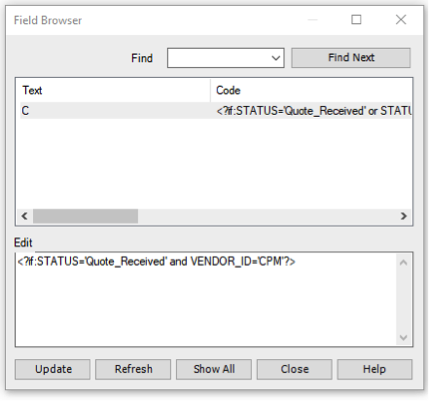
The output now displays Status of only Quote_Received where the Vendor ID is ‘CMP’.
Conditional Region on a Row
This example highlights the steps on a row using the placeholders from the original example.
Placeholder C: <?if:STATUS=’Quote_Received’?>
Placeholder EC: <?end if?>
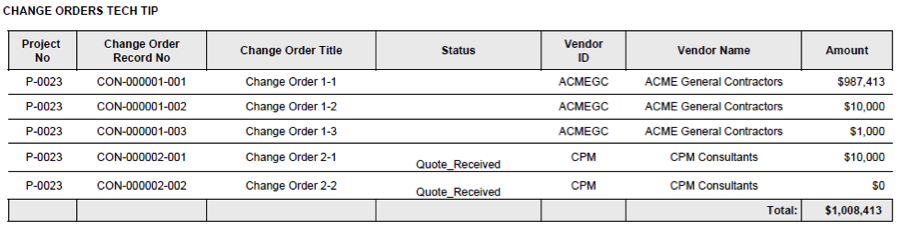
Move C between the record loop (F)/Project No placeholders and EC between Amount/end of loop (E) placeholders. Doing this ensures the IF condition is applied to the row rather than a specific cell in a row. The Conditional Region placeholders could be inserted anywhere between the record loop. However logically the placements should encompass all cells in the row.

Now only records with the Status of ‘Quote_Received’ are displayed.

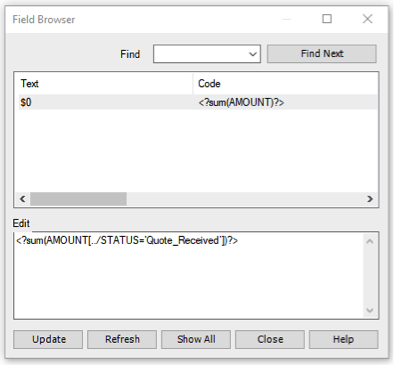
The Amount Total is not affected by the IF condition and must be modified. Highlight the Total placeholder and display the code using the Field Browser. The current code sum(AMOUNT) is the sum of all the records. Filtering code must be added at the parent level. After AMOUNT the code [../STATUS=’Quote_Received’] is included. This replicates the IF Condition but applied for all records (parent level) in the XML data set.
The Total Amount is now corrected.

- BI Publisher: Conditional Format
Conditional Format is similar to Conditional Region except it allows for a formatting change based on a condition. This example will set the row background to red and font color to white for records where Status is equal to ‘Quote_Received’.
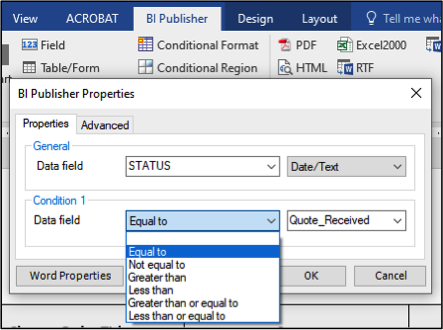
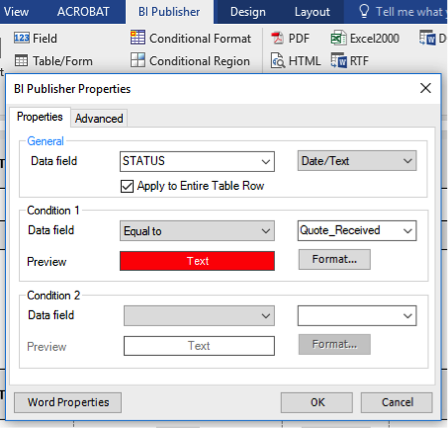
Using the original Tech Tip RTF template, place the cursor just before the Status placeholder and click Conditional Format in the BI Publisher ribbon. Select the ‘Status’ Data Field with type ‘Date/Text’ and in Condition 1 select the operator ‘Equal to’ ‘Quote_Received’ in the corresponding field. Check the ‘Apply to Entire Table Row’
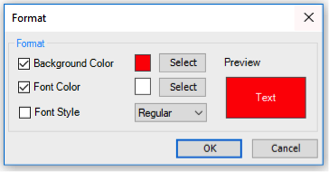
Click the Format button and check the Background Color and select the color red. Similarly check the Font Color and select the color white. Click OK.
In this instance there is no separate ‘end if’ tag as this is included in the code for the C placeholder.

Opening the C placeholder with the Field Browser the ‘end if’ is at the end. This is because the code is specified for in context (within the cell). It would affect whichever cell this placeholder is inserted. With the ‘Apply to Entire Table Row’ checked, the code @row extends the in context to all cells in the row.

Placeholder C:
<?if@row:STATUS=’Quote_Received’?>
<?attribute@incontext:background-color;’Red’?>
<?attribute@incontext:color;’White’?>
<?end if?>
Previewing would generate the following output.

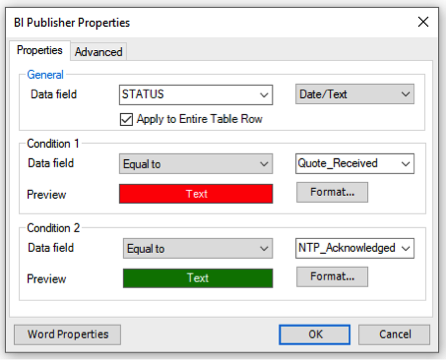
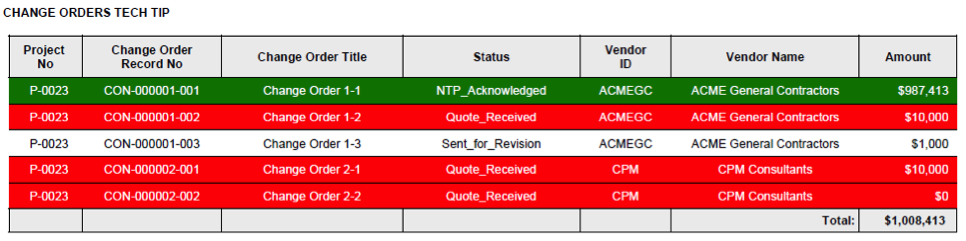
Multiple conditions can be set (see Condition 2 section). By default, the properties window provides up to two conditions but more could be added to the code. The additional condition added is Background of Green and font color white if Status is ‘NTP_Acknowledged’.
It can be seen from the code the conditions are working independently of each other. Each one is its own in context formatting IF condition.
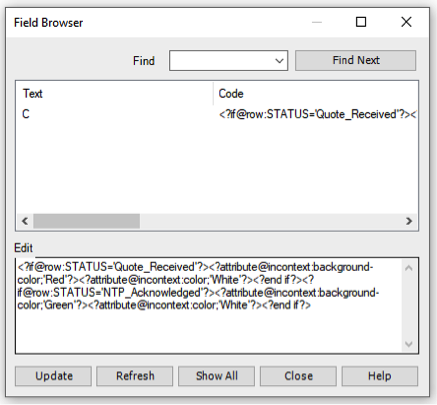
Placeholder C:
<?if@row:STATUS=’Quote_Received’?>
<?attribute@incontext:background-color;’Red’?>
<?attribute@incontext:color;’White’?>
<?end if?>
<?if@row:STATUS=’NTP_Acknowledged’?>
<?attribute@incontext:background-color;’Green’?>
<?attribute@incontext:color;’White’?>
<?end if?>
- Using IF THEN ELSE
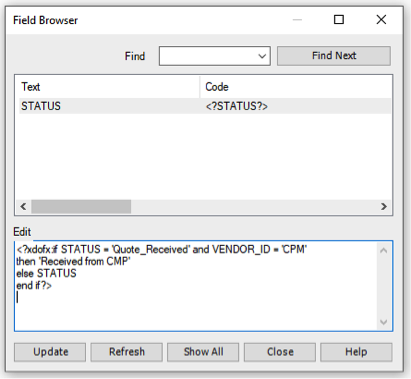
This option uses the extended XSL and SQL functions (xdofx) provided by BI Publisher. Use the Field Browser on the selected STATUS placeholder to edit the code in place.

The code to insert combines IF THEN ELSE function with the AND operator.
With this example if the STATUS is equal to ‘Quote_Received’ AND VENDOR_ID equals ‘CPM’ then display ‘Received from CMP’ otherwise display the returned value from Status. Click Update after insertion.
Code to insert:
<?xdofx:if STATUS = ‘Quote_Received’ and VENDOR_ID = ‘CPM’
then ‘Received from CMP’
else STATUS
end if?>
* Note the syntax is case-sensitive.
Previewing would generate the following output.
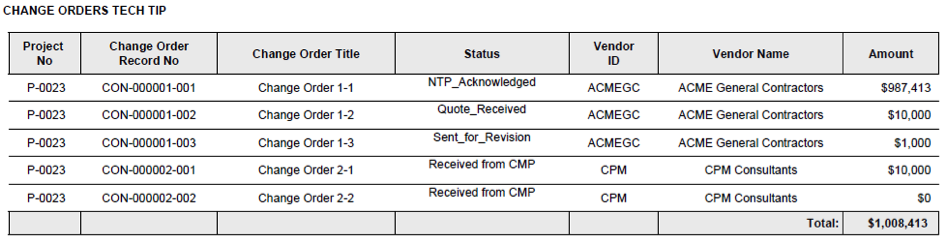
In summary, this Tech Tip provided some different conditional options to use, whether by hiding, formatting or affecting what is displayed. The flexibility they provide assists in satisfying many client specific reporting requirements.