
ORACLE UNIFIER EMAIL TIPS AND SETTINGS
DOWNLOAD THE PDF HERE
Like many applications, Unifier uses email as a key communication method to keep users aware of activities and tasks. This tech tip summarizes some of the various features and settings available as a system administrator or as a user to make the most effective use of email.
For example, Unifier can send individual task notifications to each user when they are required to take an action. If a user fails to take an action in the specified time, reminders can be sent to them. Also, notifications can be sent to users when certain actions take place—for example, if someone needs to know when a contract is created.
In this tech tip we’ll review settings and options both for the end-user and also for system administrators:
1. User Preferences
2. User Preference Templates
3. Using Groups in Distributions
4. Email Formatting/Content
User Preferences
For end-users, there are several options and considerations available to each user.
In the application, each user can click on their login name in the window and select “Preferences” from the dropdown. Select the “Email Subscription” tab to display all the various email items and alerts that might be sent to a user. A user can check or uncheck items that they want to receive or not receive.
Examples:
1. A user wants to receive emails on personal tasks (checked) but does NOT want to receive overdue notifications (unchecked.)
2. A user wants to receive ONE email daily for everything—in this case, the user will check the “Send notifications in a single daily digest”.
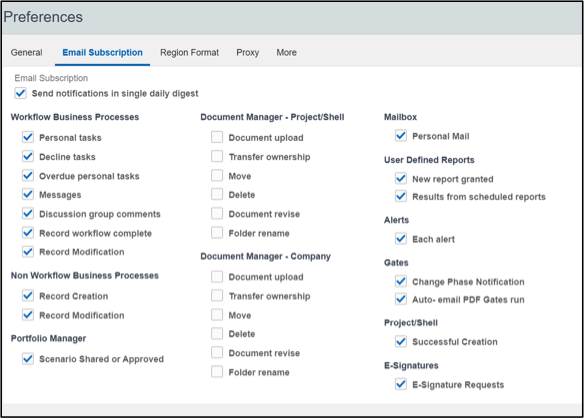
Note that these preferences cover most areas of Unifier functionality. If an organization does NOT use certain elements—for example, if not using Portfolio Manager—checking or unchecking this by the user will not have any impact.
Generally, most users want to be notified of each task they have to take (Personal tasks). However, if that user is constantly logged into the application and viewing their tasks there, they may choose to turn this feature off.
Another consideration is users that are actively a PROXY for someone else. If I am someone’s proxy—typically because I am covering while they are on vacation—I will receive emails for all of THEIR actions. If both people have an action to take, then the user covering for the other will receive two emails—one for themselves and one for the user they are a proxy.
User Preference Templates
While user preferences are available to be changed by each user, Unifier also provides the ability for administrators to set up User Preference Templates that set these preferences.
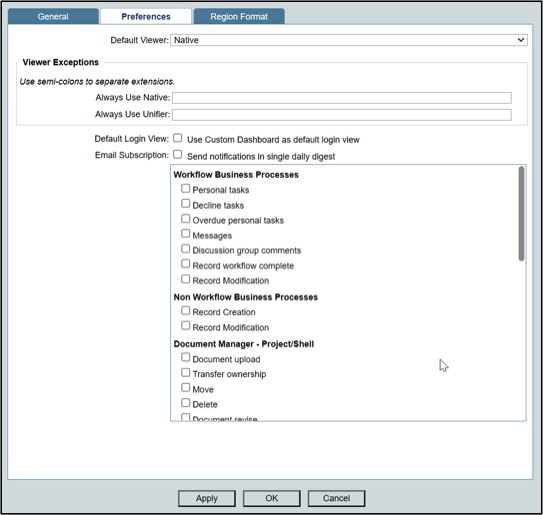
From the Company Workspace, Administration view, select Standards, and Libraries node, and select “User Preference Templates”.
From here, it is possible to define all General, Preferences, and Region Format settings and save this template.
Once set up, the administrator can push these settings out to select or all users, and this will update their profile. This can be useful to set up one or multiple standard preference settings and then use these when setting up new users. Also, if appropriate, these can be pushed out to existing users, and this would overwrite any settings that the user may have set individually.
This is useful mostly for corporate environments that want to control these settings.
Using Groups in Workflow Routing
In Unifier workflow processes, records can be routed to preassigned users or set to “User Select” where the person sending can manually select which users or groups to send to.
By default, Unifier uses “Groups” to define permissions and access to processes in the project. It also can streamline the workflow action by setting a “Review” or “Approval” step to a group of reviewers/approvers.
Also in the case of “User Select”, a “Group” can be selected in the picker to automatically select a block of users rather than selecting them one by one.
Ideally, these are identified at the time of designing the business process, since the groups must be listed in the workflow setup. Once the “group” is defined, each project can set up which users belong in that group.
Managing and setting up groups will not be outlined here; the presumption is that you’ve created the groups, pushed them out to your projects via the template, and then assigned users within that project to the group. In the project’s business process workflow setup, you will then add these groups to any appropriate steps in the workflow.
The key point here is that if you use a group in a task action, it will notify all those users in one action, eliminating the need to select individual users.
Using Groups in Linked Mail
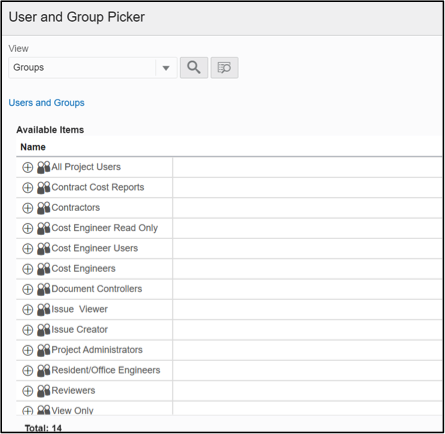
It is also possible to create individual groups for a single project (not a standard grouping used in a workflow.) If using Linked Mail, users will always have access to send to these extra groups. Note that this can only consist of Unifier users, however. If you want to route via Linked Mail to an external (non-Unifier) email, you will need to use the External CC option and cannot select from these groups.
However, it is possible to set up other groups that are not used in a business process workflow, and these groups can be seen from the user and group picker.
Customize the Email Format
Unifier emails support several customizations that can be made, allowing the end-user to better understand the actions that need to be taken.
1. Customize the email content in BP design
2. Workflow Setup for each BP step
3. Custom Email Subject Line and Content for each BP design
These are all process or standardized configurations, so this is strictly an administration function.
The email content is controlled in several ways:
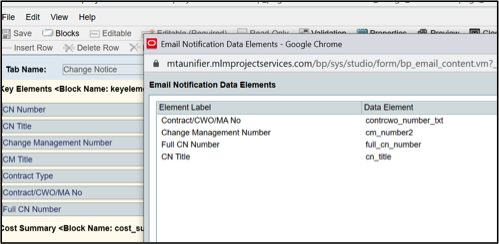
1. In the BP design (uDesigner) there are options to determine what data elements are included in the email body. You can select and order which fields you want to be displayed in the email here, and then all emails in that business process will include the same items.
a. Opening the View Form in uDesigner, select View, “Email Notification Data Elements”
b. This will let you select and order which fields you want to be displayed in the email.
2. In the workflow setup of the process, you can determine what is included in Notifications at each routing step. This includes:
a. Enable response via email (lets the user click a button in the email instead of logging in to Unifier).
b. Include record items or attachments as email attachments. (Note: If the attachments are too large to email, Unifier will include a notation in the email that the user must log in to view the attachment; otherwise will include the attachment.)
c. Custom print can be selected to be sent instead of the standard record information.
d. Custom email content can be included as a standard text in lieu of the other information.
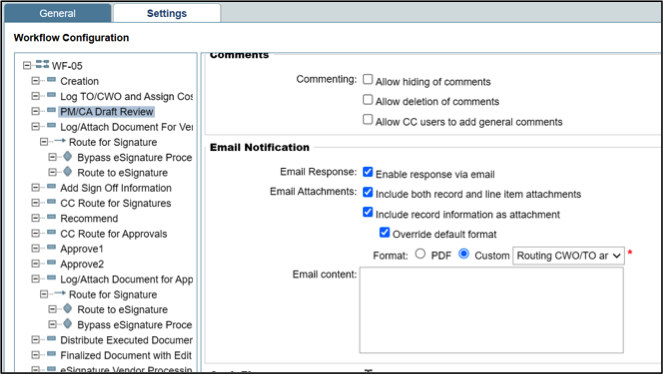
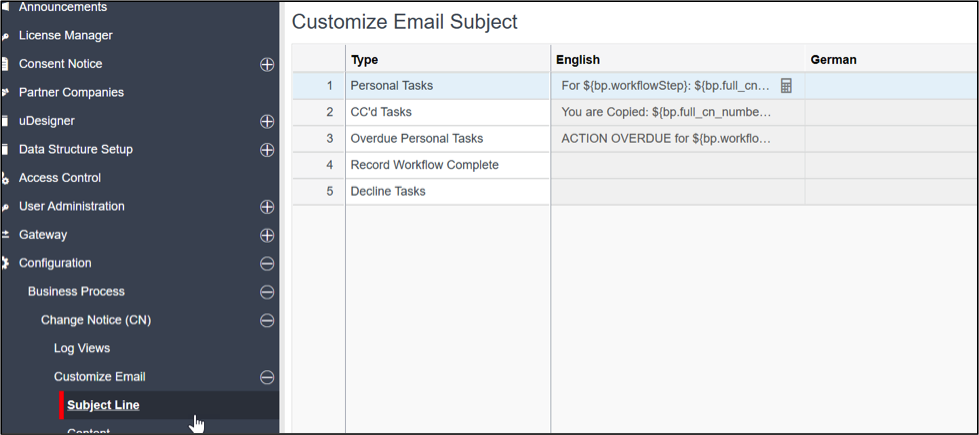
3. Customize Email Subject Line and Content. These options are in the Business Process configuration and provide the option to customize the email subject line from the default and also in Content to create a completely custom HTML formatted body content.
a. Subject Line
i. This lets you customize the subject line for a given business process for Personal Tasks, CC, Overdue, Workflow Complete, and Decline Tasks.
ii. Note this is by a business process so these changes apply to ALL projects. It isn’t possible to customize these project by project.
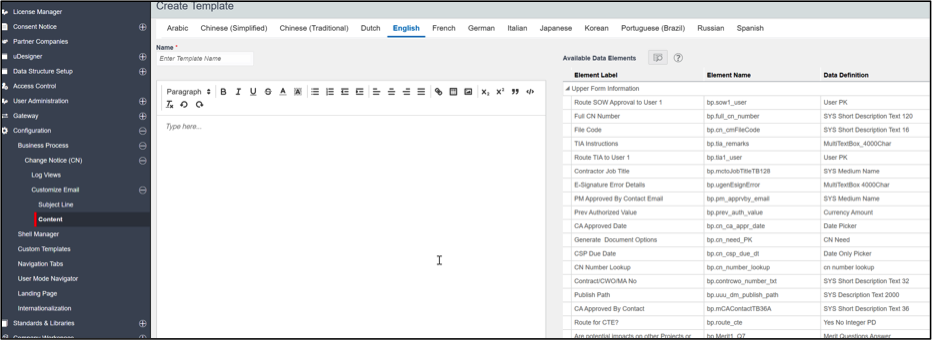
b. Content
i. This lets you create a custom formatted “template” for emails by business process rather than using the default Unifier design. The body is HTML formatted and can include font formatting, paragraphs, images, etc.
ii. Note this is by the business process so these changes apply to ALL projects. It isn’t possible to customize these project by project.
Summary
Hopefully, these tips will help improve communication with users and ultimately better manage action turnaround.