
Oracle Primavera Cloud is a full-function Project and Portfolio Management platform that manages:
- Projects from inception through completion, including schedule, risk, cost management, and reporting.
- Portfolios through proposed project pipeline, strategic alignment, budgeting, tracking, and reporting.
With the amount of information available within the system, being able to display project information for a specific audience is important. It is also relatively easy to do using Forms.
This Tech Tip will show you how to:
- Configure a form
- Make it available within the Project Forms List
- Change the default Project Details form
To perform these steps, you will need administrator rights at the Work Space level.
Configure a Project Form
Forms are used for Workflow, data entry, and information display and are created in the Form Design under Workflows and Forms.
- From the Work Space menu, select Workflows and Forms and then Form Design.

- You can add a new blank form by selecting Add (A) at the top of the screen or use the Action Gear to the left of the form to Duplicate, Edit, or Delete it. This example will update a form by adding a new tab for Status.
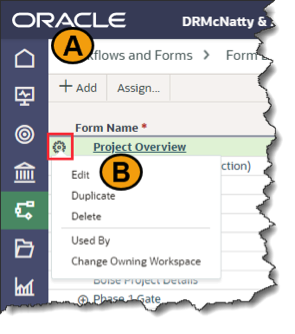
- Select Edit (B) from the Action Gear to the left of the form to open the Form Editor.
- If you are creating a new form, the Properties on the right-hand menu determine the settings for it.
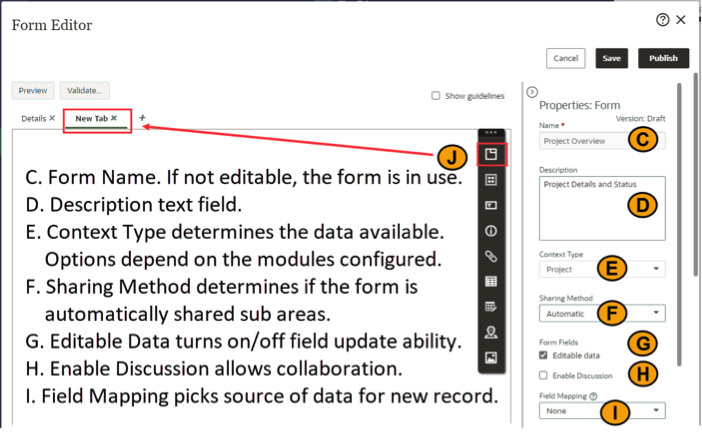
- From the Form Edit menu select New Tab (J) to add a tab to the form. Double click the name of the tab to modify it.
- Add a Group box to build sections within the form by selecting the New Group Box (K) from the menu.
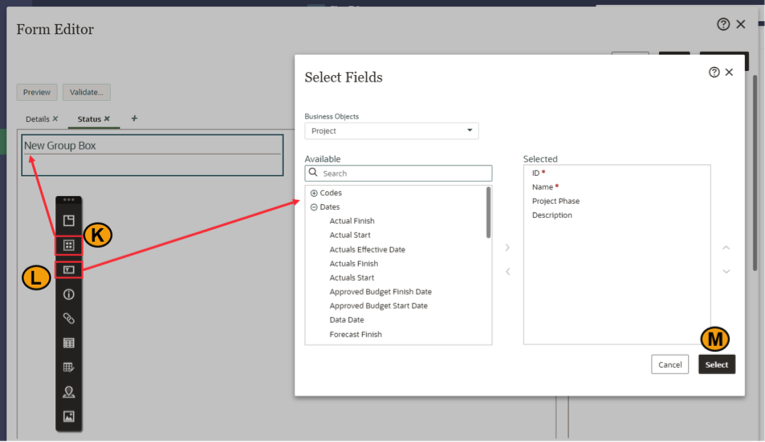
- To add fields to the box, use the Input Field (L) menu option.
- Move the desired fields from the Available column to the Selected column and click Select (M).
- Each object (Group Box, Field, etc.) is defined by the Properties area on the right of the Edit Form window.
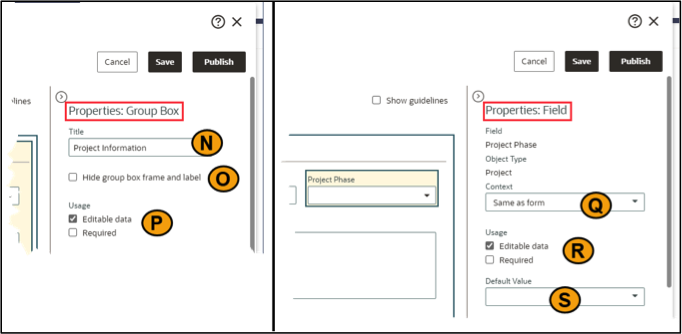
Group Box options include:
- Title (N) changes the name of the group box.
- Hide group box frame and label (O) determines if there is a boundary around the box with the name displayed or not.
- Usage (P) selects if the data can be updated (Editable data) and if it needs to be added before leaving the page (Required).
Field options include:
- The Context (Q) of the data. This is “Same as form” unless you are adding the field to a grid/table in the form. In a grid, you can set the context to “Focused Row in [grid name]” to provide the data specific to that line.
- Usage (R) makes the data editable and/or required.
- Default Value (S) is used when data entry is expected. This provides an initial entry for an otherwise blank field.
- Other objects that can be added to the form include:
- Instruction Text – Text field to provide context to the field or form
- Hyperlinks – Links to other areas within the application
- Table – Table with rows of selected data fields with filter capabilities
- File Grid – List of files, typically used with Workflows to attach documents for review
- Location – Table of information to define a location
- Cover Image – Image corresponding to the image selected for the associated project
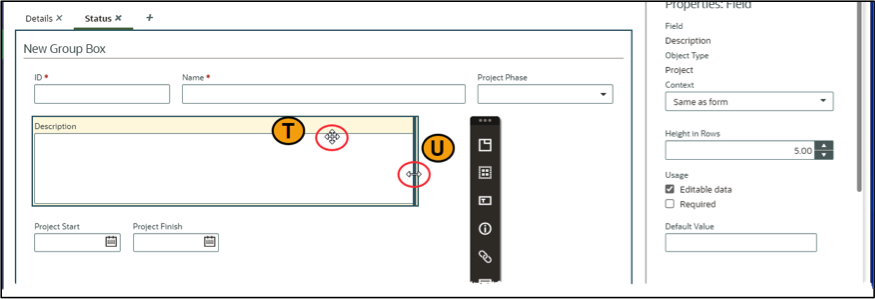
- Objects within the form can be moved by clicking on the object (T) and dragging it to a new position or resized by clicking the edge of the object (U) and dragging it in/out or up/down.
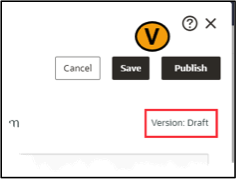
- As you are creating the form, select Save (V) in the upper right corner to create a new Draft version. When it is ready to be used, click Publish.
Make the Form Available in the Project Forms List
The form can be made available within the Project Forms List. To do this, on the Workflows and Forms /Form Design window, check the box under Available On Forms List (W).
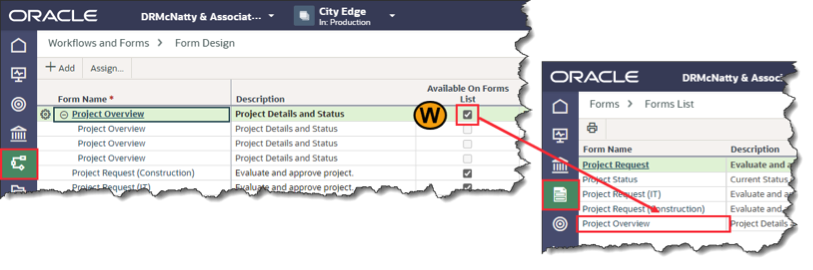
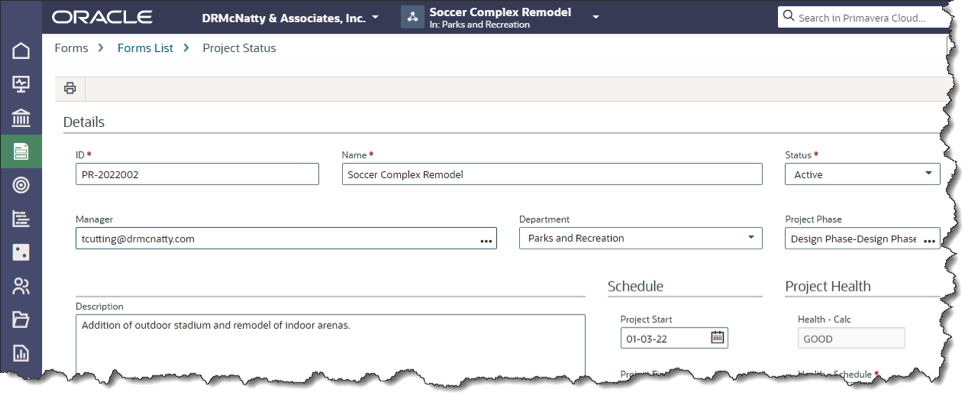
The form will now display on the Forms List window within the project.
Use Form as Details Display
To use the form on the Details window under Summary & Settings for all of the projects within the Work Space:
- Select the Summary & Settings option in the modules menu to the left-hand side of the Work Space window. Under Defaults & Options, pick Projects.
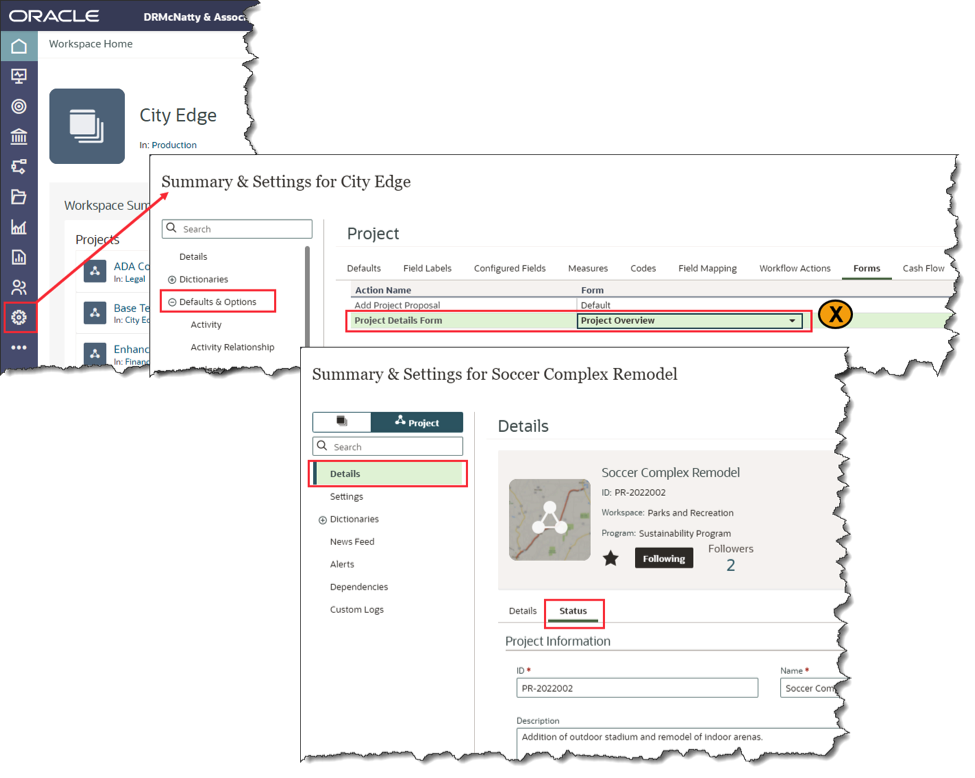
- Change the Form for the Project Details Form (X) to the newly created one.
The form now displays the added tab with the selected data fields, and, with any editable fields, the project data can be updated directly from the form.