ORACLE PRIMAVERA UNIFIER
DOWNLOAD THE PDF HERE
Unifier as a workflow driven tool routes emails to users who need to view or take action on documents. There are several options that can extend the usefulness of these email notifications for end users. These features include:
- Additional Content—adding data elements to email body
- Including record attachments
- Including a custom print instead of default print
- Action Buttons—options to include or not
These options are found in Unifier under either the uDesigner BP design or under the Configuration BP Setup. This tip presumes that you have already designed your BP, so we will focus only on these options.
ADDING ADDITIONAL CONTENT TO EMAIL BODY
Unifier includes basic data elements (like record number) in the base email. If you have custom data elements that the user needs to identify their required actions, you can add these to the design.
- In uDesigner, open your BP design in Draft mode
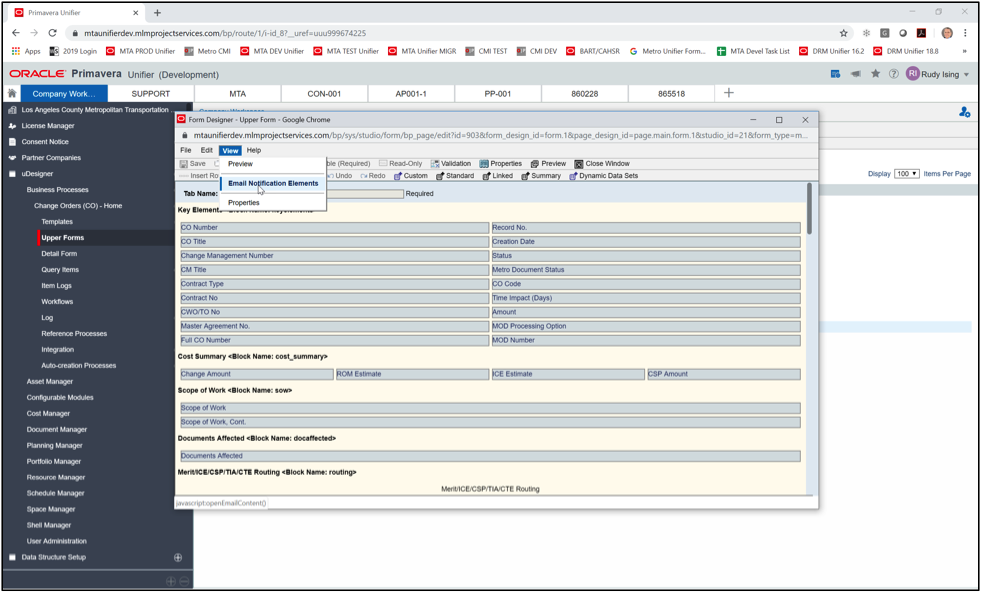
- In upper forms, open the View Form for the BP
- Click on View, Email Notification Elements
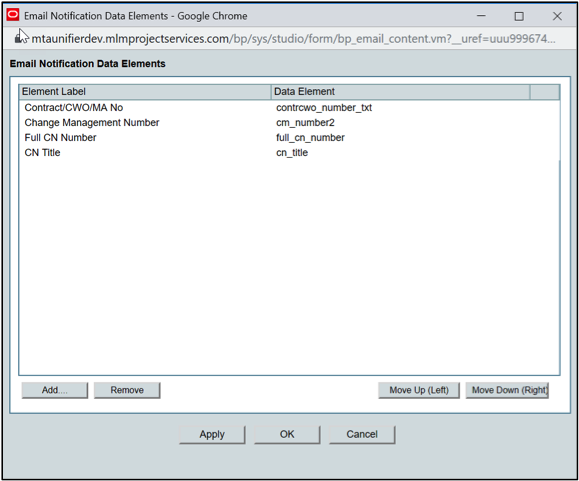
- In the window click the Add/Delete buttons to add or remove data elements and then use the Move up/down to change their order
- Click Apply, and then OK to save
- Click Save on the View form screen
- Complete and Deploy your BP design
Once this is deployed, these new elements will print in the body of the email, providing the users with more useful information.


INCLUDING RECORD ATTACHMENTS
Also useful for users is the option to route/include record attachments when requesting reviews, particularly if you are enabling the action buttons to respond via email.
- Open the BP Setup, Workflow Setup in your shell or template.
*Note: Typical practice is you would update your template and push these changes out to individual shells after changing.
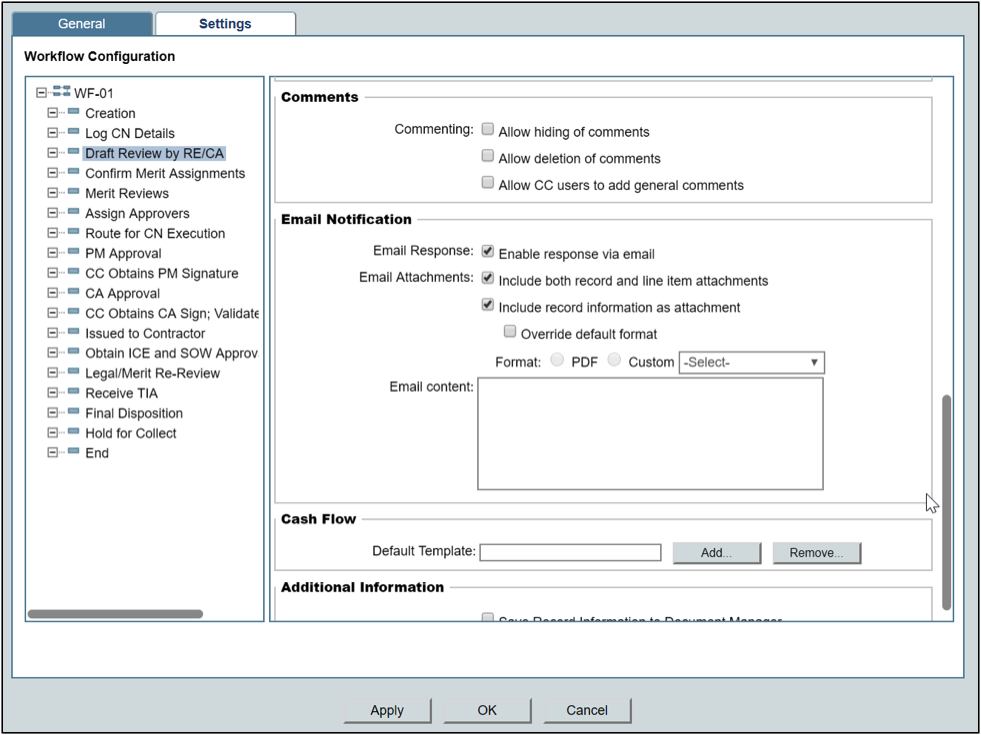
- Select the step to modify and look for the Email Notifications block.
- Here you can configure the following:
- Enable response via email
- This will add Action buttons in the email allowing user to just click a button in the email.
- You can have steps allowing actions and others where they must log in to take the action.
- Enable response via email
*Note: the subsequent step must be set to Preassigned in order to enable action buttons.
- Including Attachments
- Include both record and line item attachments—automatically sends attachments for user review.
*Note: if the email server is set to limit attachment size, Unifier will add a note at the bottom of the email stating that some attachments were not transmitted since it was too large.
- Including record information as attachment
- You can include the default record attachment (transcript of record) or you can override and include one of your custom prints.
- Email Content
- In addition, you can include standard boilerplate content here if you want all to include the same text/language.
- Repeat these configuration options for each step you want to customize.
- Click Apply and OK to save WF settings.
- Use the Update Shells option to update the appropriate projects with these changes.

Utilizing these options in Unifier will provide a more useful and productive experience for Unifier users receiving email notifications. Each BP can be customized in this fashion.
One caveat is that these are email notifications and the changes affect both action emails and CC emails but only at actual action steps. (So these changes will not be visible if you CC a user when going to the END step, for example.)
