BI PUBLISHER
DOWNLOAD THE PDF HERE
A report can require a border to appear around a specific set of values based on a condition. The following steps discuss how this can be achieved using BI Publisher Desktop for Word.
Here is a RTF design of a simple table displaying invoice numbers and their associated amounts.
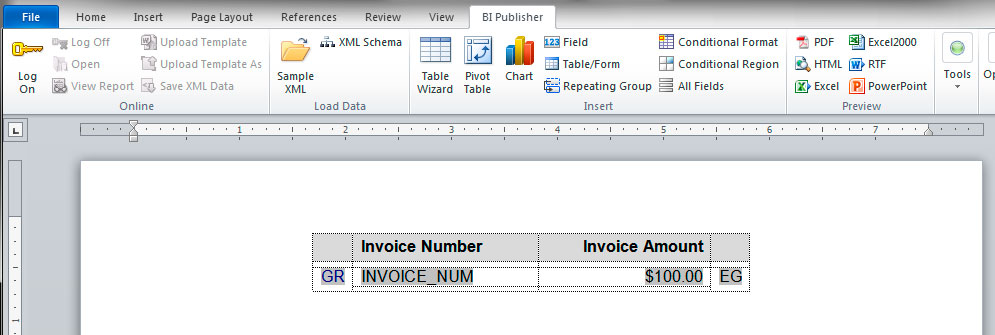
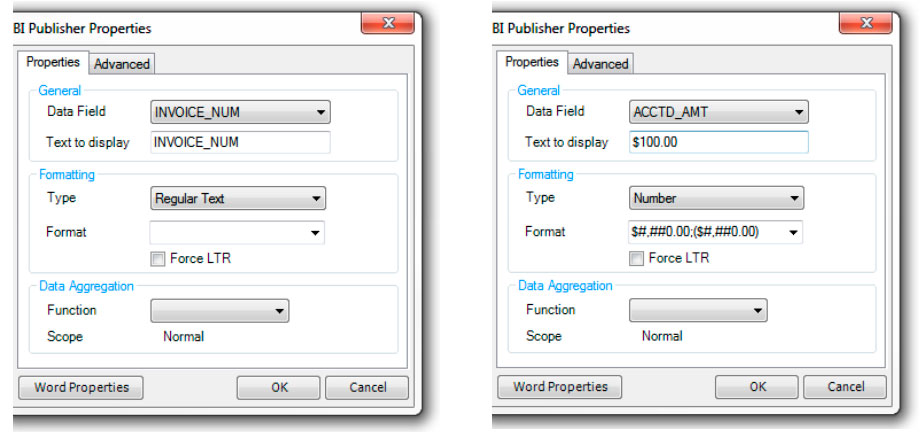
The data form fields INVOICE_NUM and ACCTD_AMT (displayed as ‘$100.00’) appear in the row.
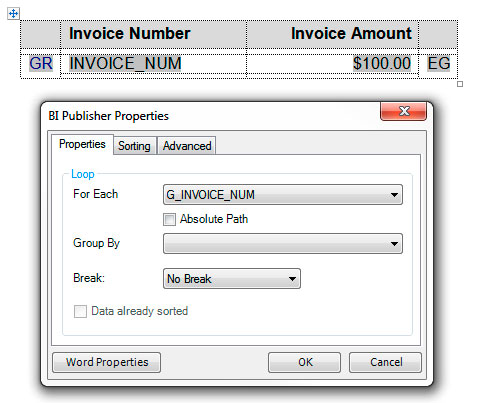
The GR and EG represents the Repeating Group instruction form fields. INVOICE_NUM and ACCTD_AMT will be repeated for each G_INVOICE_NUM in the XML data.
The borders are initially displayed to highlight the table layout. There are four columns and four rows.
Top row is the header; second and fourth are separator rows with the third as the main data row. Note the cells with GR and EG are merged cells. This will make the last separator row also repeat.

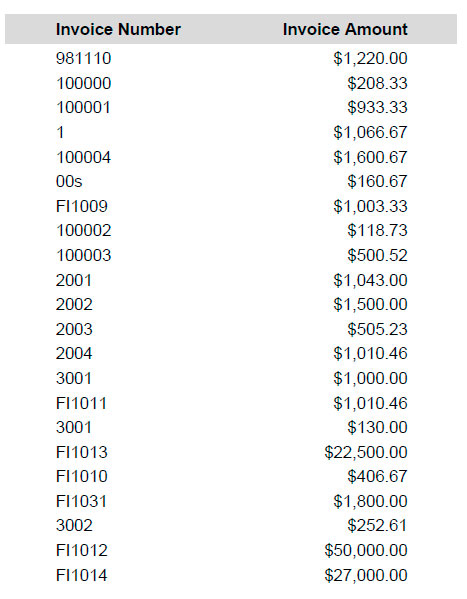
Here is the PDF output when previewing the RTF. Note the borders have been removed before the preview.
To create a border around a row of data based on a condition, a Conditional Region will be inserted. In the example two are required, one for each cell with a data form field.
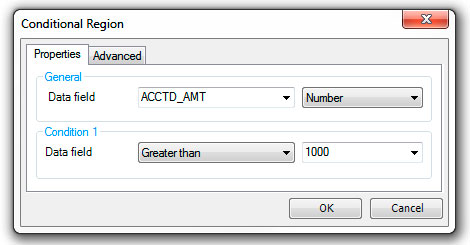
Insert the Conditional Region before each of the data form fields. The example condition used is invoice numbers with an amount greater than 1000. Select ACCTD_AMT as the Data field as Number with Condition 1 ‘Greater than’ and enter the value 1000.

Clicking OK will create two instruction form fields C and EC (highlighted in red), which represent the beginning and end of the Conditional Region. The EC field should be removed since the closing of the conditional region will be included in the C form field.

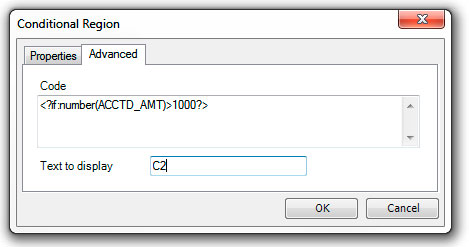
Insert another Conditional Region (not copying) with same condition set up before the ACCTD_AMT form field. Name this C2 from the Advanced tab.
Remove the EC as well and the table will now look like this. The second Conditional Region has been highlighted in blue.

Code will be added to each of the Conditional Region form fields (C and C2), which will display the borders when the condition is met. Since a border is being displayed around the data form fields not all borders of the cells will be effected. The INVOICE_NUM cell right border should not appear and similarly, the ACCTD_AMT cell left border should not display.
This is the code broken out for the C field. If the condition is met it will makes changes to the top, bottom and left border attributes with each having its style as solid and width of 1px. If the condition is not met no changes will be made. Note there is an <?end if?> at the end which replaces the EC form fields which were removed.
<xsl:attribute xdofo:ctx=”block” name=”border-top-style”>solid</xsl:attribute>
<xsl:attribute xdofo:ctx=”block” name=”border-top-width”>1px</xsl:attribute>
<xsl:attribute xdofo:ctx=”block” name=”border-bottom-style”>solid</xsl:attribute>
<xsl:attribute xdofo:ctx=”block” name=”border-bottom-width”>1px</xsl:attribute>
<xsl:attribute xdofo:ctx=”block” name=”border-left-style”>solid</xsl:attribute>
<xsl:attribute xdofo:ctx=”block” name=”border-left-width”>1px</xsl:attribute>
<?end if?>
Similarly, this is the code broken out for C2 with same changes to the top, bottom and right borders.
<xsl:attribute xdofo:ctx=”block” name=”border-top-style”>solid</xsl:attribute>
<xsl:attribute xdofo:ctx=”block” name=”border-top-width”>1px</xsl:attribute>
<xsl:attribute xdofo:ctx=”block” name=”border-bottom-style”>solid</xsl:attribute>
<xsl:attribute xdofo:ctx=”block” name=”border-bottom-width”>1px</xsl:attribute>
<xsl:attribute xdofo:ctx=”block” name=”border-right-style”>solid</xsl:attribute>
<xsl:attribute xdofo:ctx=”block” name=”border-right-width”>1px</xsl:attribute>
<?end if?>
Highlight C and double-click or right-click and select BI Publisher > Properties.
The code is added at the end of the existing code (highlighted in blue) in the Advanced Tab. The existing code describes the condition being used ie IF ACCTD_AMT is greater than 1000. Note the added code is inserted as one long continuous string.
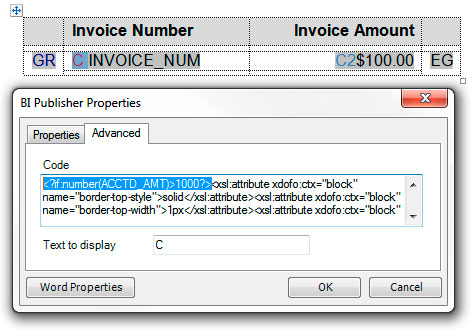
Repeat this for C2 with the appropriate code as above.
Now that the existing borders are not required, they should be removed.
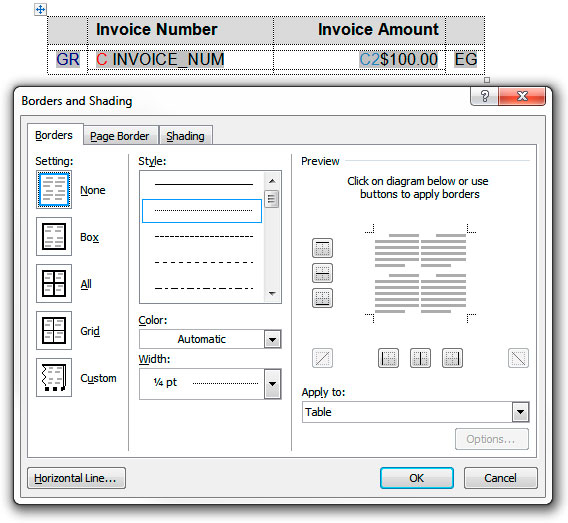
Select the table, right-click and select Borders and Shading. Select the None setting from the Border tab and click OK.
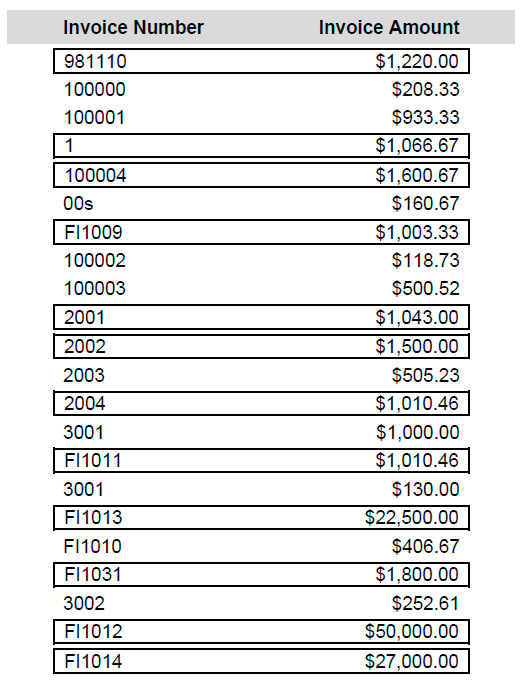
Click the PDF preview button for the resulting output. All rows where the invoice amount is greater than $1000 have a border.
