ORACLE PRIMAVERA UNIFIER & BI PUBLISHER
DOWNLOAD THE PDF HERE
When creating custom reports it is sometimes desirable to display images in my report which have been inserted into a Unifier record. These could be field images and inserted into daily reports or could be map images for a project status report just to illustrate two examples. This tip shows you the steps to perform this.
Background
Unifier enables images to be included in Business Process templates as an Image Picker.
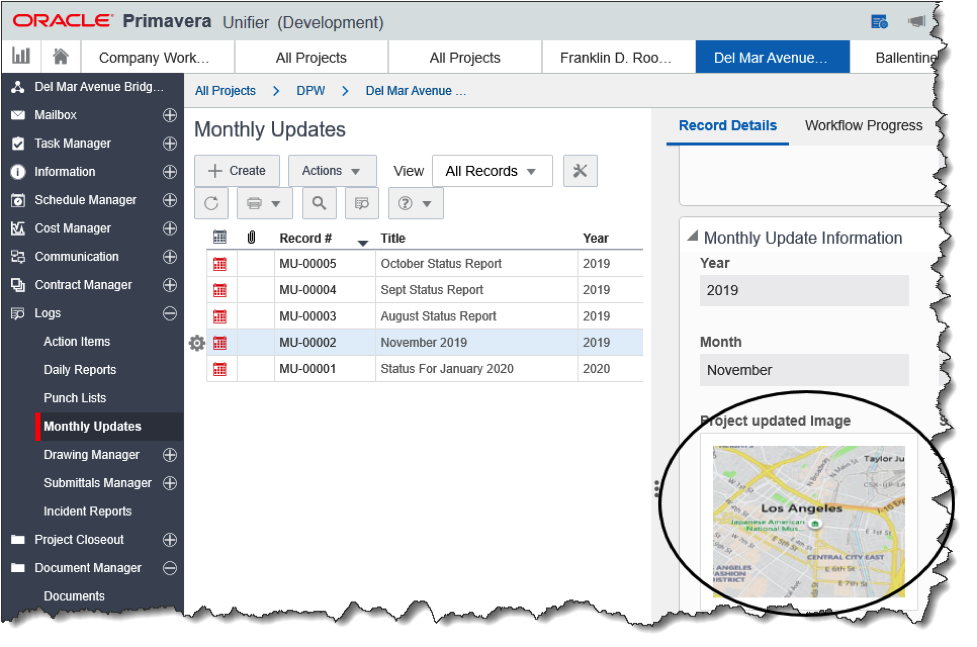
The image itself is stored in a directory like https://[unifier-server-address]/bluedoor/rest/image where [unifier-server-address] is the implementation specific server address. What is shown in the Project Update Image field is a number corresponding to the image id.
The objective is to present that image in a report as shown below.

The following steps will walk through managing this using a BI Publisher Rich Text Format (RTF) template:
- Adding Unifier variables to the BI Publisher Data Model as parameters
- Defining the “security_token” in the XDM file
- Creating the variables in the Word document as Text Form Fields
- Adding an ActiveX Control Image to the RTF
This process assumes the data model and rtf template already exist and you are adding to them.
BI Publisher Parameters
There are 3 Unifier variables that need to be defined as parameters in the BI Publisher Data Model to handle the security and identify the location of the image: uuu_p_companyRegistryF, uuu_p_sessionIdF, and uuu_p_urlF.
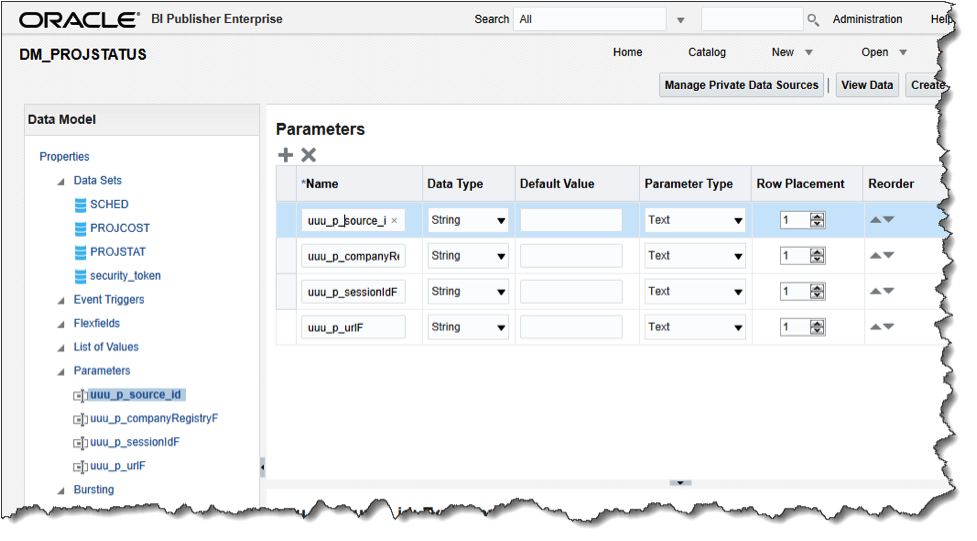
Add these three as data type “String”. In the example above you will notice uuu_p_source_id which is used to identify the record that initiated the print request and is not needed specifically to display the image.
In the code for the dateset, define the image id field. For our example we are using the Monthly Update Business Process, and the view contains the ID field K__UMUPROJECTP.
In this example the dataset would contain:
“UNIFIER_UMU_VIEW”.”K__UMUPROJECTP” as “PROJIMAGEID”
XDM Define “security_token”
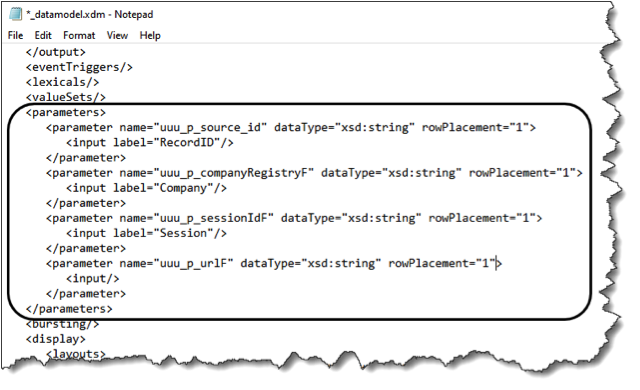
In the XDM code, the “security_token” parameter needs to be defined.
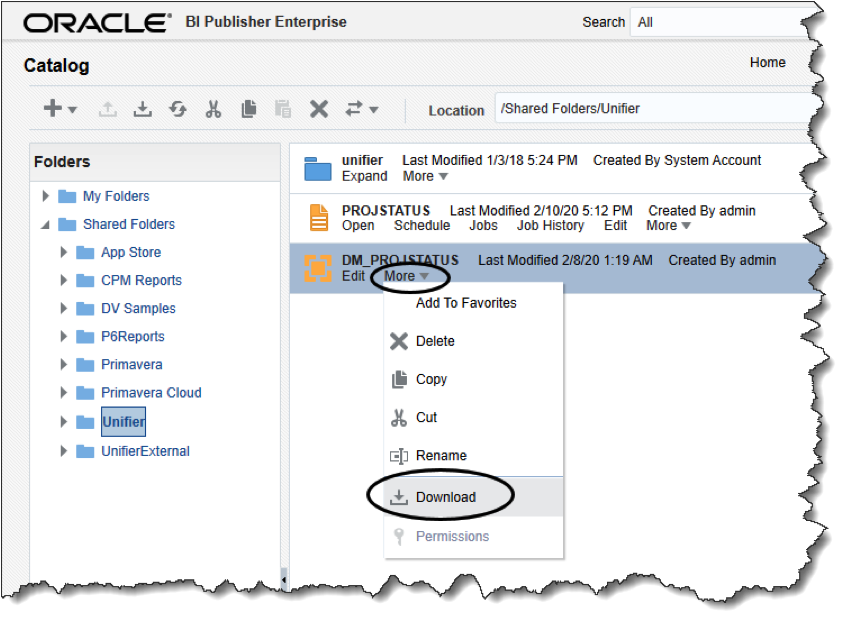
Download the Data Mode and unzip it to access the XDM file and open it using Notepad.
If you search for parameters you will find the items identified in the Data Model.
Return to the top and search for <datasets>. Define “security_token” by add the following code under that line.
Start copy after – – –
– – – End copy before
Save the changes and archive or zip the file to a file with suffix .xdmz. Import it back into BI Publisher.
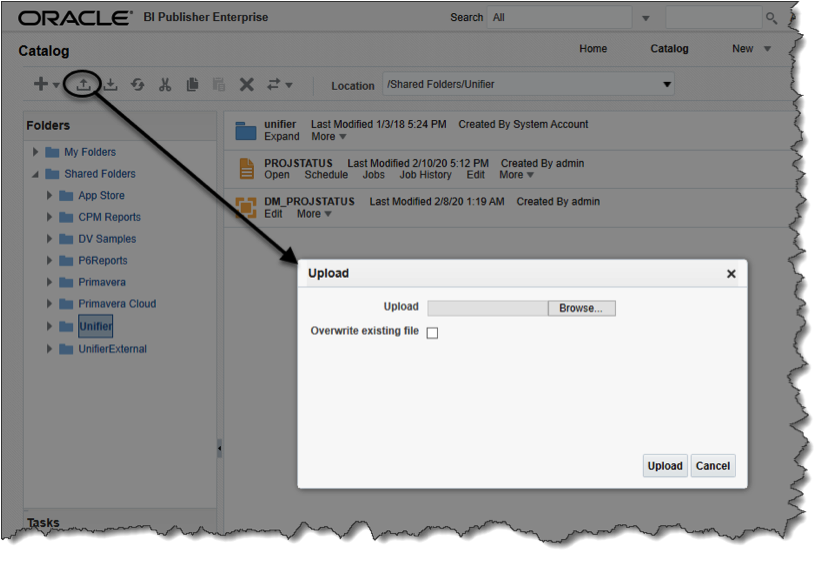
RTF Set Up Text Form Fields
The same 3 variables need to be defined in the RTF template.
Export sample data and import it into the RTF template.
Insert and define 3 Text Form Fields using the Developer tab and selecting Legacy Tools / Text Form Field.
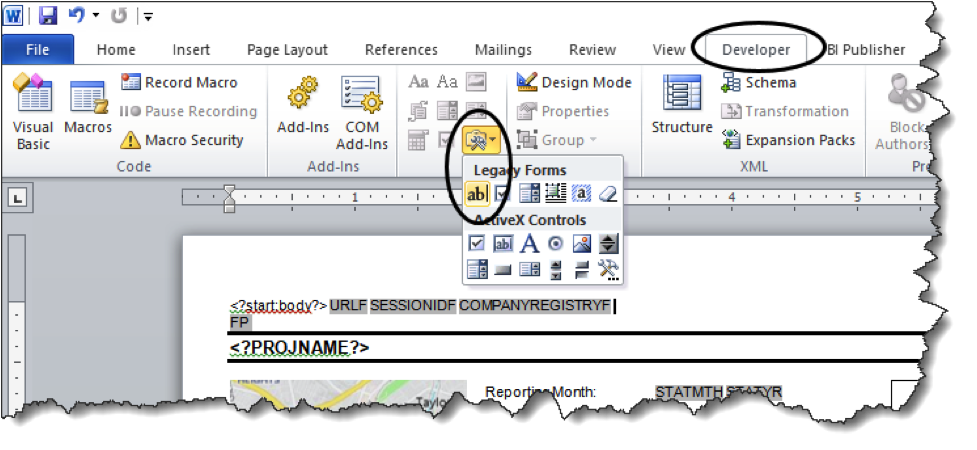
Once created, double click each field and define the code for each one as follows:

URLF : <?variable@begin:UUU_P_URLF;(.//UUU_P_URLF)[1]?>
SESSIONIDF: <?variable@begin:UUU_P_SESSIONIDF;(.//UUU_P_SESSIONIDF)[1]?>
COMPANYREGISTRYF: <?variable@begin:UUU_P_COMPANYREGISTRYF;(.//UUU_P_COMPANYREGISTRYF)[1]?>
Adding ActiveX Control Image to RTF
Insert a picture by selecting Insert / Picture and browsing to an image similar in size to the one that will be replacing it.
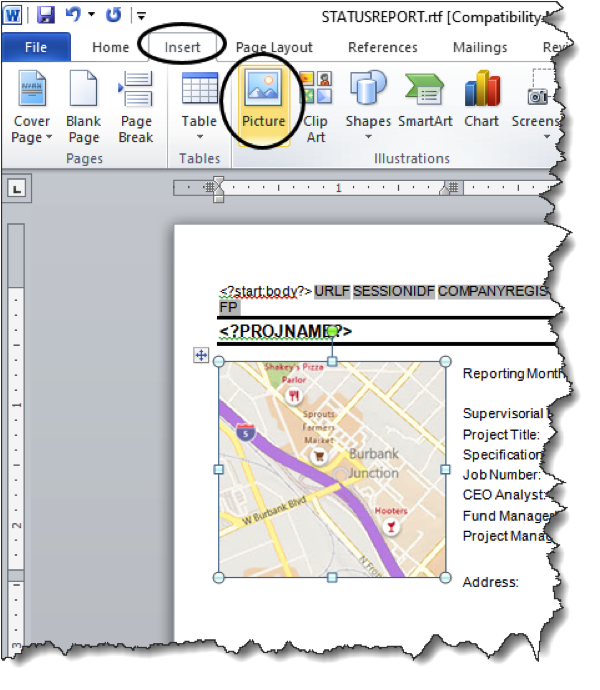
Right click on the image and select Format Control.
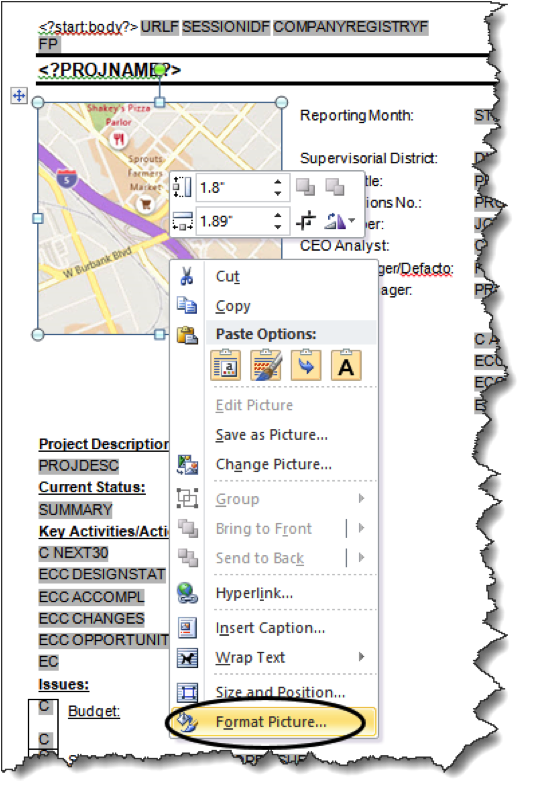
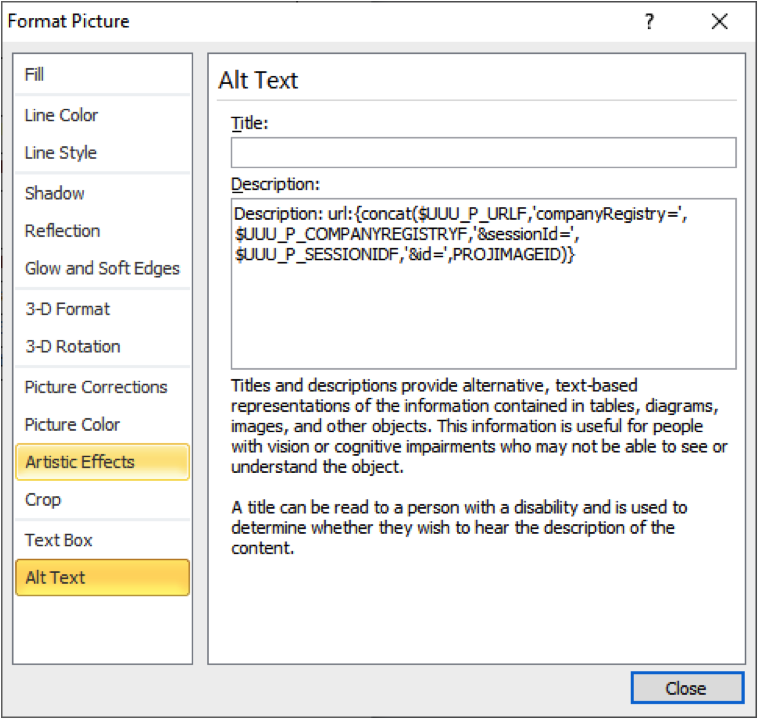
In the Alt Text field enter the following in the Description section:
Start copy after – – –
Description: url:{concat($UUU_P_URLF,’companyRegistry=’,$UUU_P_COMPANYREGISTRYF,’&sessionId=’,$UUU_P_SESSIONIDF,’&id=’,PROJIMAGEID)}
– – – End copy before
Replace PROJIMAGEID with the data model field containing the image id.
Save the file and load it back into BI Publisher.
NOTE: You won’t be able to see the image by running the PDF directly from the RTF. It will need to be run through Unifier in order to pull the parameter values and link to the actual image.
Wrap Up
If this is an External Report, moving the RTF back into and existing BI Publisher Template will automatically make it available to Unifier. If it is a Custom Report, the Data Model and Template will need to be downloaded and imported back into Unifier.
