ORACLE PRIMAVERA UNIFIER
DOWNLOAD THE PDF HERE
The following steps outline how to test a newly designed business process. From the configuration and set up, to making it available for testing in a project (shell). As a best practice, the newly designed business process will be ‘pushed’ to the project via a shell template.
The new business process (New BP) in this example is a simple-type BP with workflow, and is already deployed.

The New BP must be configured and activated to allow for setup and use. In the Company Workspace > Configuration node, locate and select the New BP and click ‘Open’.
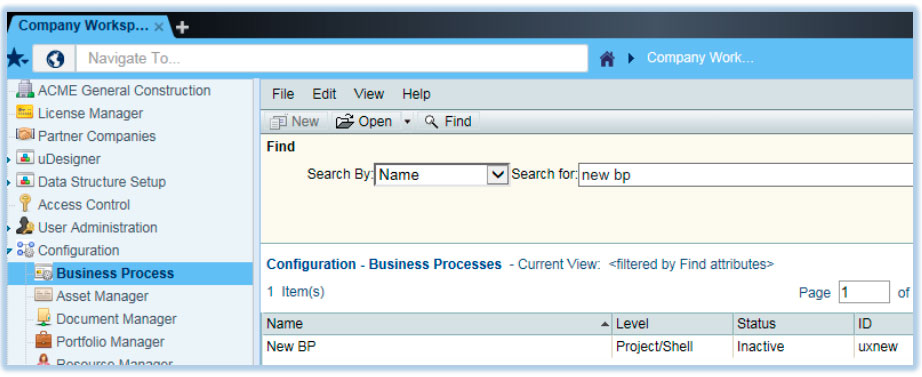
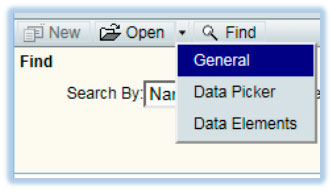
The New BP does not include any Data Pickers, or Auto-Sequence or Query-based Data Elements requiring configuration so only the General option needs selecting.
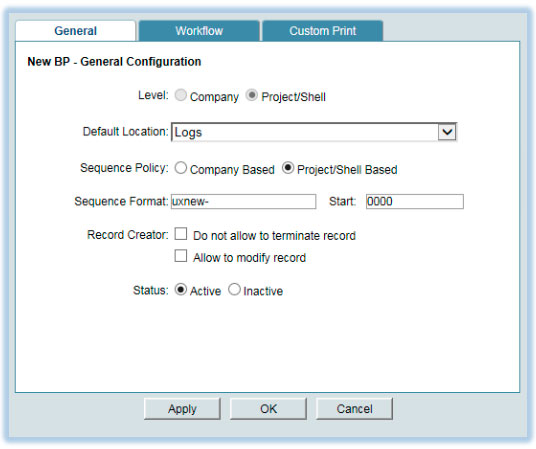
In the General tab, there are several settings that can be changed. In this example, the default settings will suffice but the General Configuration Status needs to be set to Active.
In the Workflow Tab, the workflow also needs to be added and set to Active. Select the WF record, click the ‘Activate’ button and click ‘OK’ when prompted in the pop-up Alert window.
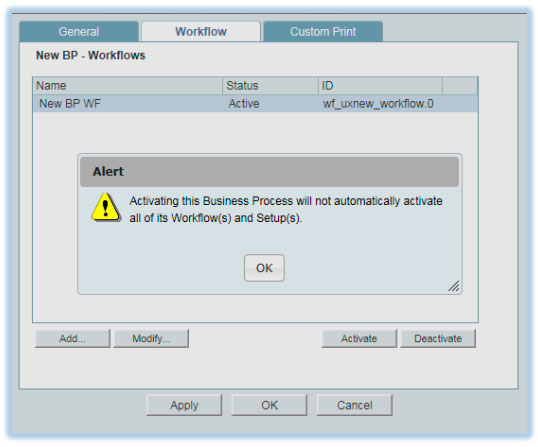
The New BP is now configured and activated.
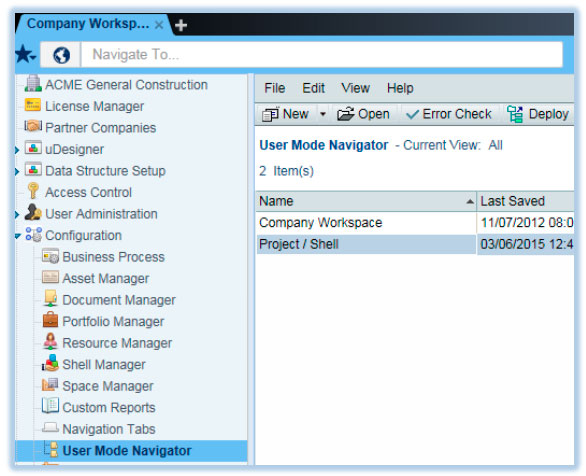
The New BP must be made available within the User Mode Navigation of a shell. Still in the Configuration node, select the User Mode Navigator sub-node and click ‘Open’ or double-click the Project/Shell navigator.
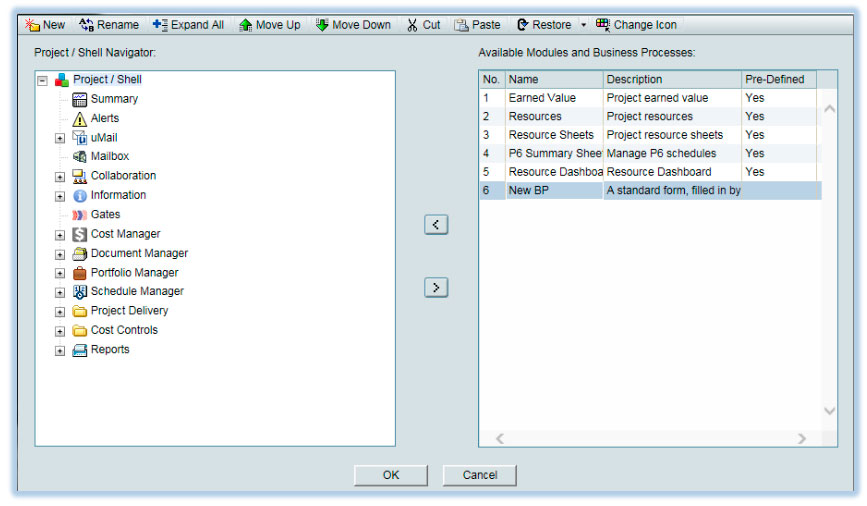
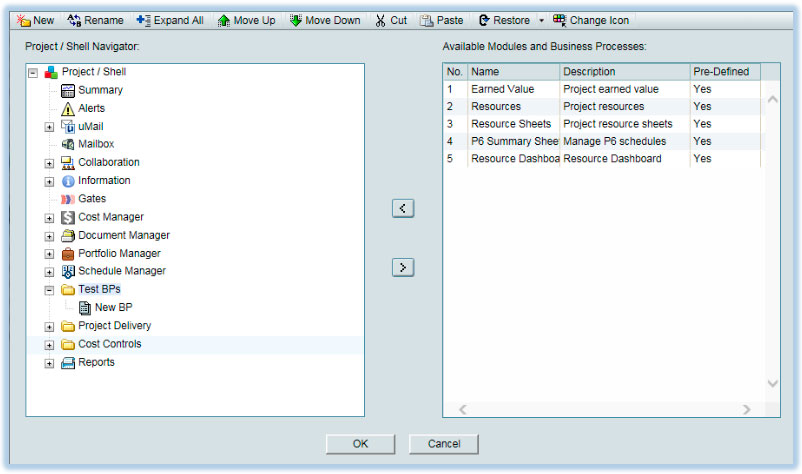
The navigator window opens displaying the navigation structure on the left hand pane, and available modules and business processes in the right hand pane that could be included within the navigator. Since the New BP is configured and activated, it is shown in the right hand pane.
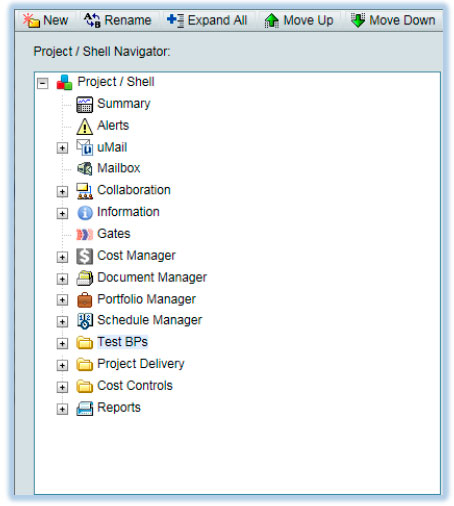
To keep this New BP separate from the other existing BP’s, a new folder will be created by clicking on the ‘New’ button. This new folder can be named something appropriate. In this example it is named ‘Test BPs’.
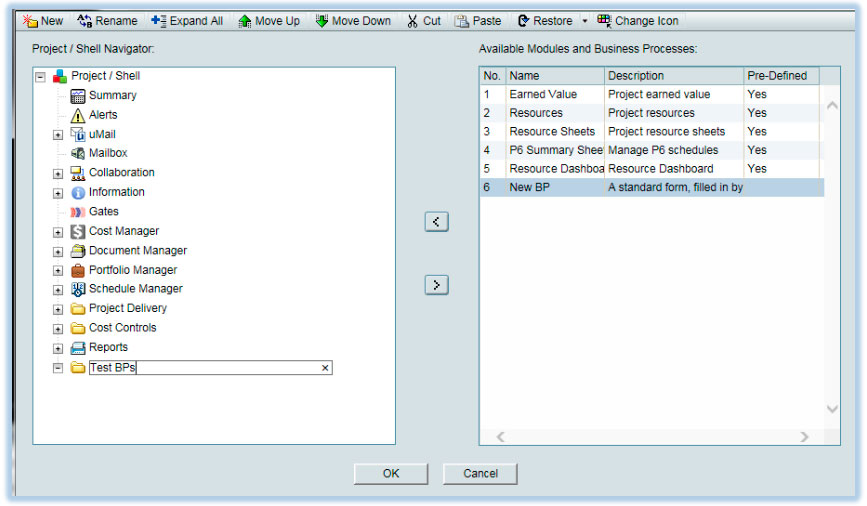
This folder will be positioned above the existing BP folders using the ‘Move Up’ button and moving up three positions.
With the ‘Test BPs’ folder and the New BP selected from each pane, the New BP is moved into the folder by clicking on the left arrow icon. Click ‘OK’ when completed.
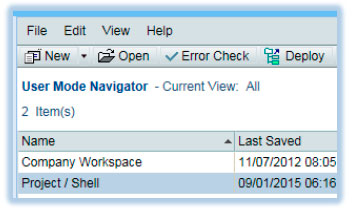
The User Mode Navigator for Project/Shell needs to be deployed for the new change to be reflected. Click ‘Deploy’ with the Project/Shell navigator selected.
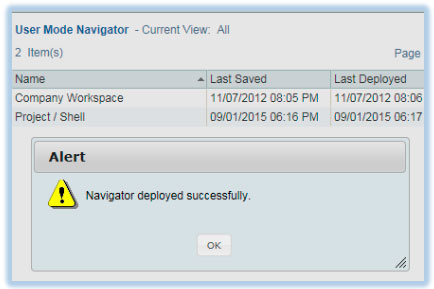
Click ‘OK’ on the Alert window. The Project/Shell User Mode Navigator is now deployed with the New BP.
The New BP must now be included in the shell template. In Company Workspace > Templates > Shells > Projects node, select the shell template to be used and click ‘Open’ or double-click the record. The template this example uses is a copy of the default shell template.
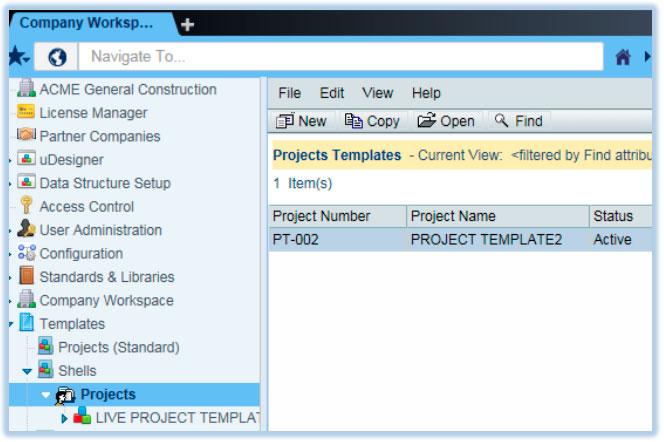
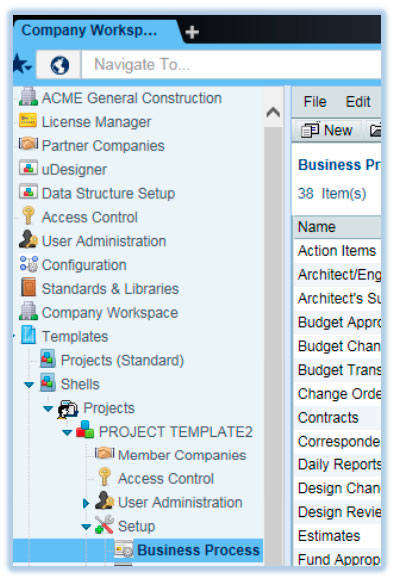
The shell template sub-nodes will now be displayed. Select the Setup > Business Process sub-node and click ‘New’.
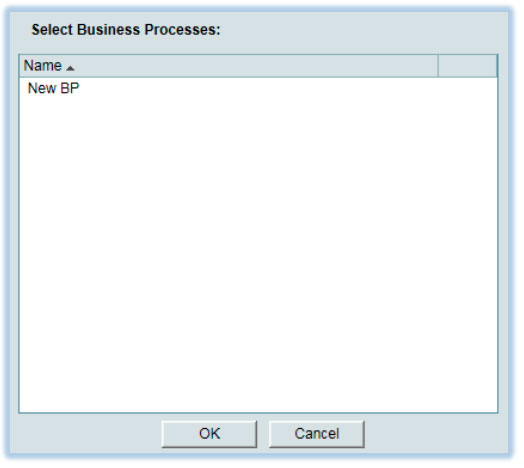
In the pop-up window select the New BP and click ‘OK’.
The New BP will now be in the list of available BP’s for this shell template. Find the New BP and click ‘Open’ or double-click the record.
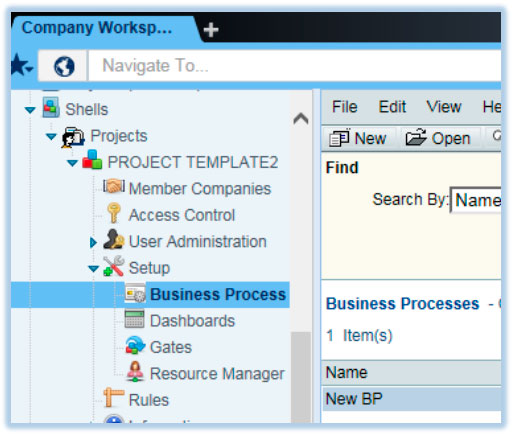
A New BP sub-node will display including a Workflow Setup sub-node. In the New BP sub-node click ‘Open’ or double-click the record.
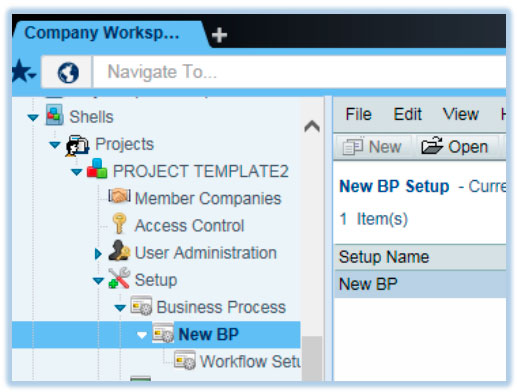
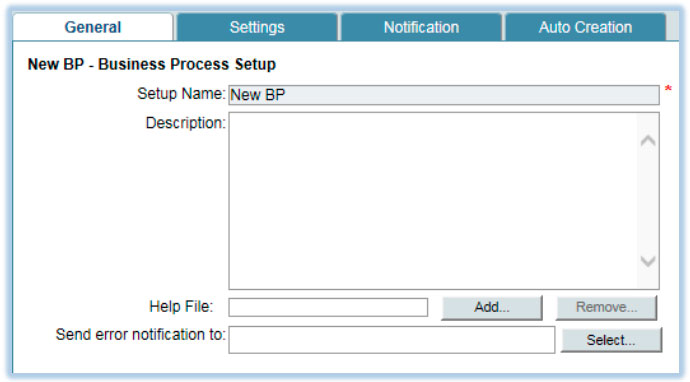
This New BP does not require a custom help file; any user assigned for error notification; any record editors; automatic email notifications on record modifications or any bp auto-creation functionality, so these tabs will be left as their defaults.
The New BP will require workflow setup. Select the Workflow Setup sub-node for this BP and click ‘New’.
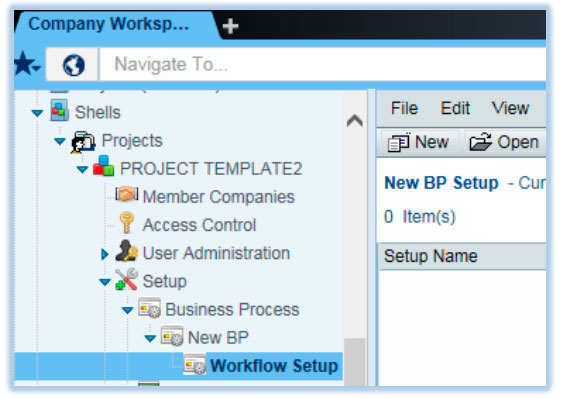
Select the workflow that was activated during the configuration steps and click ‘OK’.

In the General Tab, give this workflow setup a name and change the Status to Active.
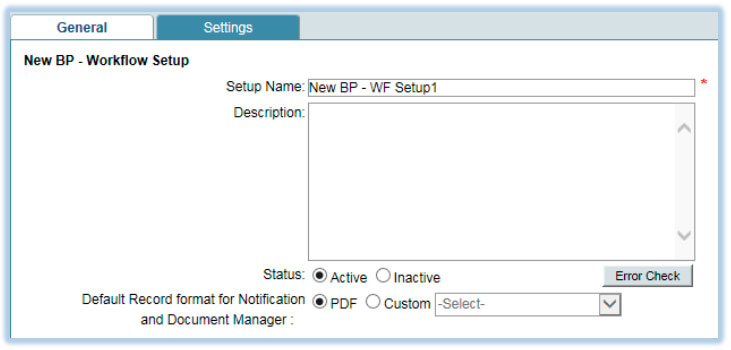
For this example, workflow settings will be kept as the defaults, however there will be a requirement to assign Assignees at each step. In the Settings tab, the left pane has sub-nodes for each step in the workflow.
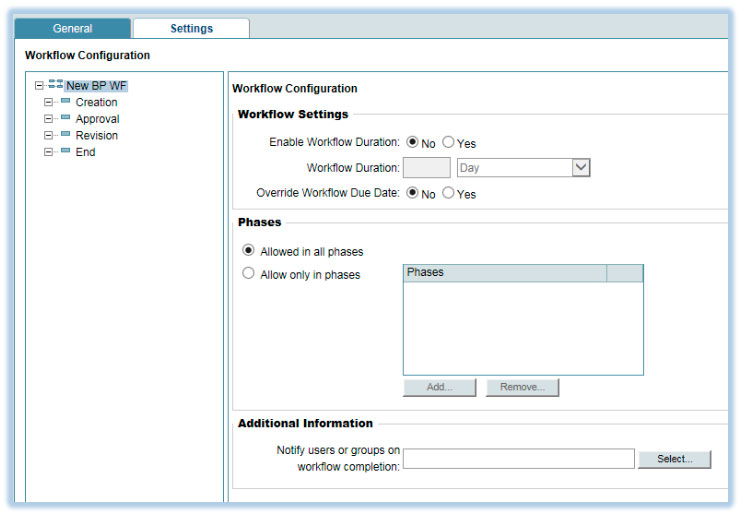
Selecting Creation step first, assign an appropriate Assignee for testing. This could be specific User(s) or Group(s). In this example, the Company Admin will be selected throughout. From the ‘Select’ drop down list select ‘User Picker’.
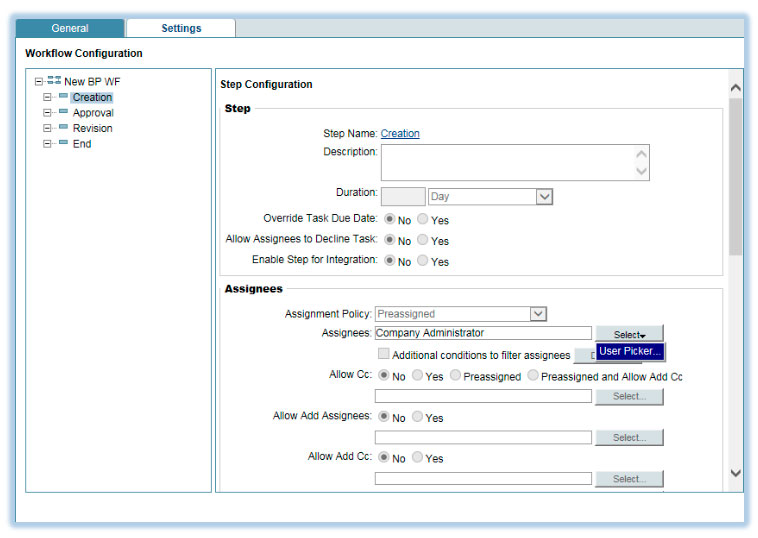
Select the appropriate User(s) or Group(s) and click Add, and then OK.
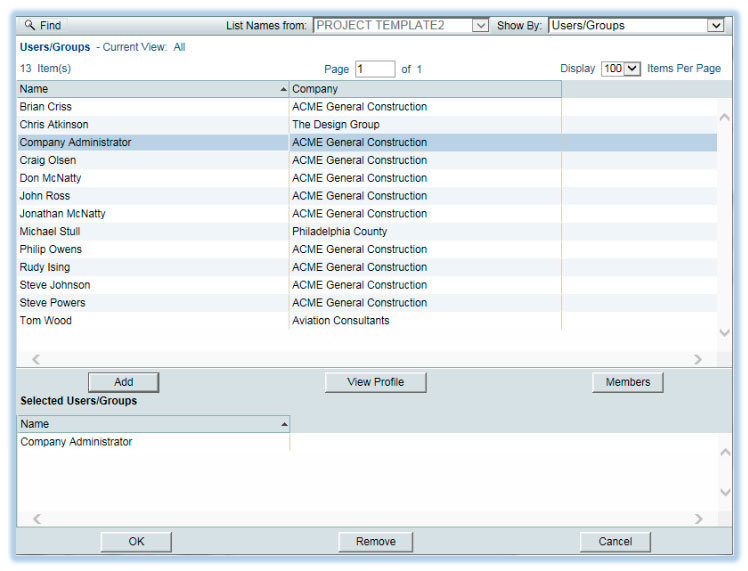
Creation Step now has Company Admin as an Assignee.
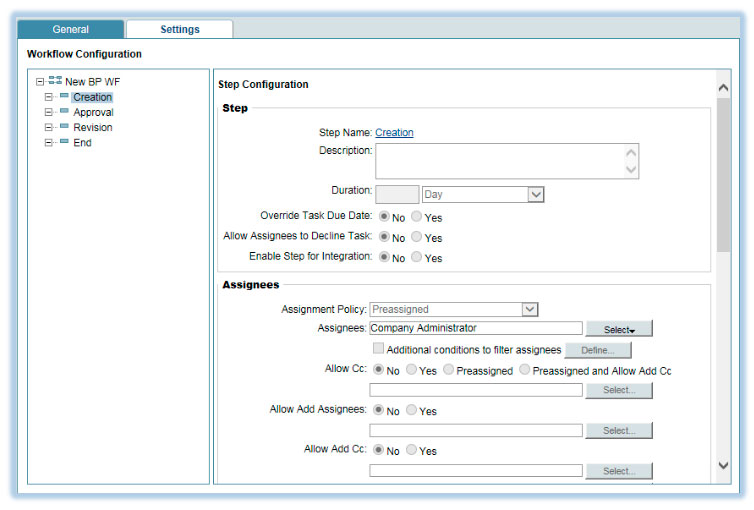
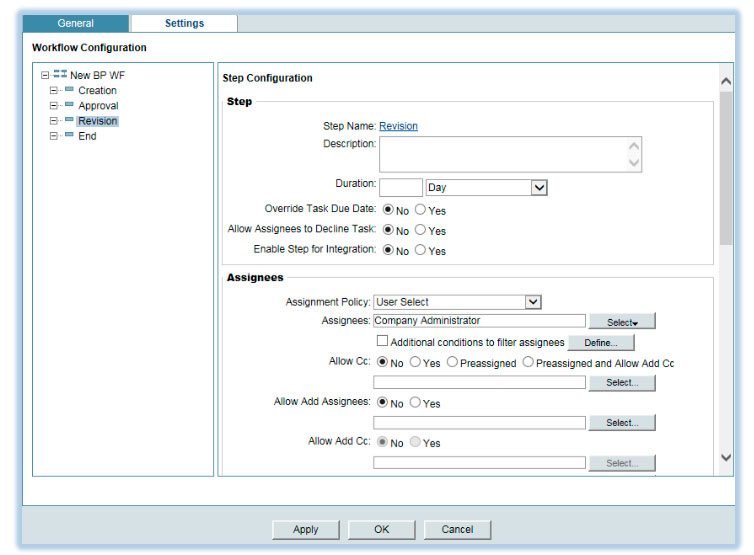
Repeat with the other steps (End step not required).
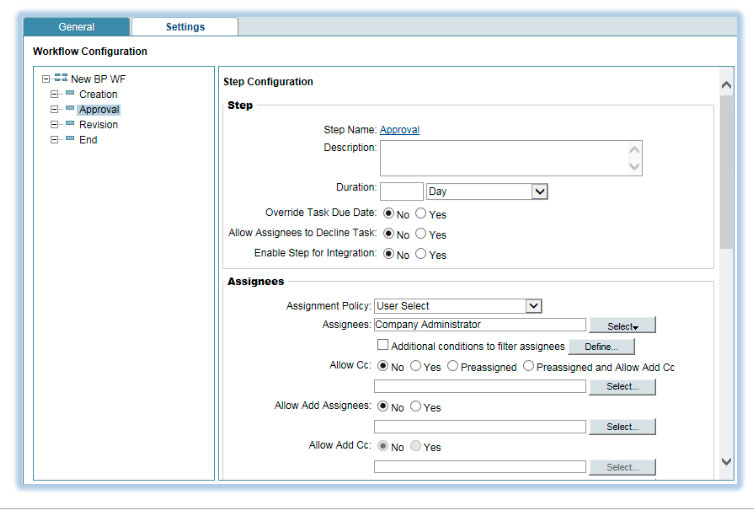
Click OK once all steps have Assignees.
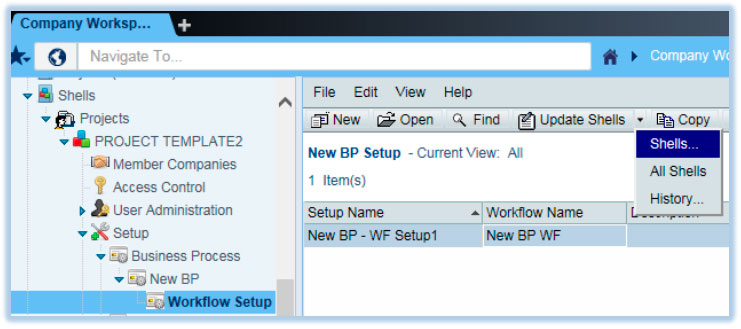
The New BP set up is ready to be “pushed” to the testing project. Still in the Workflow Setup sub-node, select ‘Shells…’ from the ‘Update Shells’ drop down list.
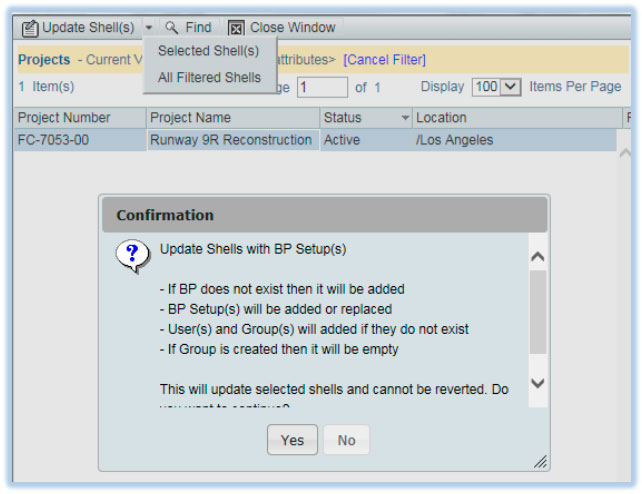
Select the appropriate project from Projects pop-up window.

Select ‘Selected Shell(s)’ from the ‘Update Shells’ drop down list.

Click ‘Yes’ on the Confirmation pop-up window.
To confirm the update has been successful, select ‘History…’ from the ‘Update Shells’ drop down list.
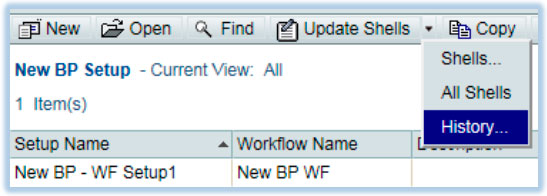
The Status will display Finished on completion.

It is important that the testing User has the correct permissions already set to view and work in the Project (shell). Since this example uses a copy of the default shell template set up, a new test user could be added to the appropriate pre-defined Groups and ‘pushed’ to the test project.
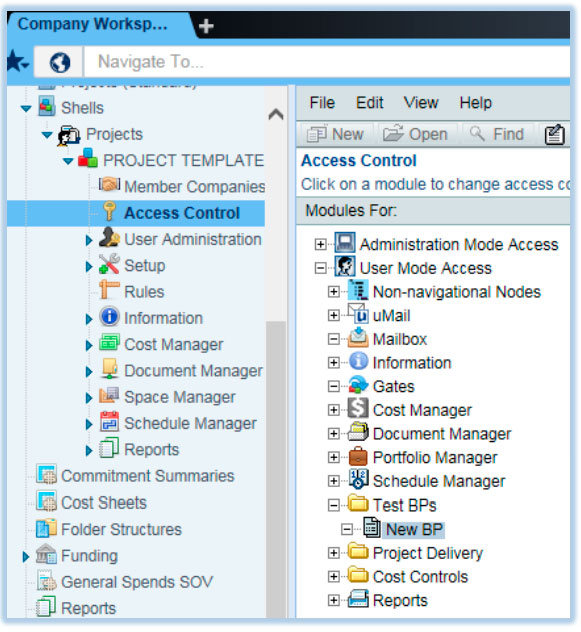
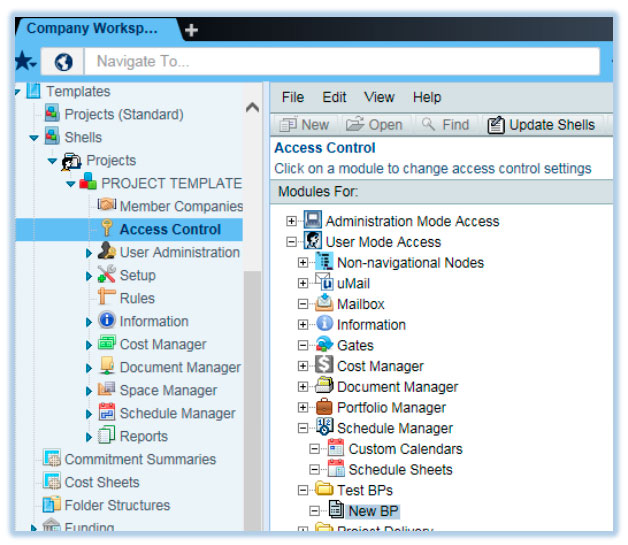
The New BP now needs specific permissions to be set to allow it to be used within the test project for the testing User. Back in the Templates node > Shells > Projects > project template sub-node, select Access Control. Select the User Mode Access node and select the New BP from ‘Test BPs’ folder.
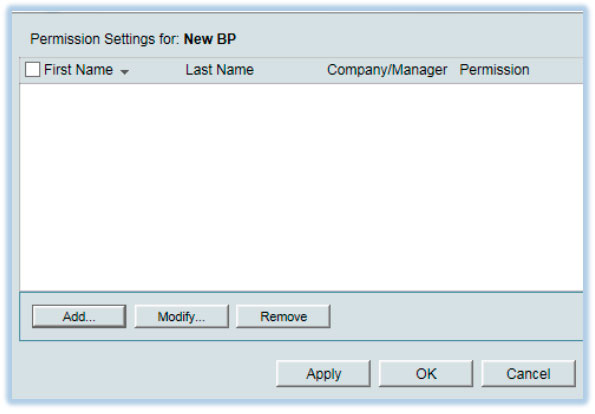
A Permission Settings pop-up window will display. Click ‘Add’.
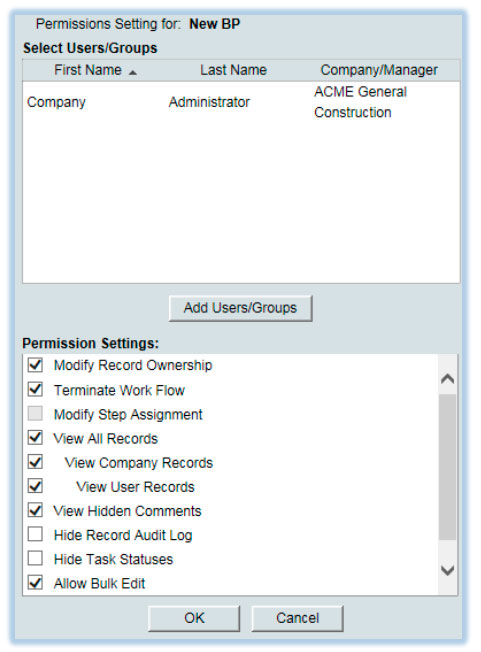
Click the ‘Add Users/Groups’ and select the appropriate User(s) or Group(s). This example uses Company Admin.
Select all Permissions Settings apart from Modify Step Assignment, Hide Record Audit Log and Hide Task Statuses. Click OK.
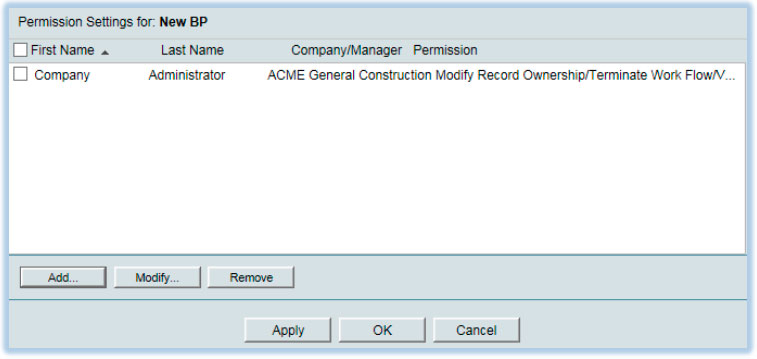
The initial window will now display the User(s) or Group(s) that have been assigned permissions for this New BP.
These permissions need to be “pushed” to the test project. From the Access Control node click ‘Update Shells’ button.
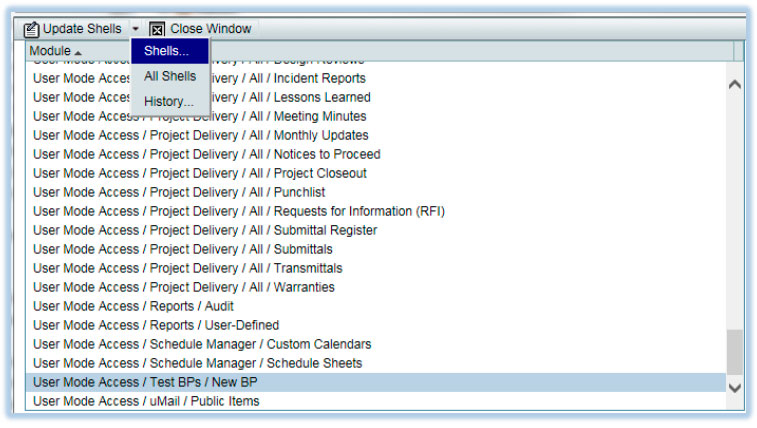
Scroll down to User Mode Access / Test BPs / New BP and select ‘Shells…’ from the ‘Update Shells’ drop down list.
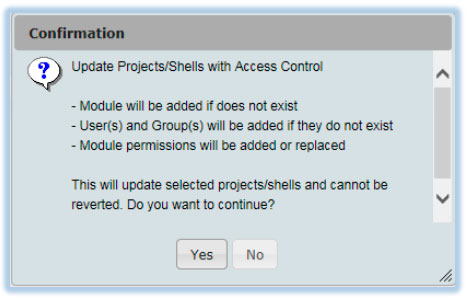
Select the test project and select ‘Selected Shell(s)’ from ‘Update Shells’. Click ‘Yes’ from the Confirmation pop-up window.

Click Yes on the Confirmation pop-up window.
To confirm the update has been successful, select ‘History…’ from the ‘Update Shells’ drop down list.
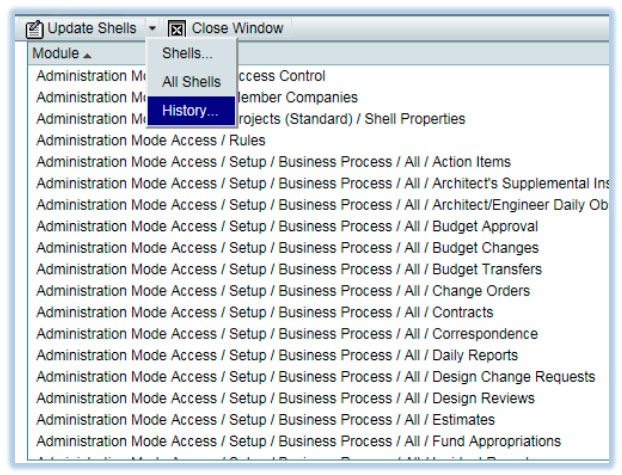
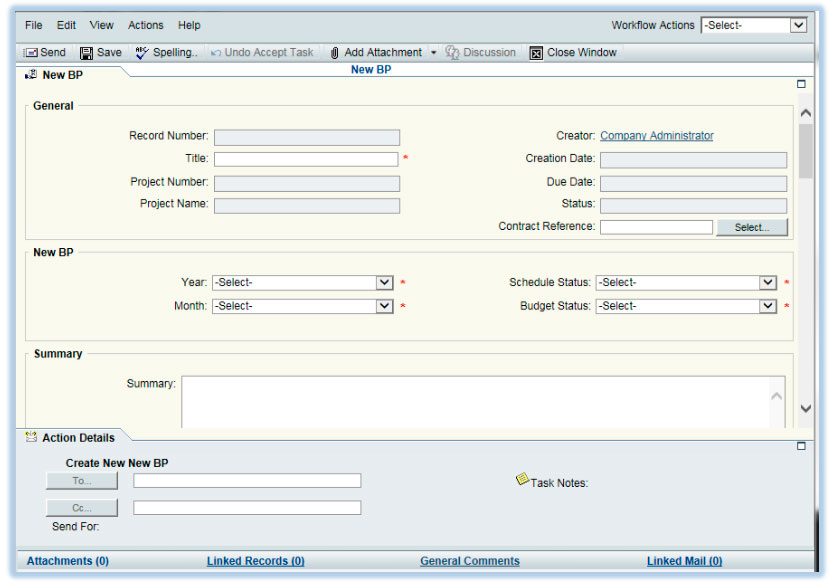
The New BP is correctly configured, set up and permissions assigned. Locate the test project and select the New BP from the Test Bps folder node. Click ‘New’.
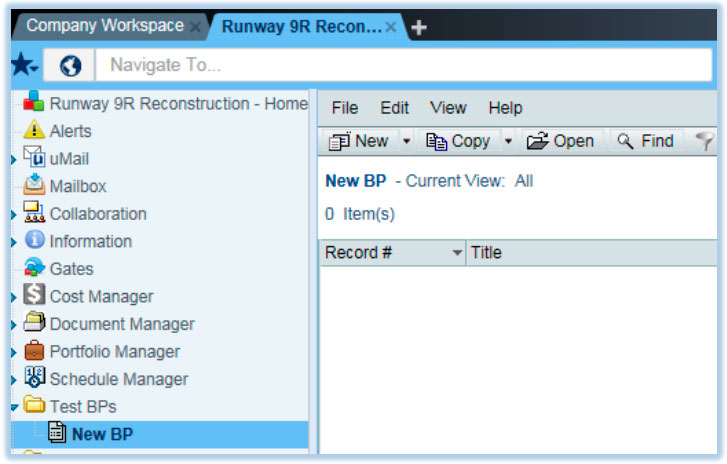
The New BP record form displays and is now ready to for testing through its workflow.
