


Primavera P6 EPPM (Enterprise Project Portfolio Management) and Oracle Primavera Cloud (OPC) are powerful project management tools that can work together seamlessly through built-in integration. This allows users to work in either P6 EPPM or OPC while keeping project data synchronized across both platforms. This tech tip explains how to set up and use the integration to enable real-time data refresh between P6 EPPM and OPC.
Prerequisites
Before integrating P6 EPPM and OPC:
- Ensure you have administrative access to both P6 EPPM and OPC.
- Verify that both systems are accessible, either on-premises or cloud-based.
- Confirm that your organization has Primavera Gateway or direct integration configured.
- Ensure you have the necessary workspace permissions in OPC (Must be an Application Administrator in OPC) and have project access in P6 EPPM.
Setting Up the Integration
Integration between P6 EPPM and OPC is facilitated through Primavera Gateway or Direct Integration within OPC. Follow these steps to configure the connection:
- Access Integration Settings in OPC
-
- Log in to OPC and navigate to Global Admin > Integrations page.
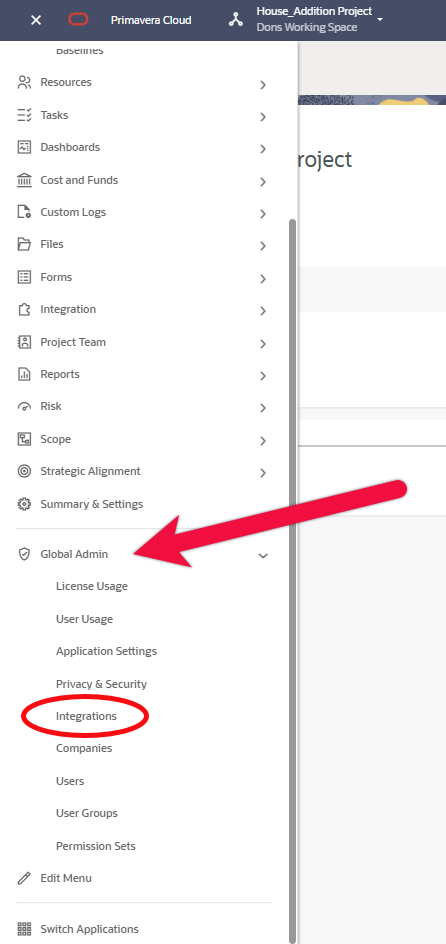
- Log in to OPC and navigate to Global Admin > Integrations page.
-
- Select Add Connection and choose P6 EPPM as the external application.
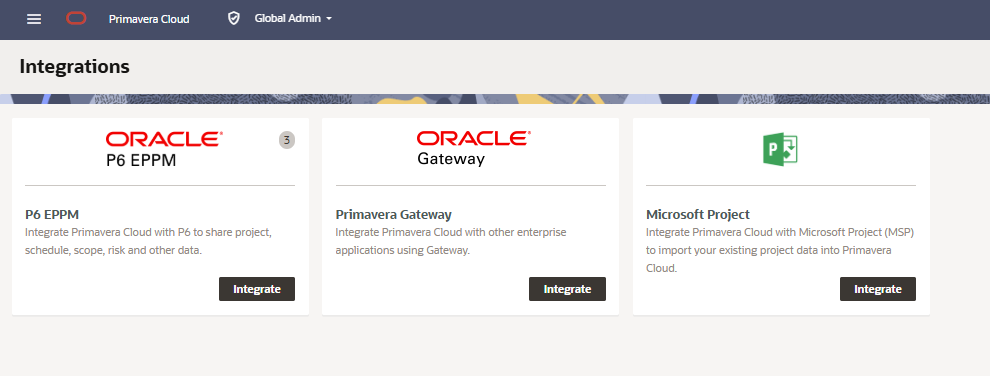
2. Choose Integration Method
-
- Direct Integration: Ideal for minimal setup with default business flows. Select this if your organization uses standard data mappings (e.g., project schedules, resources).
- Primavera Gateway: Use for customized data flows. Connect both P6 and OPC to an on-premises or cloud-based Gateway instance. This may require adding URLs to an allowlist and can take up to 14 days to configure due to security settings.
For this example, we are going to do a direct integration from OPC to EPPM using default business flows
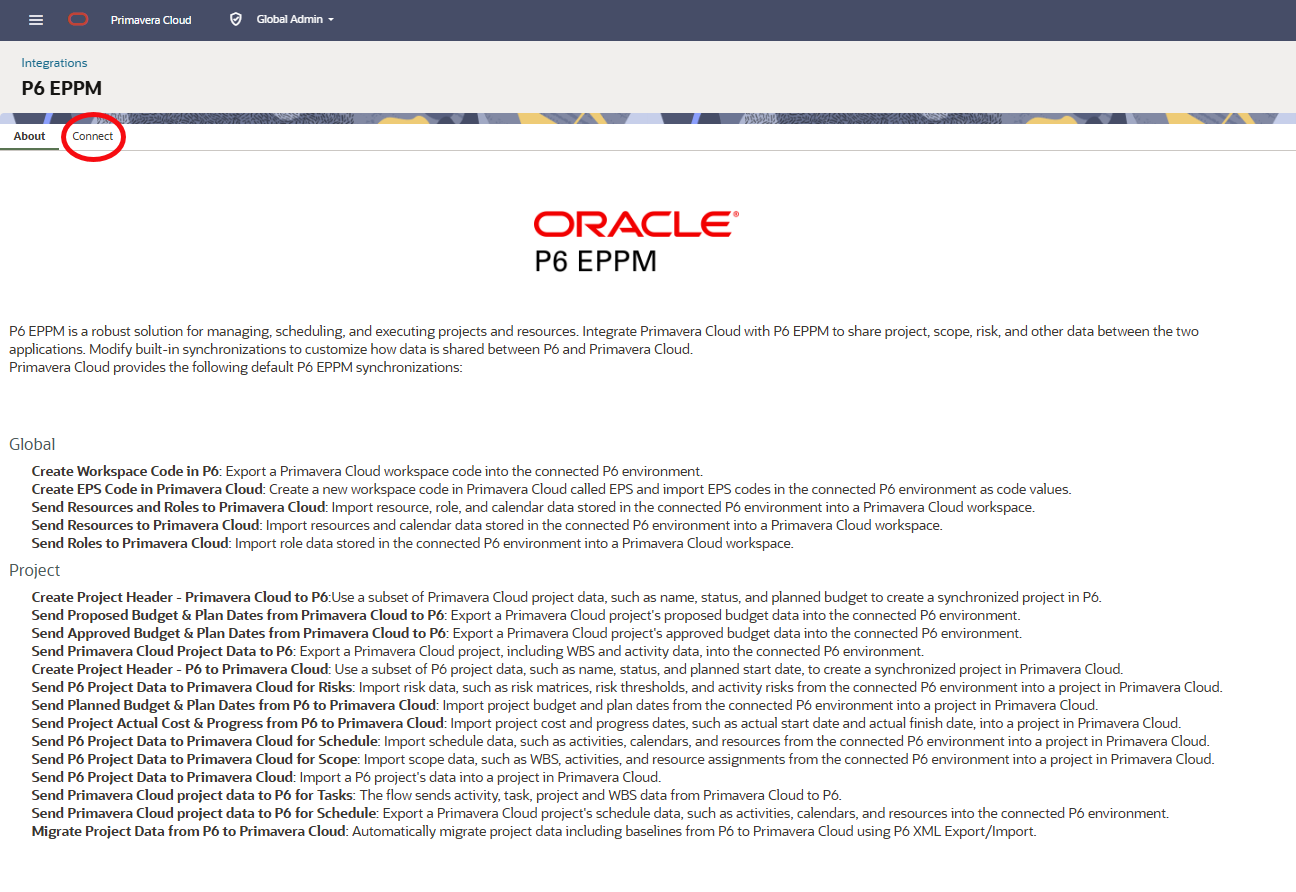
3. Add a New Connection: Click the “+ Add Connections” button at the top of the page to start creating a new connection.
-
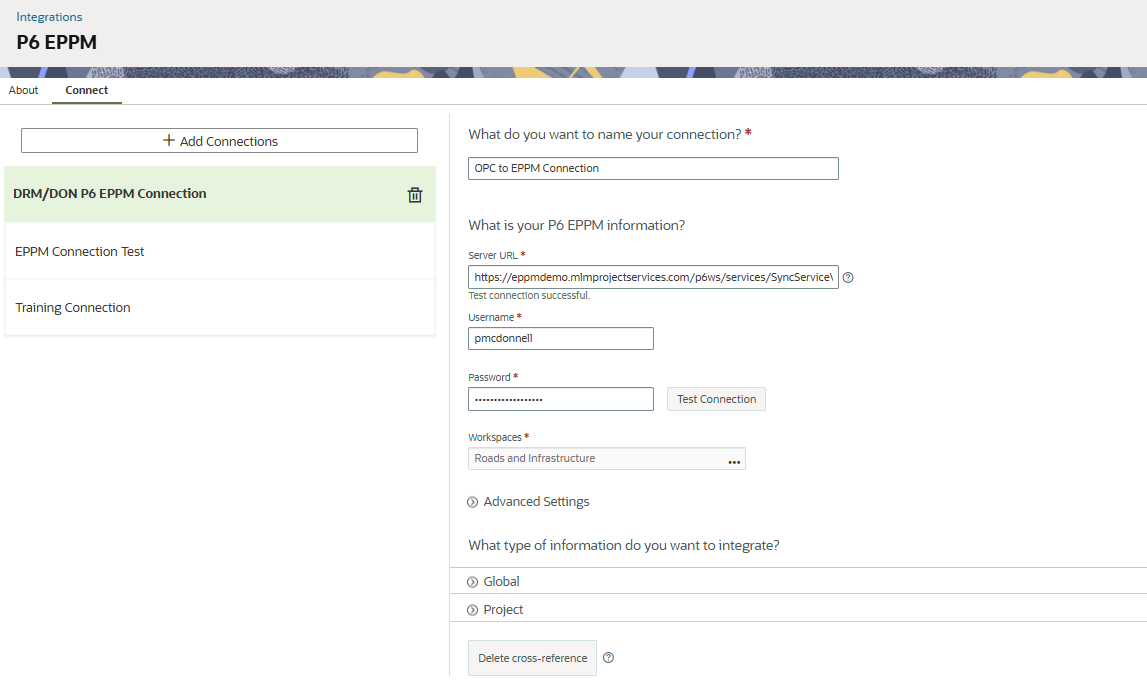
- Name Your Connection: In the “What do you want to name your connection?” field, enter a descriptive name, such as “OPC to EPPM Connection” or something relevant to your integration
4. Enter P6 EPPM Information:
-
- Server URL: Input the URL for the P6 EPPM web service, ensure it points to the correct SyncService endpoint.
- Username: Enter the P6 EPPM username
- Password: Enter the corresponding password for the username
- Workspaces: Specify the workspace(s) you want to connect to.
- Test the Connection: Click the “Test Connection” button next to the password field. Verify that it shows “Test connection successful.” If not, double-check your URL, username, and password.
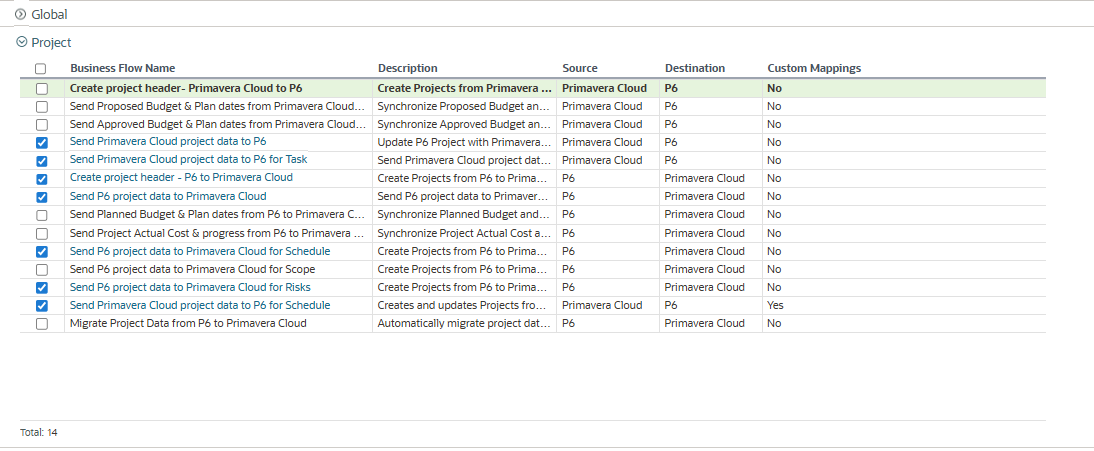
 5. Configure Business Flows
-
- Define business flows to map data fields between P6 EPPM and OPC (e.g., mapping P6’s “Must Finish By Date” to OPC’s “Planned Finish Date”).
- Use default flows for common objects like activities, resources, and roles, or customize flows in Primavera Gateway for specific needs.
- Assign the connection to the relevant OPC workspace(s).
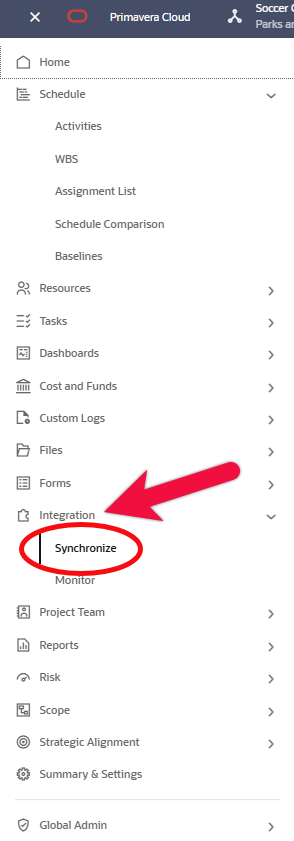
6. Set Up Synchronization
-
- In OPC, go to the Synchronize page in the workspace-level or project-level Integration app.
-
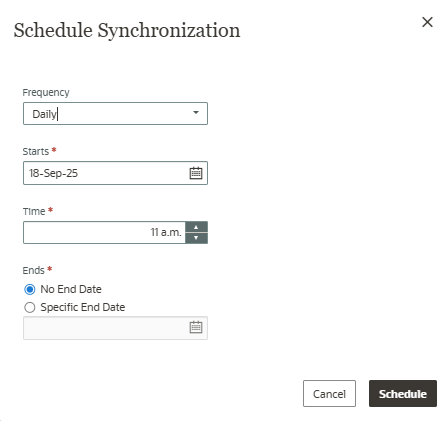
- Add the business flow to a synchronization job, specify parameters (e.g., data objects to transfer), and choose to run it on-demand or schedule it for regular intervals (e.g., daily).

How Data Refresh Works
Once integrated correctly, data can flow bidirectionally between P6 EPPM and OPC:
- From P6 EPPM to OPC: Updates made in P6 (e.g., activity dates, resource assignments) are sent to OPC via the synchronization job. For example, updating a task’s start date in P6 will reflect in the corresponding OPC project after the sync.
- From OPC to P6 EPPM: Changes in OPC, such as adding a new activity or adjusting a baseline, are pushed to P6 during synchronization.
- Real-Time Collaboration: OPC’s cloud-based platform allows multiple users to work simultaneously, while P6 users can continue using the familiar desktop interface. Changes sync based on the configured schedule or manual trigger.
Steps to Use P6 EPPM and OPC Together
- Work in Either Platform
- In P6, create or update schedules, assign resources, or manage baselines as usual.
- In OPC, leverage collaborative features like real-time discussions, risk analysis, or portfolio management.
- Run Synchronization
- In OPC, navigate to the Synchronize page and select the configured business flow.
- Run the synchronization manually or rely on the scheduled job to refresh data.
- Review the synchronization log to confirm successful data transfer or troubleshoot error
- Validate Data
- After synchronization, check the project in both P6 EPPM and OPC to ensure data consistency (e.g., activity dates, resource allocations).
- In OPC, reschedule the project (Schedule > Activities > Schedule) and recalculate costs to align data.
- Monitor and Adjust
- Use OPC’s Schedule Comparison feature to compare schedules, baselines, or scenarios across both platforms.
- Adjust business flows in Primavera Gateway if specific data mappings need refinement.
Best Practices
- Test First: Set up and test the integration in a non-production OPC workspace to ensure correct data mapping.
- Schedule Regular Syncs: Automate synchronizations (e.g., hourly or daily) to keep data current without manual intervention.
- Validate Data: Always reschedule and recalculate costs in OPC after importing P6 data to avoid discrepancies.
- Secure Connections: For on-premises setups, work with IT to add necessary URLs to the allowlist and enable SSL if required.
- Limit Customizations: Use default business flows for simplicity unless specific customizations are needed.
Conclusion
Integrating P6 EPPM and OPC allows teams to combine P6’s robust desktop scheduling with OPC’s cloud-based collaboration and advanced features like risk analysis. With built-in integration via Direct Integration or Primavera Gateway, data refreshes seamlessly between platforms, enabling users to work in their preferred environment while maintaining a single source of truth. For further information or to tap into our 30+ years of expertise as a dedicated Oracle Partner, visit DRMcNatty.com.