

Importing a Schedule from Primavera P6 into Oracle Primavera Cloud (OPC)
DOWNLOAD THE PDF HERE
 Transitioning project schedules from Primavera P6 to Oracle Primavera Cloud (OPC) is a common task for organizations moving to a cloud-based project management solution. This tech tip provides a step-by-step guide to importing a P6 schedule (in XML or XER format) into OPC, ensuring a smooth transfer of project data.
Prerequisites:
- Have a valid P6 XML or XER file ready (file size under 1 GB).
- Ensure you have OPC workspace permissions to import or edit projects.
- For XER files, confirm OPC’s locale matches the file’s language to avoid encoding issues.
Steps to Import a P6 Schedule into OPC
1. Log in to OPC
- Access OPC via a web browser and sign in.
2. Go to Projects
3. From the Object Selector, choose Projects > View Projects List.
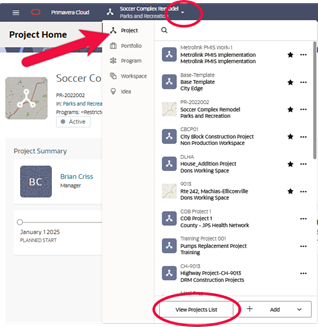 Select the target Workspace for the import.
4. Start the Import
- Click Actions > Import from P6.
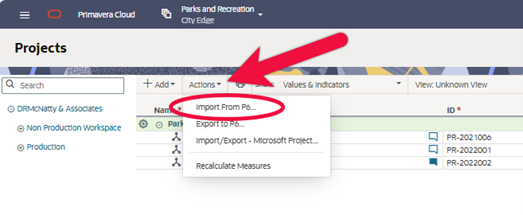
- In the dialog, click the ellipses to select your P6 XML or XER file (compressed files are supported for faster uploads).
- Click Next.
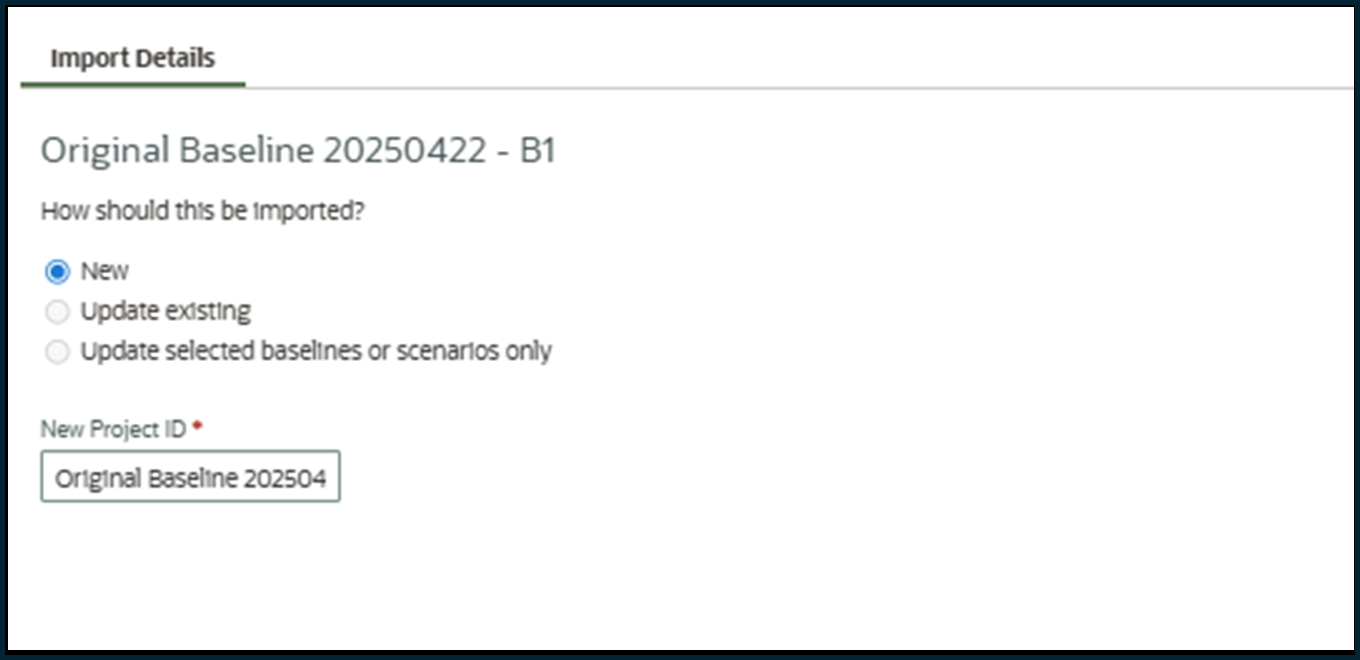
5. Choose Import Actions
- For each project, baseline, or scenario in the file, select an action:
-
- Create New Project: Adds a new project (adds a suffix if the ID exists).
- Update Existing Project: Updates a project with a matching ID.
- Do Not Import: Skips the project.
-
- For baselines/scenarios, specify whether to create or update them and link to the correct project.
- Click Next.
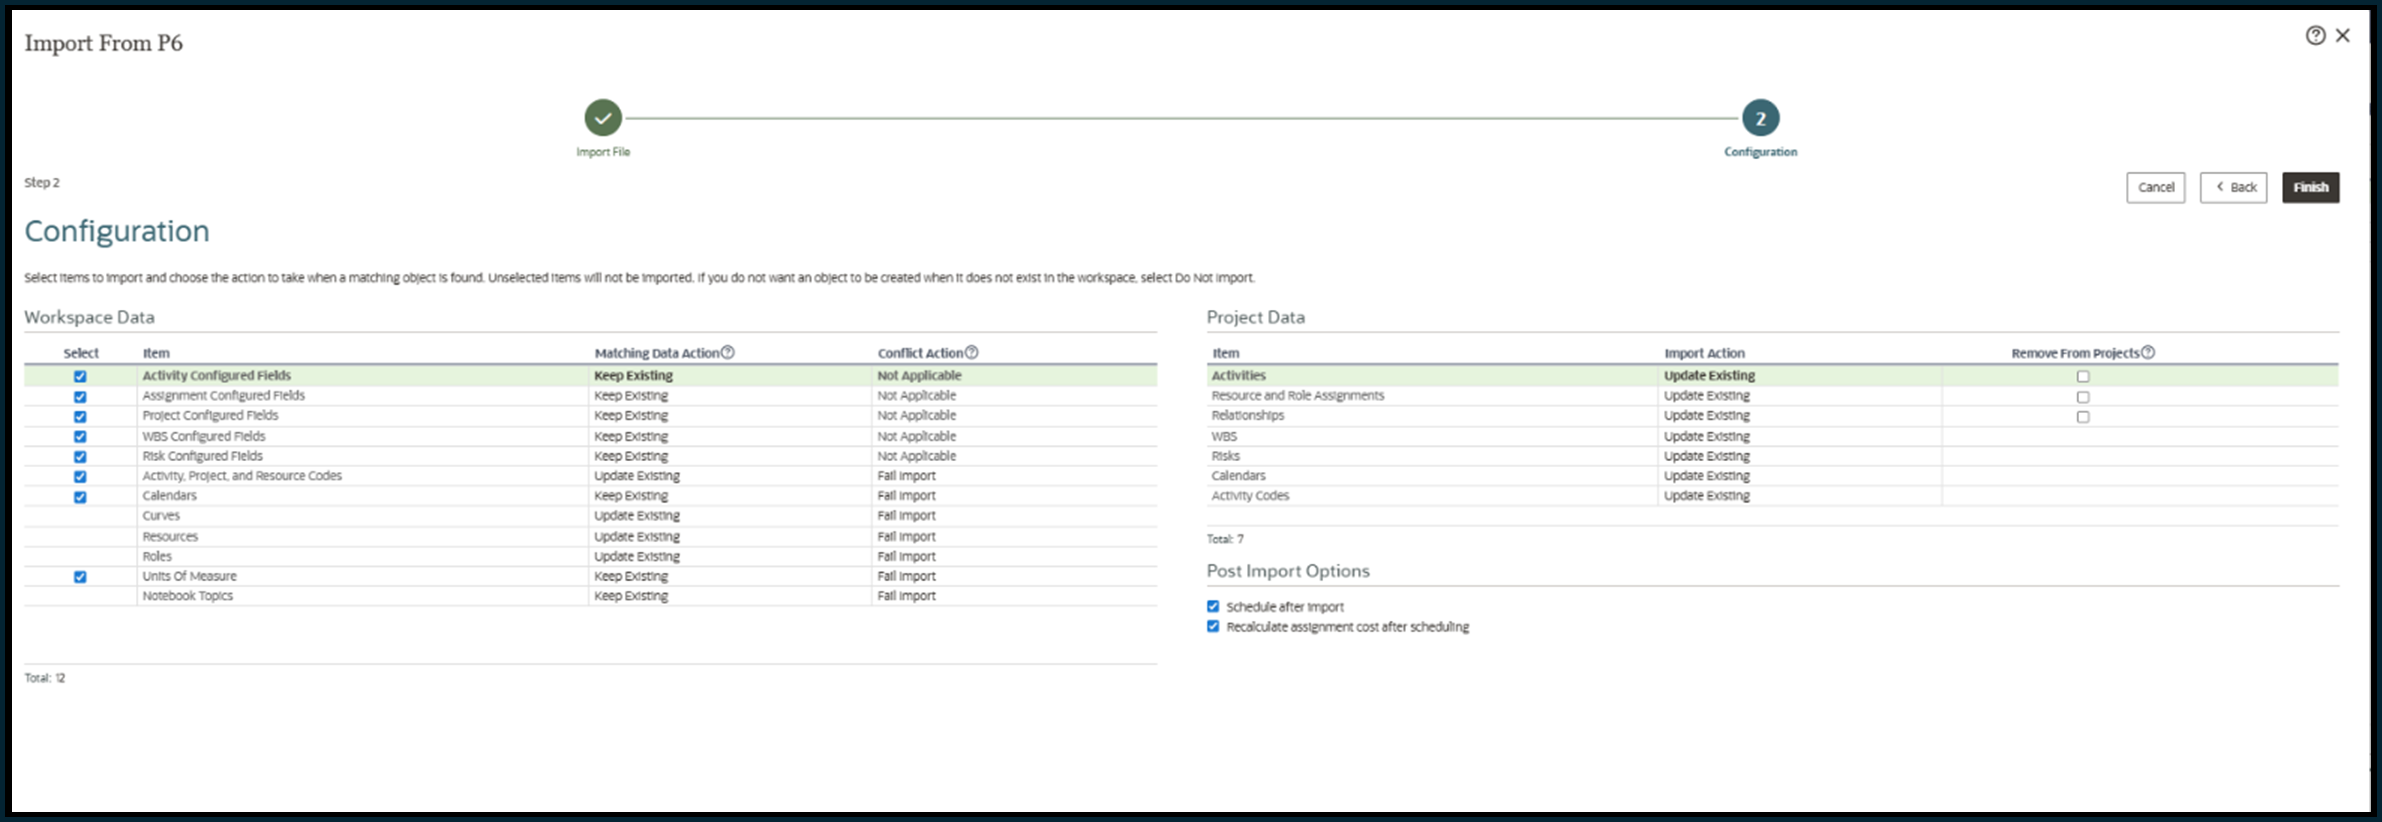
 6.Set Import Options
- Choose which data to import (e.g., activities, resources).
- Optionally, select Remove from Projects to delete OPC data not in the P6 file.
- Check Schedule after import to schedule the project automatically.
- Check Recalculate assignment cost after scheduling to update costs (this enables scheduling).
- Click Finish.
7. Review the Import
- Wait for the import to complete (you’ll get a notification).
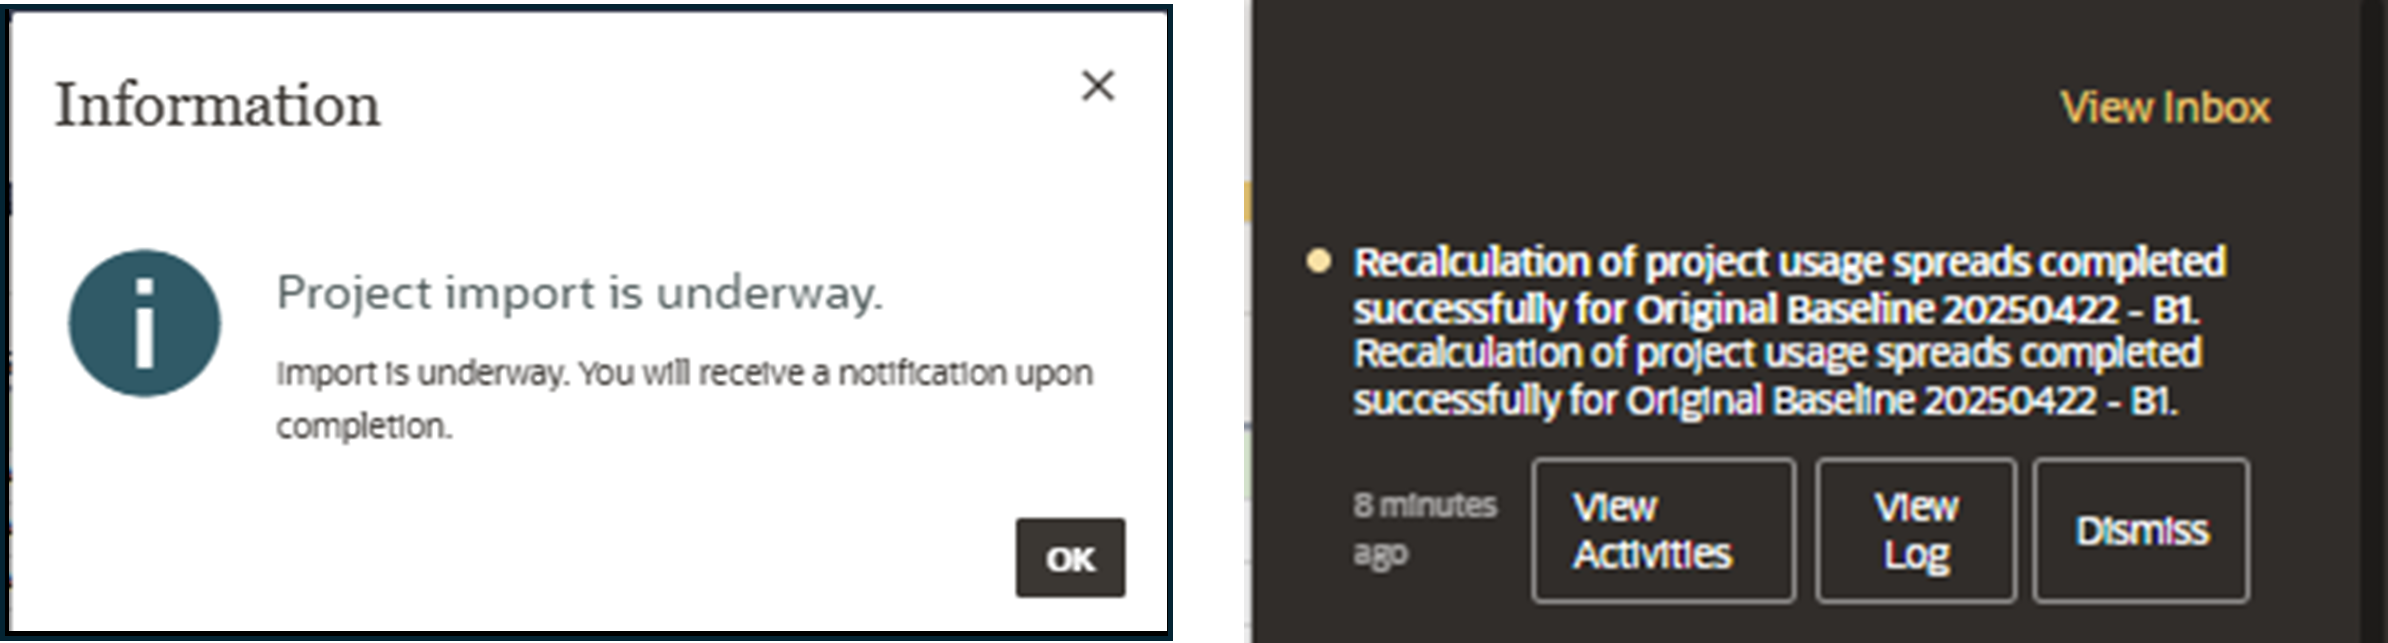
- Check the import log for errors or confirmation of success.
- Fix any issues in the P6 file and retry if needed.
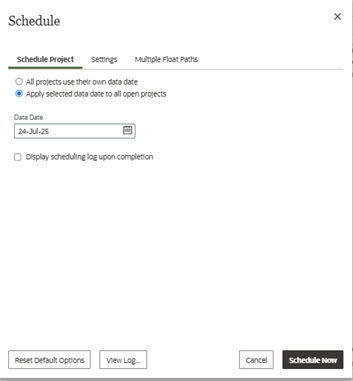
8. Schedule and Verify
- In OPC, go to Schedule > Activities in the project (or hit F9)
- Select Schedule and set the data date.
- Recalculate costs to ensure accuracy.
Best Practices
- Use XML for Full Data: XML files include baselines; XER files do not but can be imported as baselines/scenarios.
- Check File Validity: Ensure the P6 file is error-free before importing.
- Locale Match: For XER files, set the correct locale in OPC to avoid encoding issues.
- Permissions: Confirm you have sufficient OPC permissions.
- Limit: Import up to 30 schedules (projects, baselines, scenarios) per file.
Conclusion
Importing a P6 schedule into OPC is straightforward with the right preparation and configuration. By following these steps, you can seamlessly transition your project data to the cloud, leveraging OPC’s advanced features like risk analysis and collaborative scheduling. For more details, visit DRMcNatty.com or go to Oracle Primavera Cloud Help