ORACLE PRIMAVERA UNIFIER & P6
DOWNLOAD THE PDF HERE
This topic will cover three areas related to Unifier and P6 projects that are integrated:
- How to copy projects in both P6 and Unifier and then how to make the connection.
- How to send P6 data to the Unifier schedule sheet from P6.
- Troubleshooting errors that might arise.
Copy the Unifier & P6 Projects
In this section we’ll outline how you copy projects in both Unifier and P6, and then how to properly set them to be linked correctly.
Unifier Shell Copy
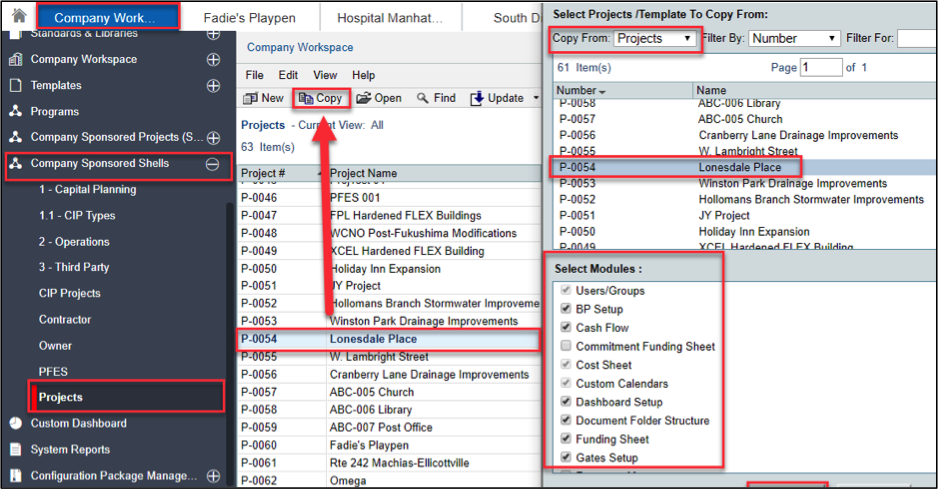
Navigate in Unifier to Company Workspace > Admin mode > click on Company Sponsored Shells > Projects > select the project you want to copy Click on Copy > Choose Copy from Projects and Select the Project to copy > and select the Modules you wish to copy > click OK
P6 EPPM Schedule Copy
Navigate to P6 EPPM login & go to the Projects Tab
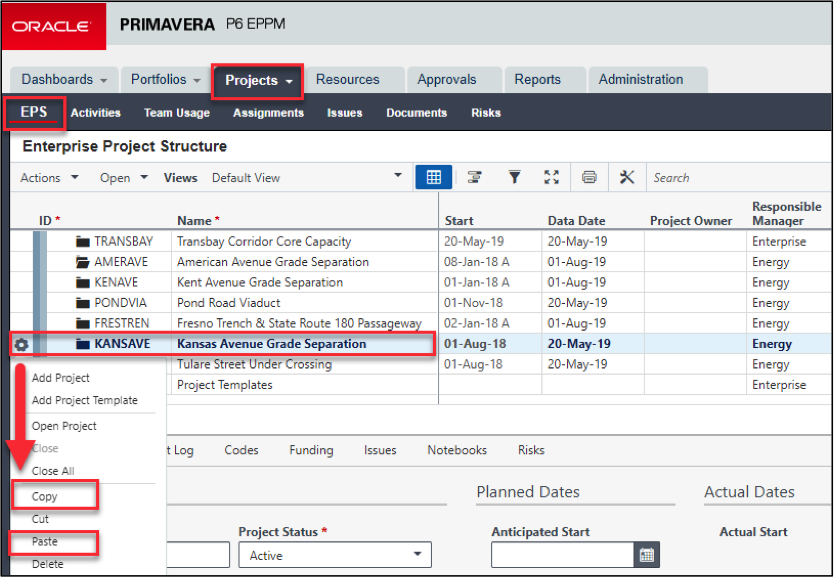
Within the User interface, navigate to EPS > Click on the Project you want to Copy > Select on the Gear Icon select Copy
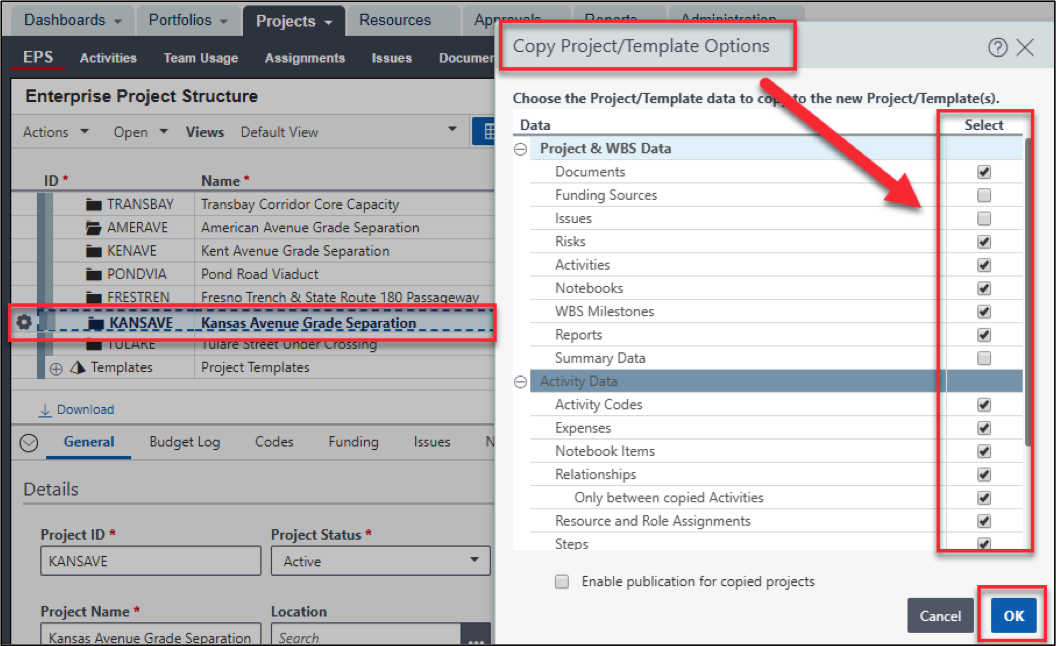
Select where you want to put the Project in the P6 EPS Hierarchy and click Paste, Select the Copy Project Options you want to copy > Click on OK
Linking the Unifier copied project to the P6 Copy
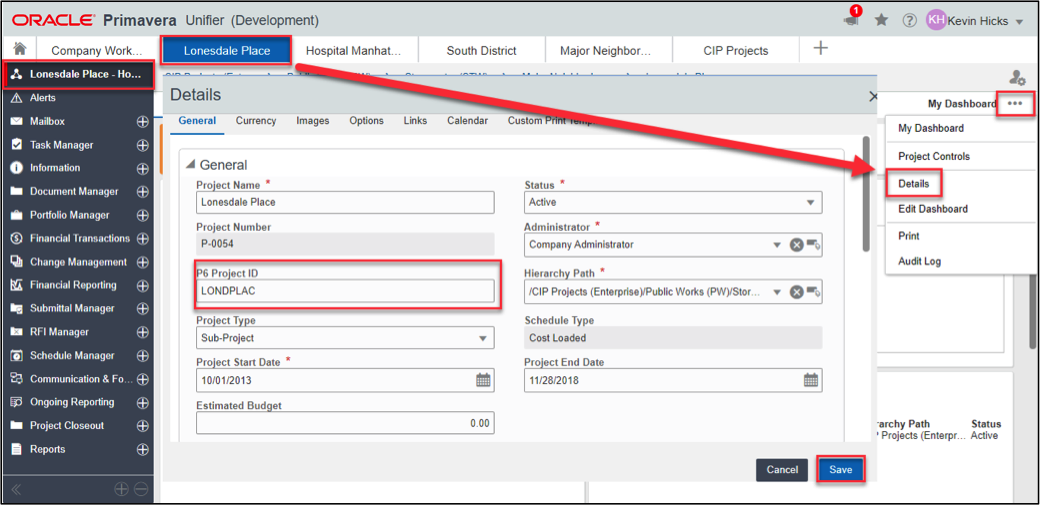
In Unifier go to the Project you just copied be sure to clear out the Unifier Project settings you copied in the Project Details tab.
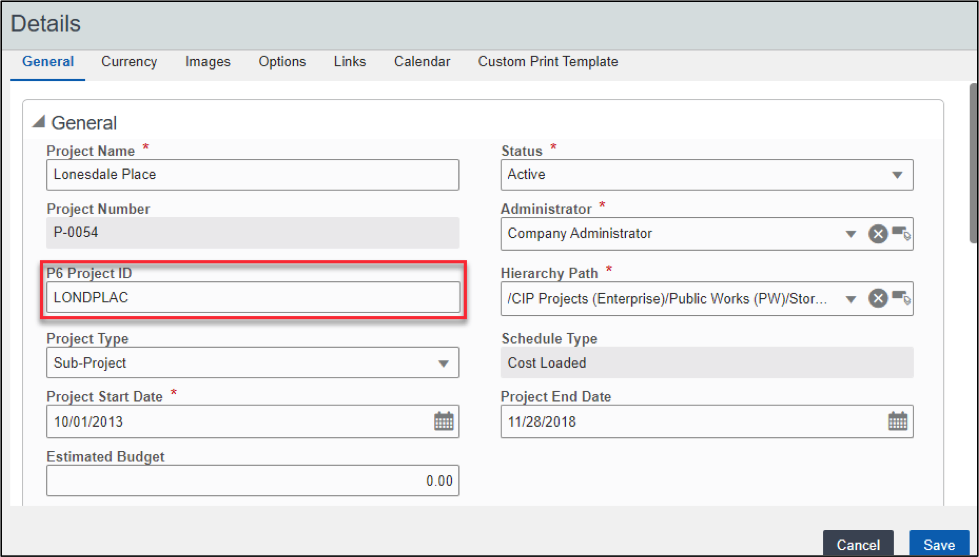
To do this Navigate to Your Unifier Project > Details Tab > and change the Unique P6 Project ID then Copy your Unique P6 Project ID > Click Save
Linking the P6 copied schedule to the Unifier Copy
In P6 EPPM go to the Projects Tab
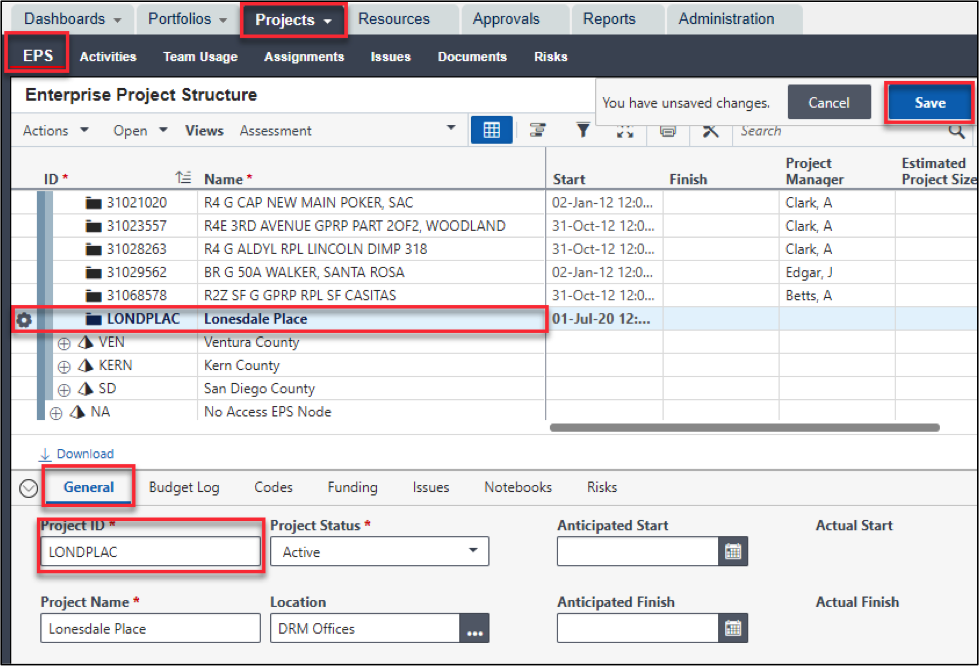
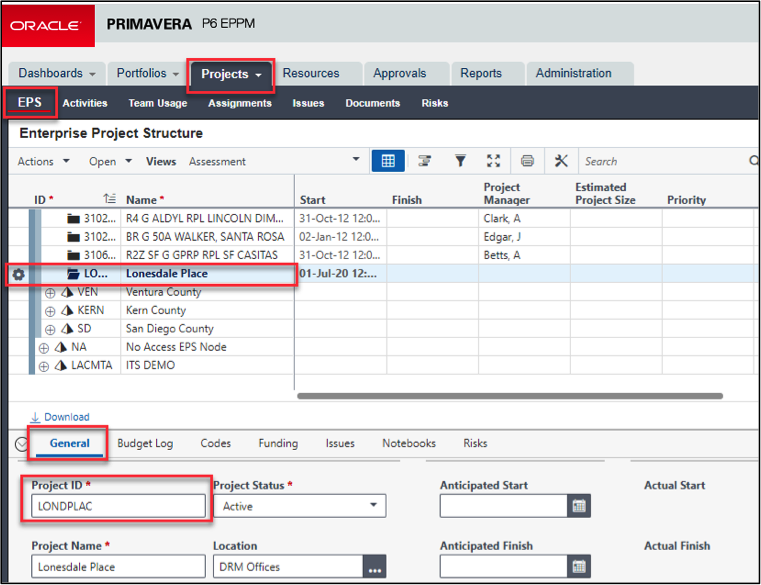
Within the User P6 EPS, navigate to your new copied P6 Project > Projects Tab > EPS > General and copy your New Unique Project ID from Unifier into the Field. ** The case sensitive words must match exactly ** > Click Save
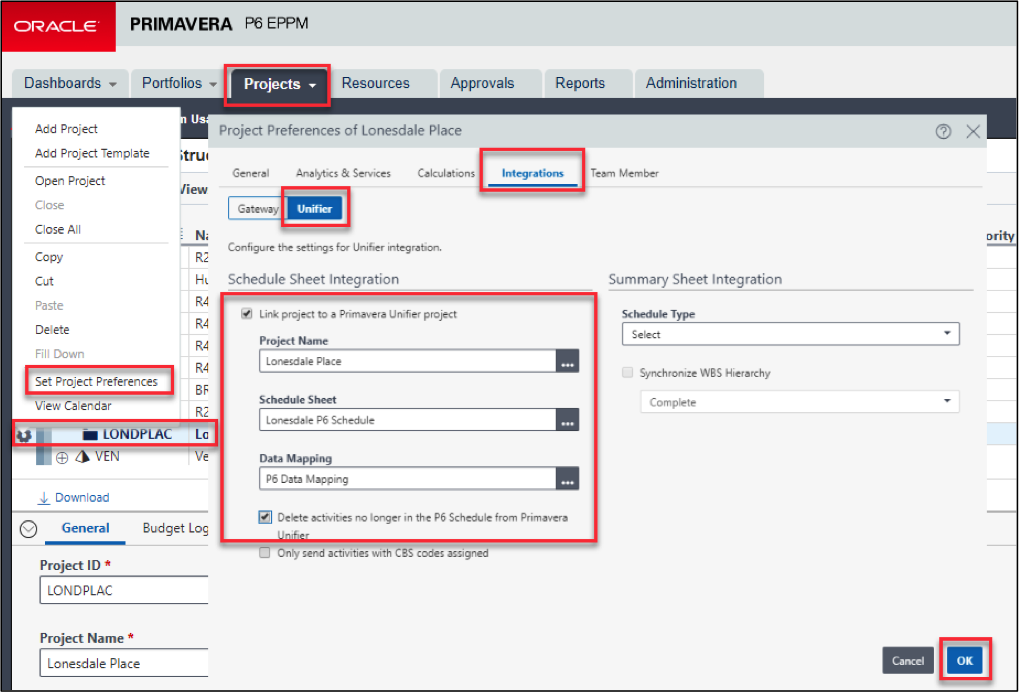
Navigate to P6 EPPM login & go to the Projects Tab
Within the User interface, navigate to EPS > Click on your copied Project > Select on the Gear Icon select > Set Project Preferences > Go to the Integrations Tab > Click Unifier > Select Link Project to a Primavera Unifier Project > Select your Project Name > select your Schedule Sheet > Select your Data Mapping > click the Box Delete activities no Longer in the P6 Schedule from Primavera Unifier > Click OK
Sending the P6 Schedule Data to Unifier
As a refresher, below are the steps to SEND P6 data over to the Unifier Schedule sheet.
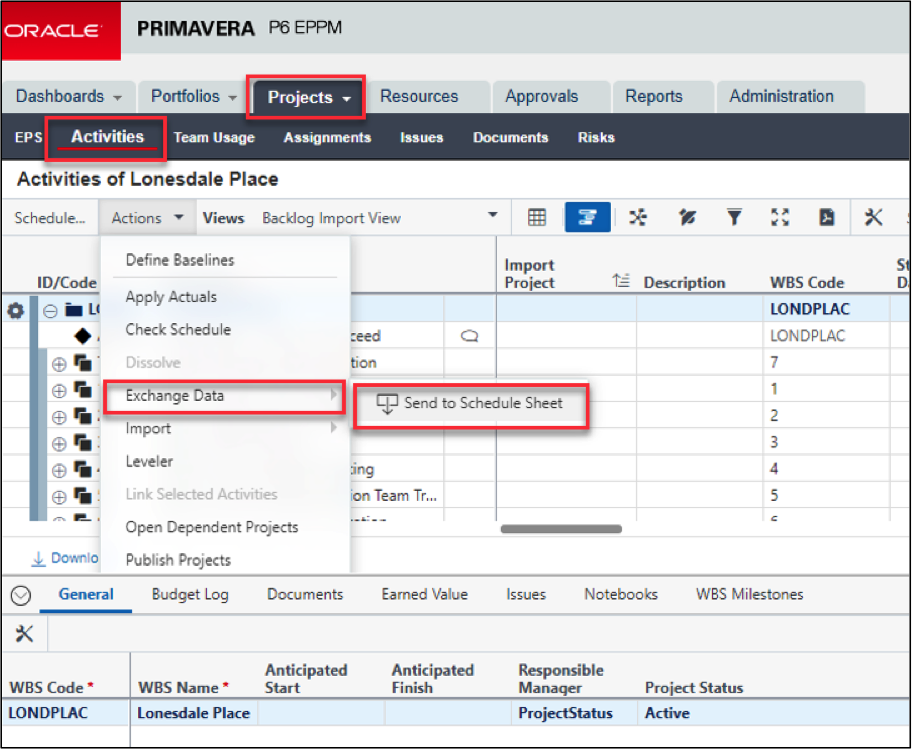
Next in P6 EPPM > with your “Project” Open > go to the Activities Tab > Actions > Exchange Data > Send to Schedule Sheet
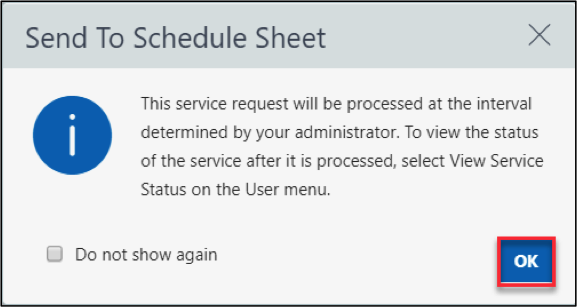
Click > OK
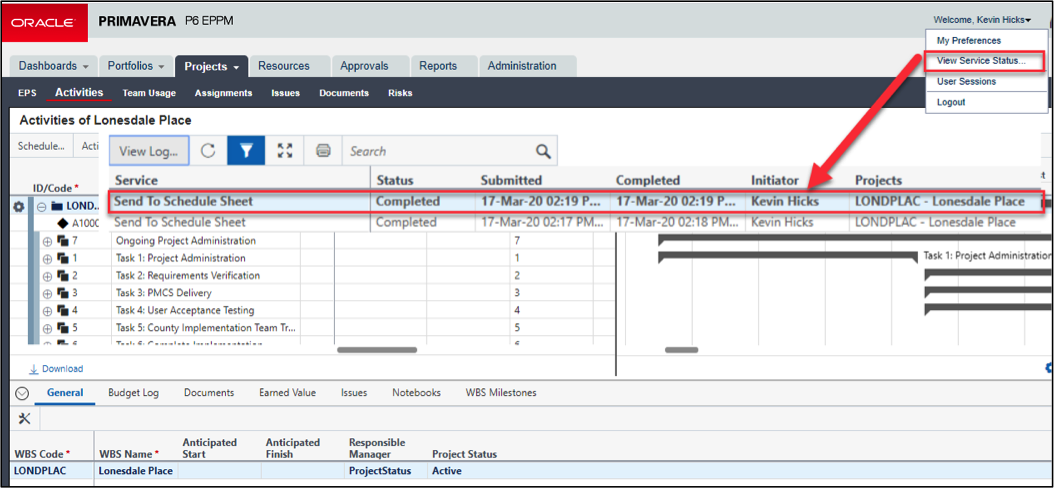
Under your username > Select View Service Status > to see the completed service > Click Close
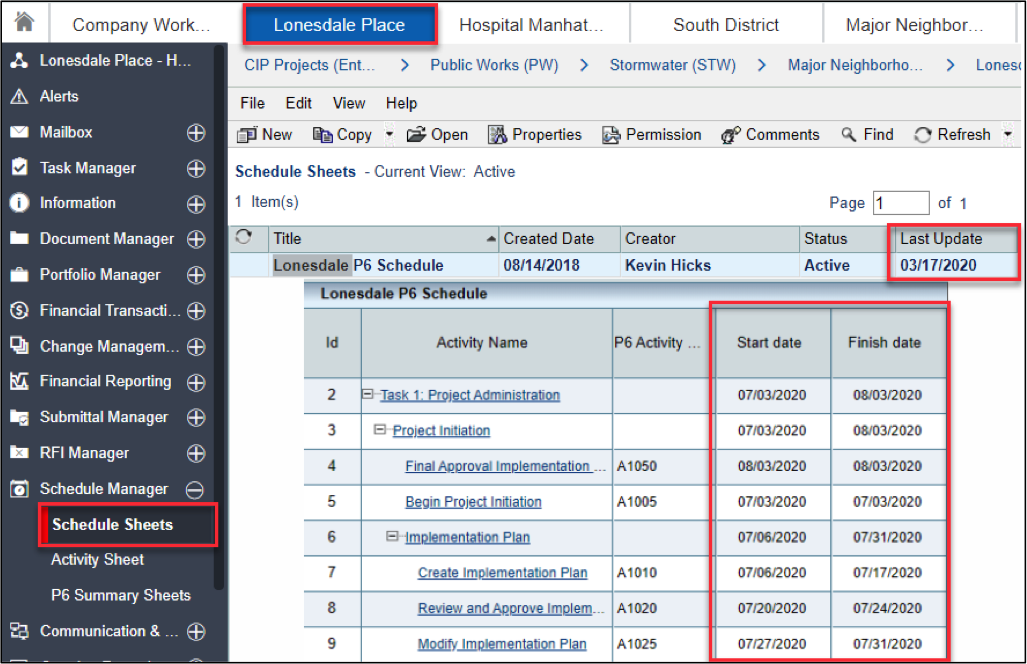
Next Navigate Back to Primavera Unifier > go to your “Project” > Schedule Sheets > Open and view your data and verify your Project Schedule Sheet has been Updated
Troubleshoot any errors that may arise
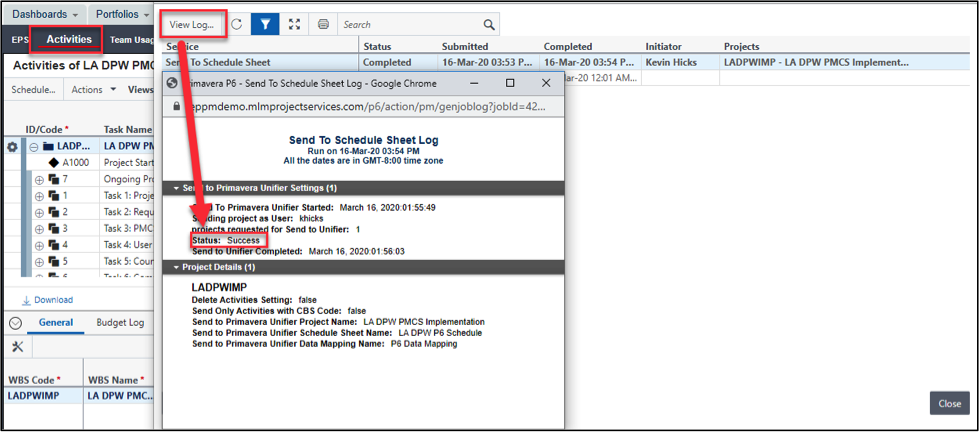
If you encounter errors when you attempt to send the P6 copied project schedule data to Unifier > they may include a most common error message > Navigate in P6 EPPM to your Project > With your “Project” Open > go to the Activities Tab > then Under Your Username > Select View Service Status > Click on View Log to see the completed Service > Click Close
If your schedule data transfer is successful you will see this message screen below
If your schedule data transfer is Failure you will see this message screen below
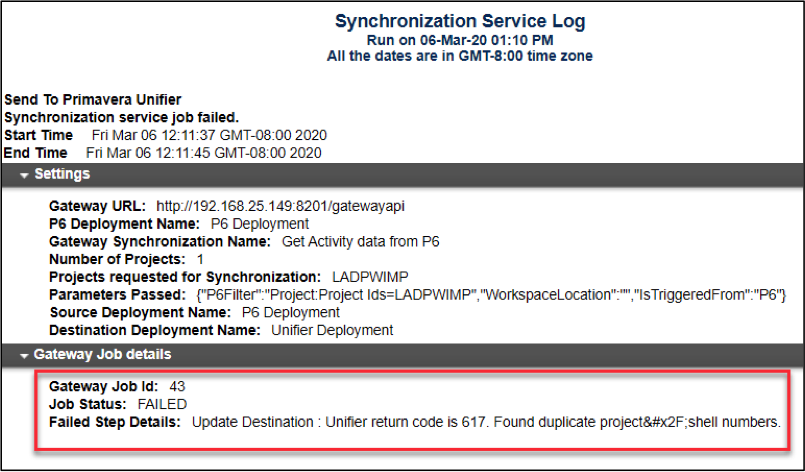
This error message means most likely you have duplicate Project ID Numbers on more than one Project in Unifier and or in P6 > Check both > it’s highly possible it’s the project that you made as Copy of earlier in Unifier
Navigate to your newly copied Unifier Project > Details Tab > and change/Double Check the Unique P6 Project ID > Click Save
Navigate back to P6 EPPM, navigate again to your new copied P6 Project > Projects Tab > EPS > General > and change/double check New Unique Project ID from Unifier that is in the field. ** The case sensitive words must match exactly ** > Click Save > and Re-Run your schedule integration
Summary
Using Unifier’s out of the Box built in integration to P6 is one of the most efficient ways to manage and provide schedule visibility to users working in Unifier projects with P6 schedule components/needs. Schedule data being updated in P6 can be quickly duplicated & transferred to Unifier as long as you understand some of the aspects of its use and how it impacts your projects.
