
STATUS UPDATES FROM TEAM MEMBER
ORACLE PRIMAVERA P6 EPPM R19
DOWNLOAD THE PDF HERE
Notes: The following are required but not included in this Tech Tip:
- The Team Member user must have Team Member checked in their user Module Access
- The individual must be assigned to activities either as a Resource or as the Activity Owner
This Tech Tip outlines the use of Primavera P6 Team Member by showing how to:
- Configure the project to allow Team Member
- Update data in Team Member
- Review and approve changes made in Team Member
- Correct rejected updates
The steps involved are performed in P6 EPPM (Web Version) and the Team Member application (Web, IOS, or Android). For purpose of this document, the Team Member Web version was used, but the steps are similar in IOS and Android.
Configure Project for Team Member
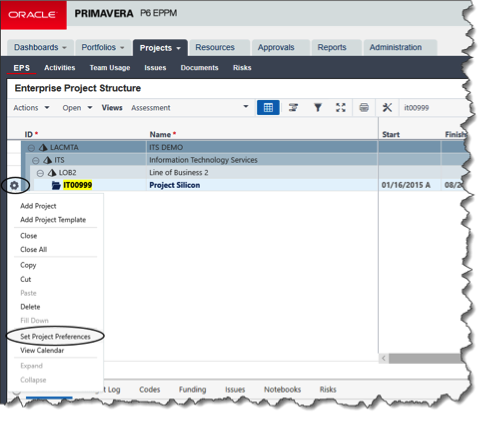
- In EPPM, click the gear beside the project to be configured and select Set Project Preferences option
- On the Team Member tab of Project Preferences, select the Status Updates window and configure the options needed.
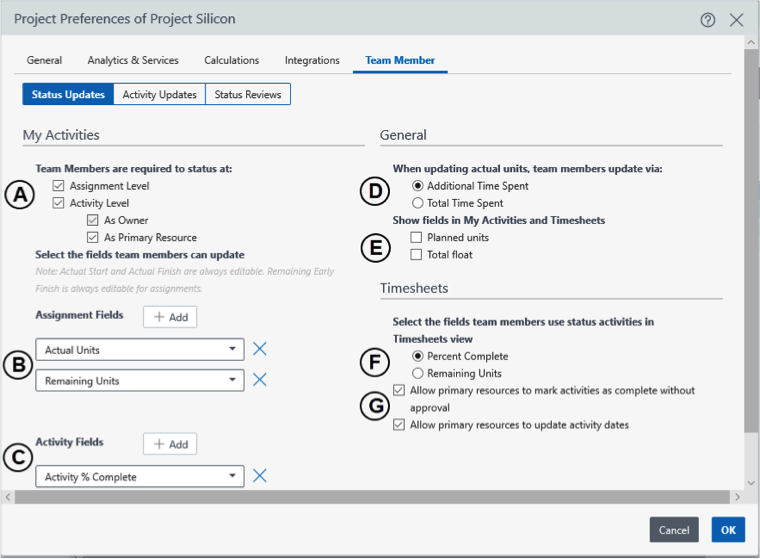
- Status Level (A) – Select to allow the Activity to be updated at the Resources assignment level, at the Activity information level, or both. The Assignment Level allows Resources to update their progress. The Activity Level allows the Activity Owner or Primary Resource to update information about the Activity.
- Assignment Fields (B) – Add or Remove the fields Actual Units, Remaining Units, Remaining Duration. This depends on which, if any, that the Resources need to update on the Activity.
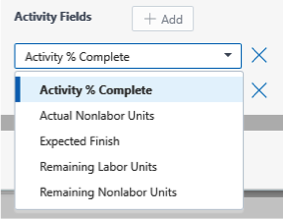
- Activity Fields (C) – Select the Activity fields to be updated by the Primary Resource or Owner from the drop down.
- Actual Units (D) – Select approach to updating Actual Units as either use the time spent entered to add to previous hours in P6 or to replace what is in P6.
- Show Activity Fields (E) – Select to show either or both Planned Units or Total Float for the activity. These data fields can not be updated.
- Percent Complete / Remaining Units (F) – If using Timesheets, determine if you want the Resource to enter status based on % Complete or Remaining Units.
- Primary Resource Options (G) –Choose to allow the Primary Resource to mark activities as complete without approval and update activity dates
On the Team Member tab of Project Preferences, select the Activity Updates window and configure the options needed.
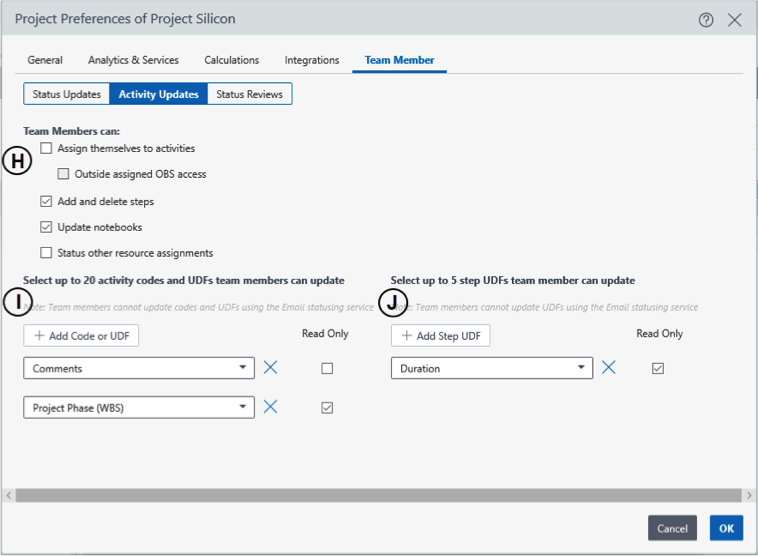
- Team Member Options (H) – Select the items to allow team members to:
- Assign themselves to activities (not recommended)
- Add and Delete Steps
- Update Notebooks
- Status Other Resource Assignments (not recommended)
- Activity Codes and UDFs (I) – Select the Activity Codes and User Defined Fields for team members to see and determine if the team member can modify them or not
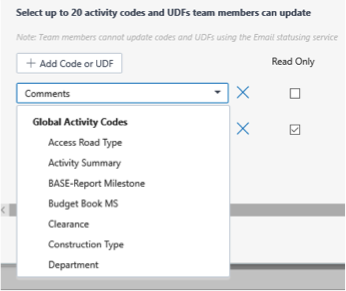
- Steps UDFs (J) – Select the Steps User Defined Fields for team members to see and whether they can modify them or not
On the Team Member tab of Project Preferences, select the Status Reviews window and configure the review options
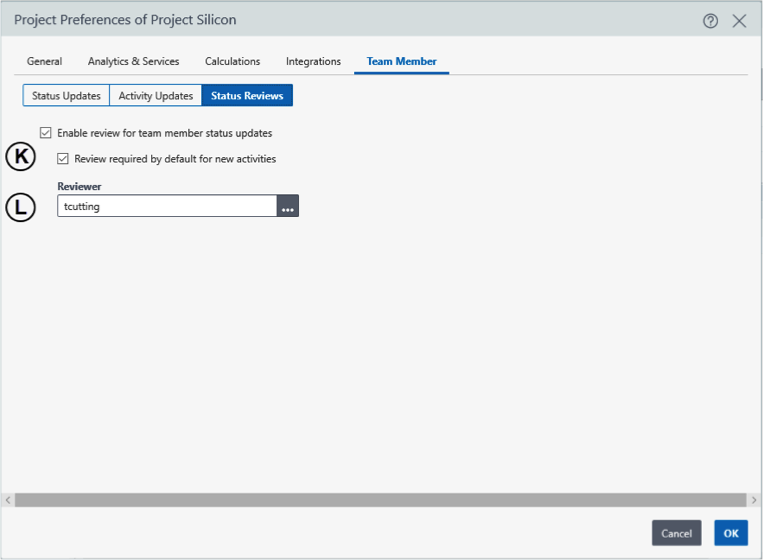
- Review Options (K) – Determine if the changes need to be reviewed before they impact the schedule. The Enable Review option allows review of the changes and the Review Required option makes it required.
- Reviewer (L) – If Review is selected, a Reviewer must be selected from the list of users
Team Member Updates
In EPPM, click the gear beside the project to be configured and select Set Project Preferences
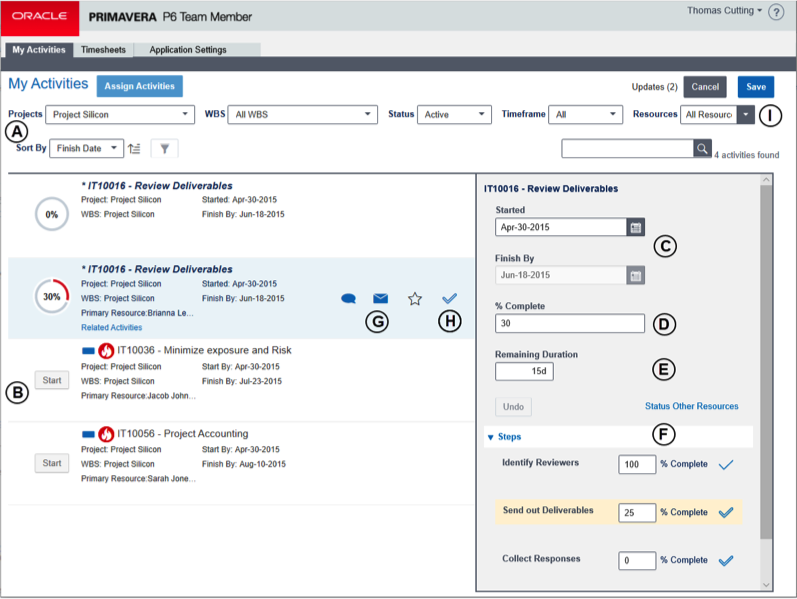
- Filter (A) – Use the Projects, WBS, Status, etc. to limit the activities displayed
- Start (B) – Use the Start button to initial the activity
- Started (C) – Select the Started date to indicate the day the activity was initiated
- % Complete (D) – Enter the % Complete (or Remaining Units depending on settings)
- Remaining Duration (E) – Enter the number of days remaining for the activity
- Steps (F) – If Steps access is granted the Resource can update the steps information including the % Complete and User Defined Fields. Based on permissions, Steps can be added, removed, and renamed.
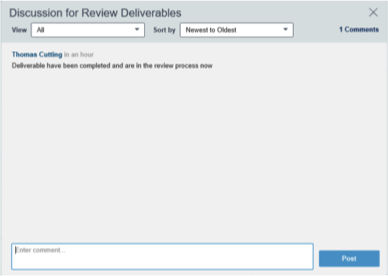
- Discussion, Email, and Star (G) – Resource can review and add to the activity discussion, send an email about the activity, and mark the activity as “starred” for filtering purposes.
- Mark as Complete (H) – Clicking the check mark will indicate the activity is complete
- Save (I) – Click Save to finalize the changes and submit them
Review and Approval Team Member Changes
In EPPM, select the Approvals tab to review and approve updates from Team Member.
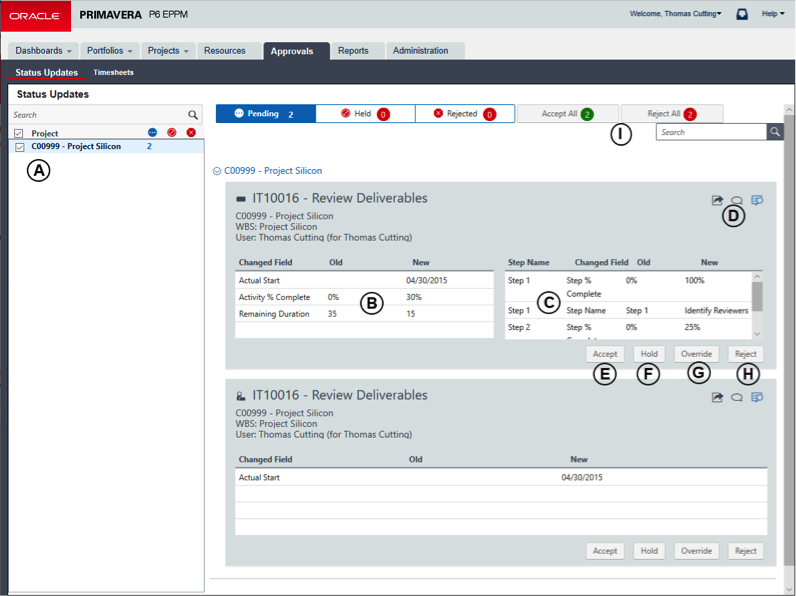
- Filter (A) – Click the check box beside the project name to limit the changes displayed
- Changed Fields (B) – Review the changes made to the activity fields
- Step Changes (C) – Review the changes made to the Activity Steps
- Email, Discussion, Submitted Date (D) – Use these options to send an email about the activity, review and add to the activity discussion, and view the submitted date of the change
- Accept (E) – Accept the specific change as displayed
- Hold (F) – Place the change on hold in order to review later
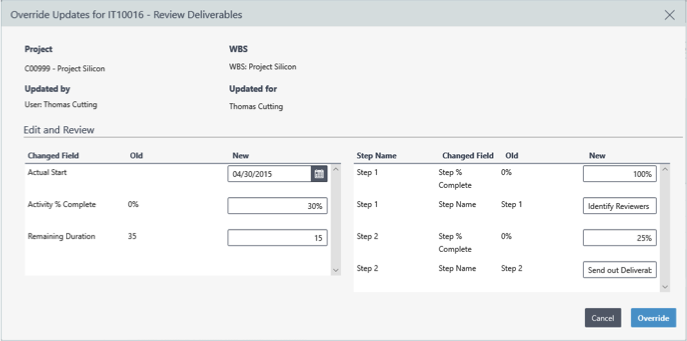
- Override (G) – Modify the information submitted in order to correct it before updating the schedule
- Reject (H) – Return the changes to the Resource for re-entry. Reviewer can add a Reason for Rejection on each line and overall Comments. The check box in the bottom will notify the team member by email that it has been rejected.

- Accept / Reject All (I) – These option allow all the updates to be accepted or rejected
Once items have been approved the activity data is updated in the schedule.
Correcting Rejected Updates
When an update has been rejected it will show up in Team Member on the Action Required tab.
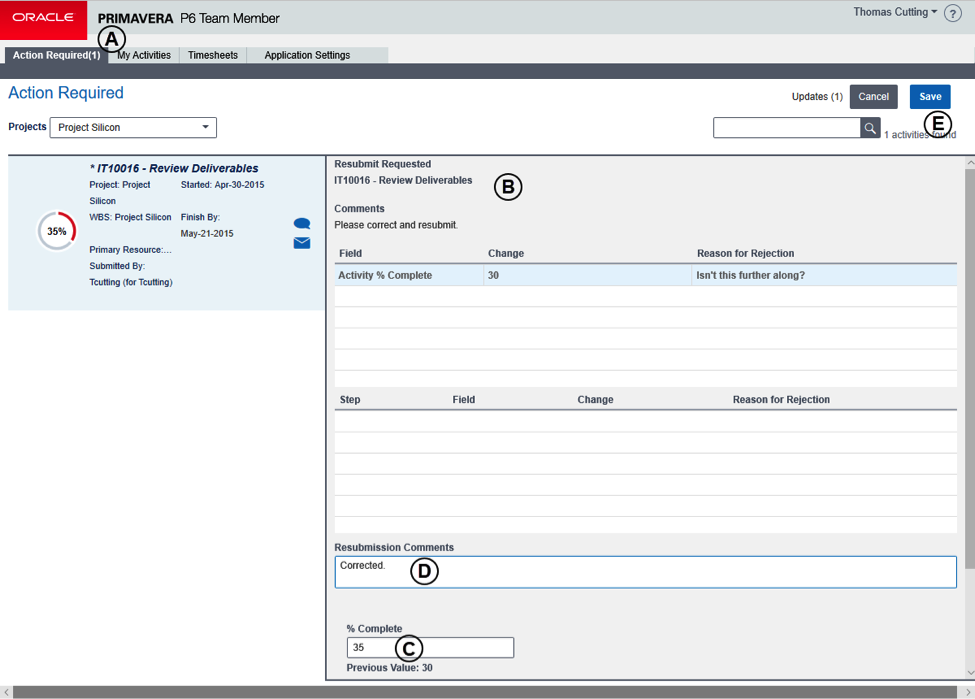
- Action Required (A) – Select the Action Required tab to display rejected items
- Resubmit Request (B) – This section shows the response from the reviewer with the Reason for Rejection
- Correction (C) – Make the changes to the items that should be corrected
- Resubmissions Comments (D) – Enter a response to the request
- Save (E) – Save the changes to return the activity for review
The changes will display for the reviewer in EPPM for approval.