NOVEMBER 2013
CONTRACT MANAGEMENT
HOW TO USE MEETING MINUTES EFFECTIVELY
Meeting Minutes are one of the key components to project documentation. Contract Management provides a robust module to track these discussions and quickly generate subsequent meeting notes. There are a couple of techniques for organizing the printed documents effectively. There are also techniques for effectively printing and distributing the minutes.
1. Meeting Number Convention:
Primavera numbers meetings sequentially from 00001 on. If different types of meetings are held, use a numbering convention that defines what “type” of meeting is being held. In this way, Jobsite Meetings will all be numbered sequentially.
For example:
J = Jobsite Progress
D=Architectural Design Meeting
S=Safety Meeting
O=Owner Meeting
Note: When generating new meetings, Primavera will find the next “highest” value, which may not be in the sequence you selected. If there are “O” (Owner) meetings in your set, and you’re generating the next “J” (Jobsite) meeting, you’ll need to change the Meeting Number manually to the next “J” number.
The advantage of this method is that you can visually see the types of meetings in your log view, and also keep segregated the meeting number sequences.
1a. Meeting Type Alternate Method
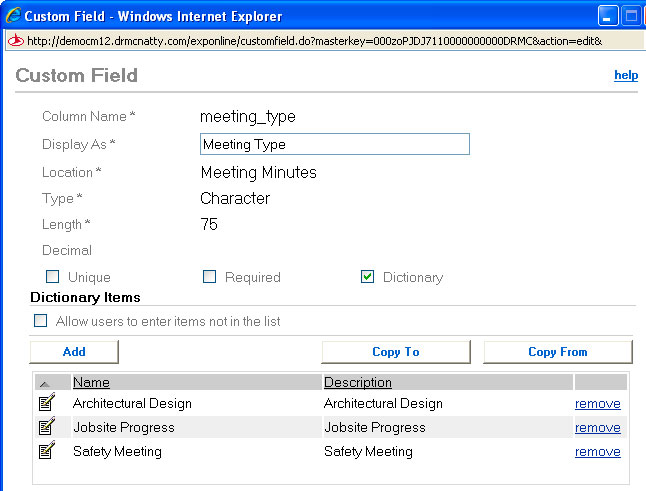
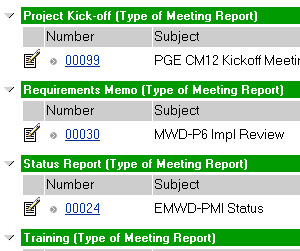
Another method of tracking Meetings by Type would be to create a custom field, and use this field to sort/group the layout in the log.
This will require some modifications to the database (creating the custom field) and then will require modifications to the Layouts and/or to the printed reports (changed in Infomaker.)
Once you to this, you still will need to be aware of the document number, because Contract Management will automatically find the next available number based on the highest sequence.
The advantage, however, is that you can create layouts that clearly sorted by the type of meeting.
2. Business Item (Discussion) Number Conventions
Business items are sorted on the printed forms by the Item Number field. By using custom number conventions in the Item Number, you can sort the discussion topics in the manner you need.
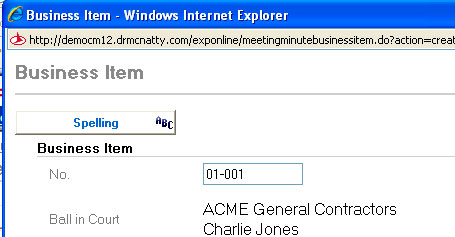
Some examples may be to include Meeting Number, followed by Topic Number so that topics are sorted first by the meeting in which they first were initiated.
In this method, “01-001” represents the first meeting (the “01”) and the first topic in that meeting (the “001”)
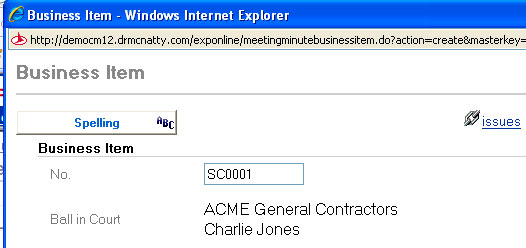
Another example might be to use a topic code in front of the item number to sort by a topic.
In this method, one or two characters of the item number represent a code for a given topic. “CO” = Change Orders, “SC” = Schedule Discussion, “EV”= Environmental, “SB” = Submittals, etc.
NOTE: You are limited to 6 characters in the item number, so up to 2 characters should be fine. You don’t need to use “dashes”—as that will limit how many characters you have for the actual number.
2a. Business Item Sorting/Grouping Alternate
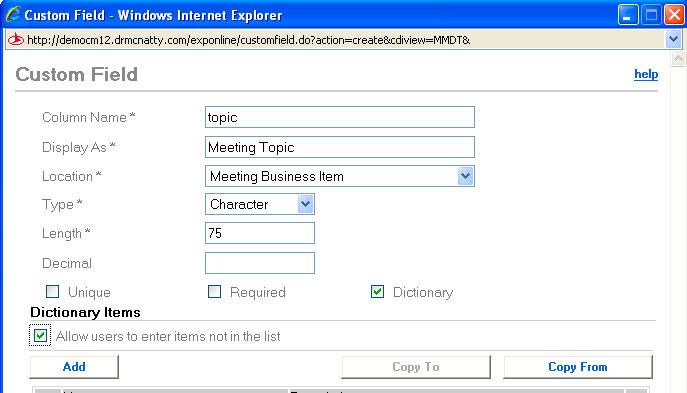
Another way of sorting/grouping the Business items would be to create a custom field called “Topic”, and then modify the printed forms to sort/group by this field.
To use this, you’ll first need to setup the custom field. This would be added to the “Meeting Business Item” section of custom fields. Setting to a Character type and set to a length of 75-100 characters should be sufficient for most.
While this requires some customization and changes to the database and the forms, this method has the advantage of being able to clearly print the full “Topic” title.
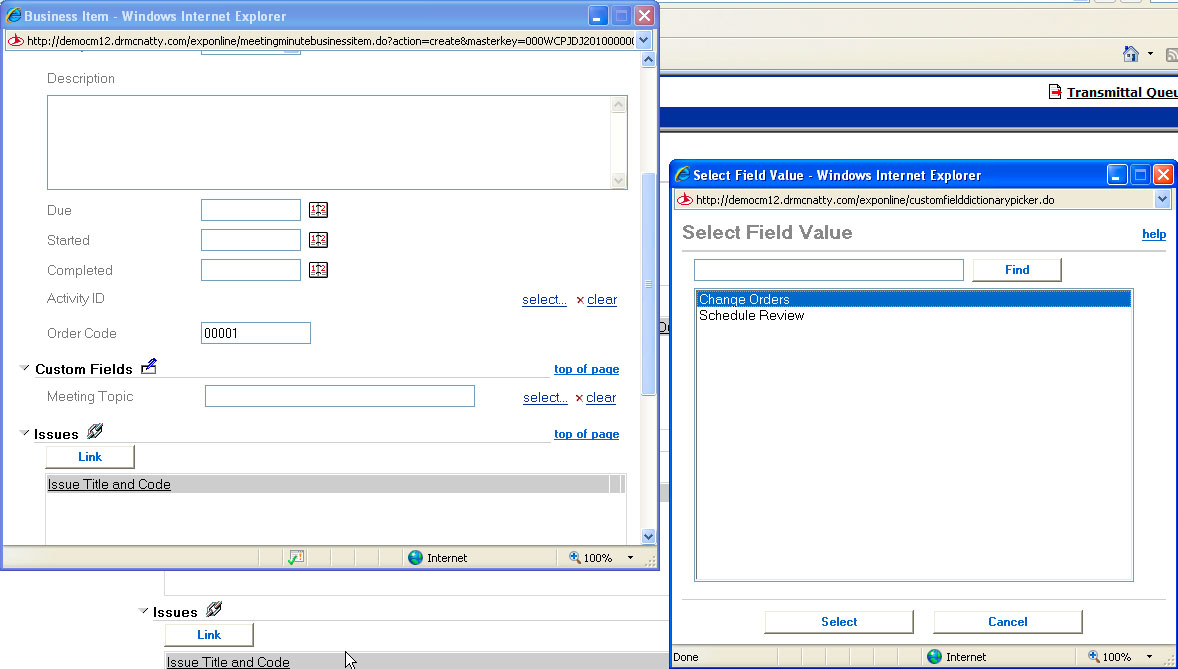
If you set this to a “Dictionary”, the expected topics can be pre-populated for users to “Select”. To add topics “on the fly” without modifying the dictionary, check the “Allow users to enter items not in the list” box.
When creating Business Item topics, assign each item to a topic by selecting or typing in the custom field the value you want.
NOTE: for the printed forms, the “topic” field will need to be added using Infomaker and then the form sorted/grouped by that.
3. Organizing the Meeting Attendees
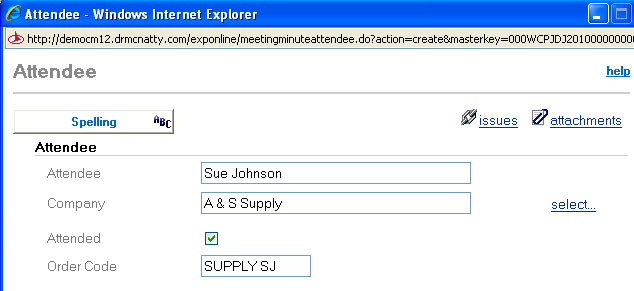
The Attendee section is organized by default alphabetically by Company and Name. Often, you want to organize the attendee list in a specific order.
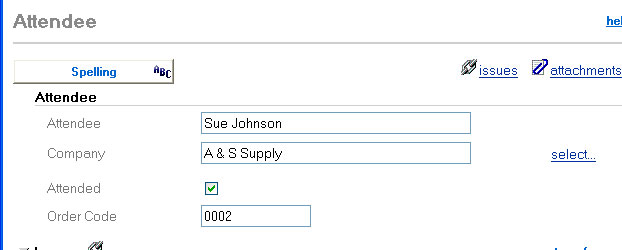
Simply change the “Order Code” field from the value specified when you Select attendees to a numeric value (i.e. “0001”, “0002” etc.)
This does not require any customizing of the forms or the database, and provides you with a convenient way to quickly sort the list in the “politically correct” order.
4. Meeting Agenda or Meeting Minutes?
To create a Meeting Agenda, enter the topics into the meeting record without typing any discussion. Then modify the printed (Infomaker) form to say “Meeting Agenda” instead of “Meeting Minutes.” This is the simplest way to create an agenda.
Alternately, use the previous week’s meeting minutes as the “Agenda” for the next week’s meeting.
5. Distributing the Meeting Minutes
The quickest way to distribute meeting minutes is to use the “Send Email” function in Contract Management. After finishing the minutes, simply pick the “Send Email” from the Select an Action. This dialog will automatically populate all attendees as long as the email addresses are in the Company Directory.
NOTE: be sure to add email address to the company directory to best use this.
6. Sunset Clause in Form
The last tip for Meetings is to include on the printed/distributed form a “sunset” clause in the signature block that instructs the recipients to respond back with changes within a specified time, otherwise your minutes become an “official” record.
7. Generate Meetings
Just a reminder—never create follow up meeting minutes from scratch. Always open up the last meeting minutes and use the “Generate Document” function to generate the next meeting. This carries over all attendees and any open Business Items without having to re-type them.
Summary
Using these techniques you can make more effective use of the meeting minute module.


