CREATING A DATA VIEW
A Data View is a custom query that defines a set of data that can be used in queries or reports. It is useful for combining elements from different tables, making it reusable and eliminating the need to redevelop complex data structures within SQL statements.
This Tech Tip illustrates how to create one in Unifier.
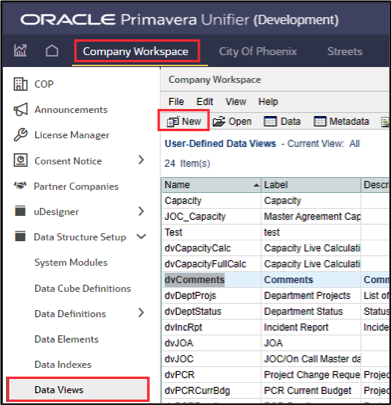
Data views are found in the Company Workspace under Data Structure Setup.
Select Data Views and click New to open the edit window.
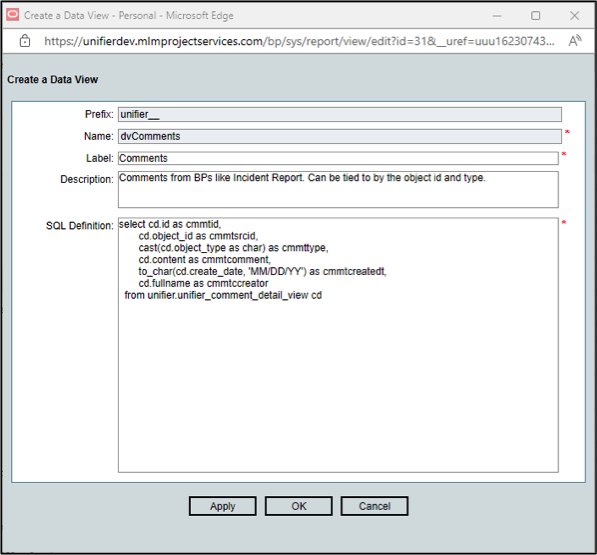
Enter the Name, Label, and Description to identify the data view. The Prefix “unifier__” is preset and can not be modified.
Create or copy/paste the SQL code into the SQL Definition and click Apply to save or OK to save and exit.
In order to use the data view as the main subject in a project or shell-level User Defined Report it must contain the field project_id. Supporting data views do not require it.
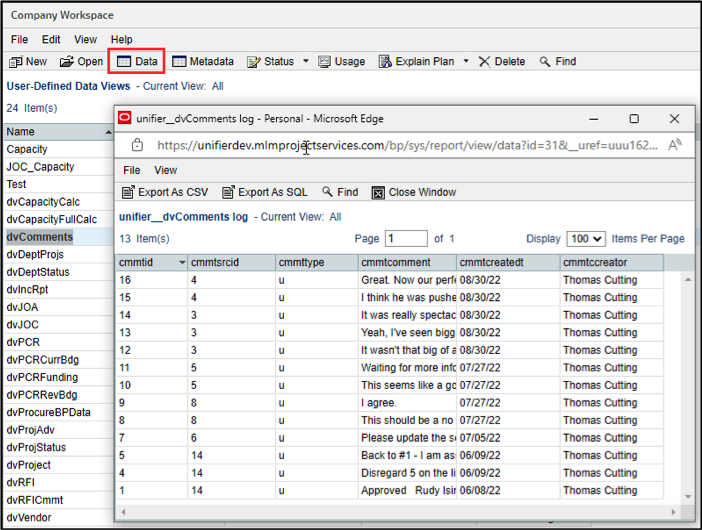
The Data button in the upper menu runs the query and displays the results to ensure the SQL works properly.
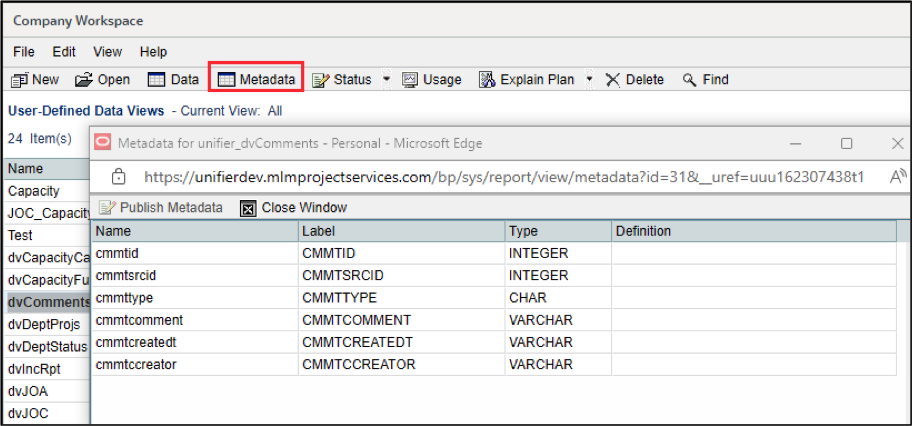
The Metadata button shows each of the data elements and their type.
The Label is editable to allow the display name to be changed.
The Definition option associates the element with its data definition. For example, if the element is from a pull-down menu, selecting the definition will display the description of the item instead of the id value. If Definitions are selected the metadata will need to be published in order for the data to be connected.
To publish the metadata, click the Publish Metadata button. The data view needs to be published before the option is available.
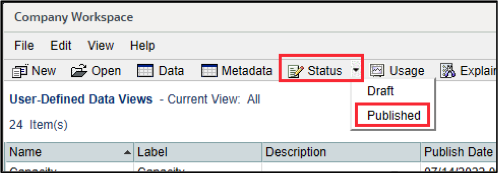
To publish the data view, select Status / Published from the upper menu. In order to update the data view it will need to be in Draft status.
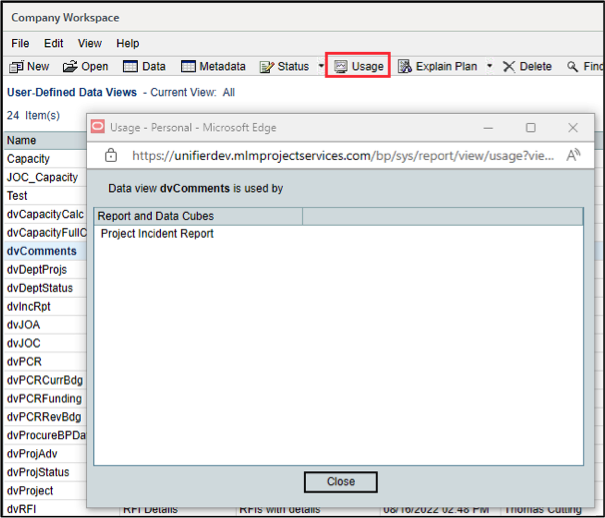
The Usage button displays the Reports and Data Cubes that the data view is used in.
To use the data view in SQL with other data models, reference it using unifier<underscore><underscore>dataviewname as shown below:
select comm.cmmtcomment
from unifier.unifier__dvcomments comm

