OCTOBER 2014
PCM 14 and P6 v8.4
XML DATA RETRIEVAL FOR WORKING IN BI RTF TOOL
Summary:
When working in the RTF (Word) template tool, you need to save a copy of your Data Model as an XML copy that you’ll load to work with the form. If you make changes to the Data Model in BI, you need to re-export the data model to a new XML file to load when you open the RTF tool.
Methods to Retrieve XML output:
Two methods—one is to use the retrieval arguments found in your existing “Sample Data” stored on the BI server and the second is to get the retrieval arguments from a new record in PCM.
Using Sample Data
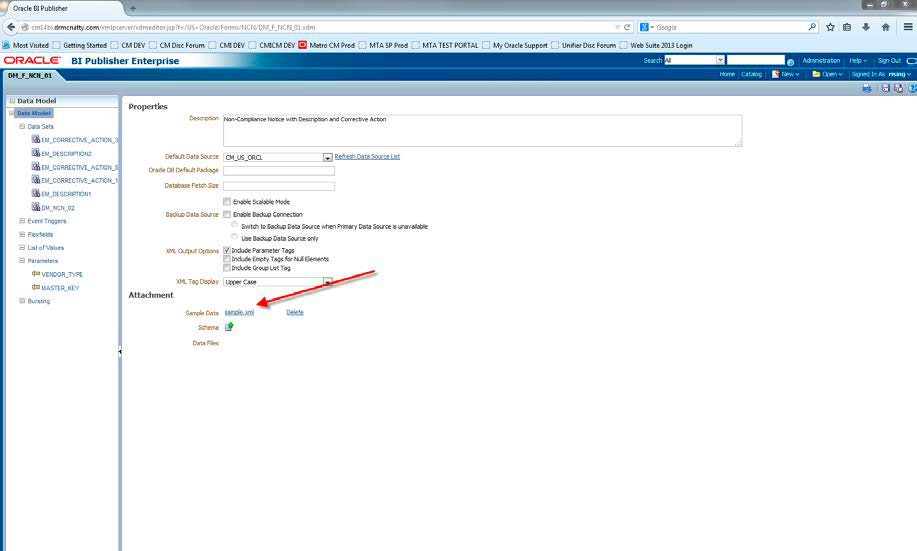
- Open the Data Model in BI web.
- In the main tab, Attachment section, click on “sample.xml.” (see next page)
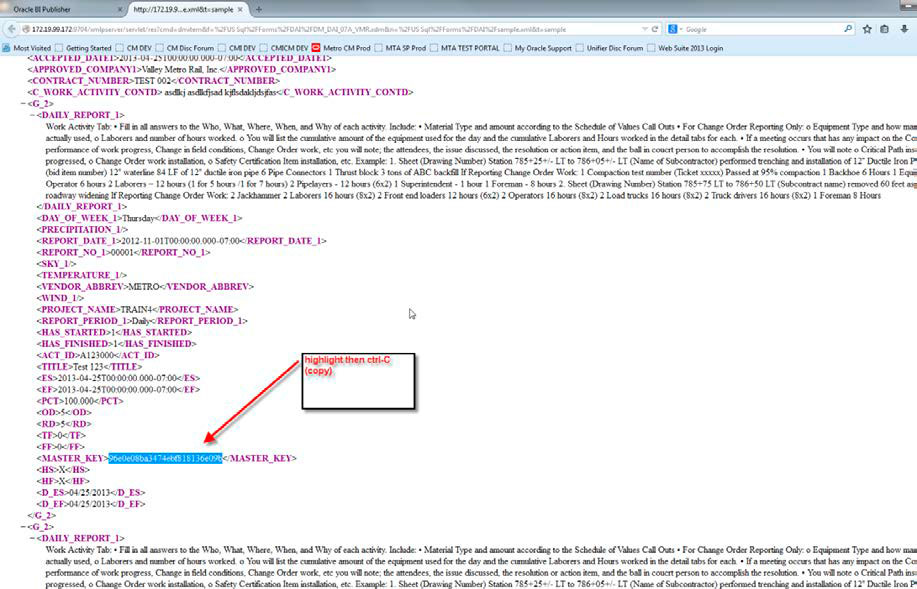
- Scroll the window that opens and find your retrieval arguments (usually “master_key”, “project_name”, “vendor_type”) and highlight and copy. (see next page)
- Open Notepad or a text editor and click paste to store.
- Close the window.
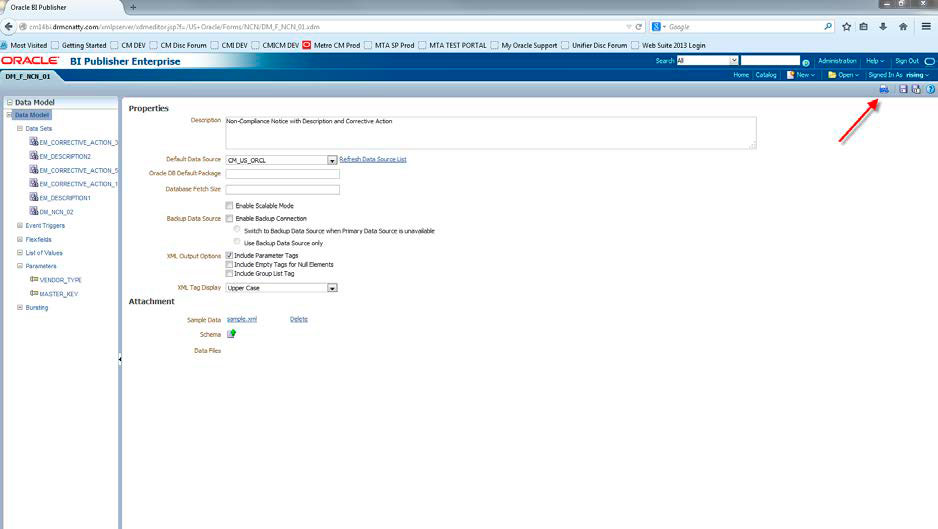
- Next, in the Data Model click the “XML” icon. (see page 3)
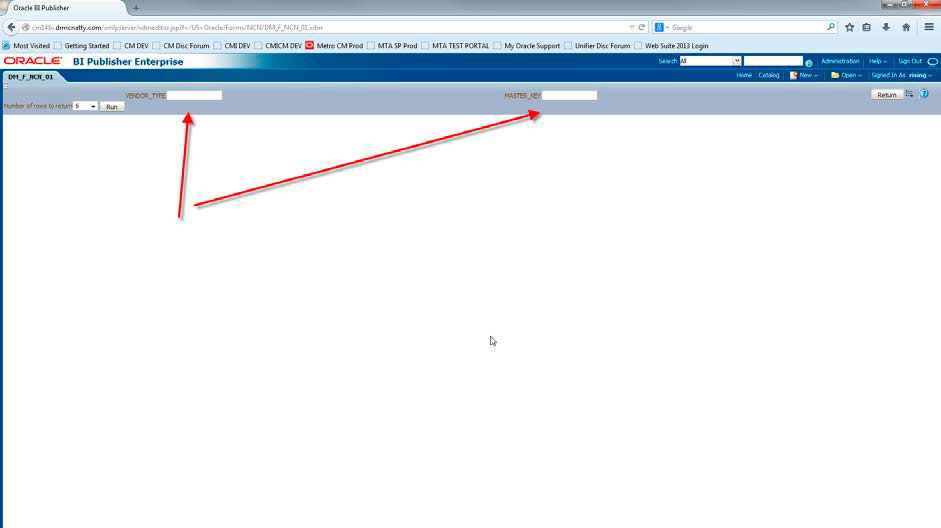
- Enter your retrieval arguments, and then click “Run.” (see page 3)
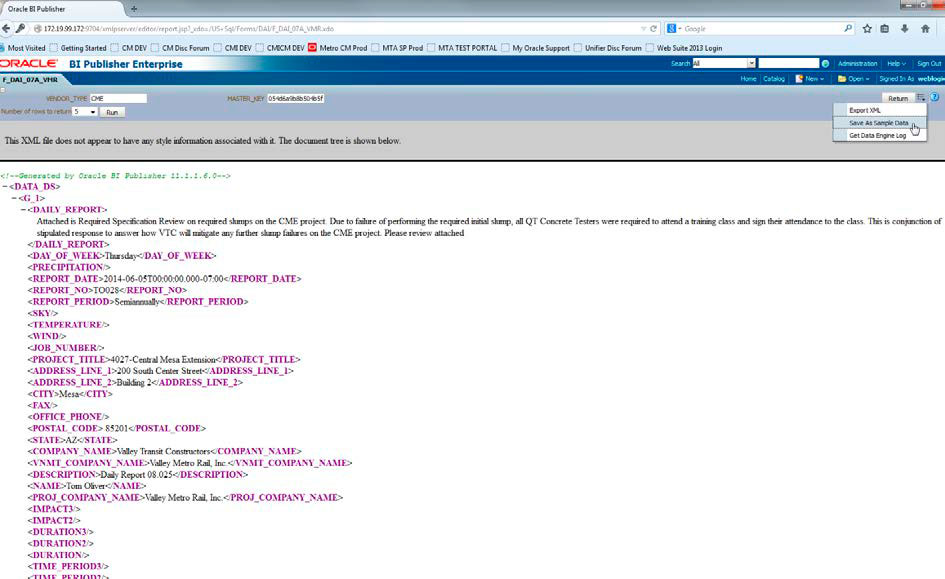
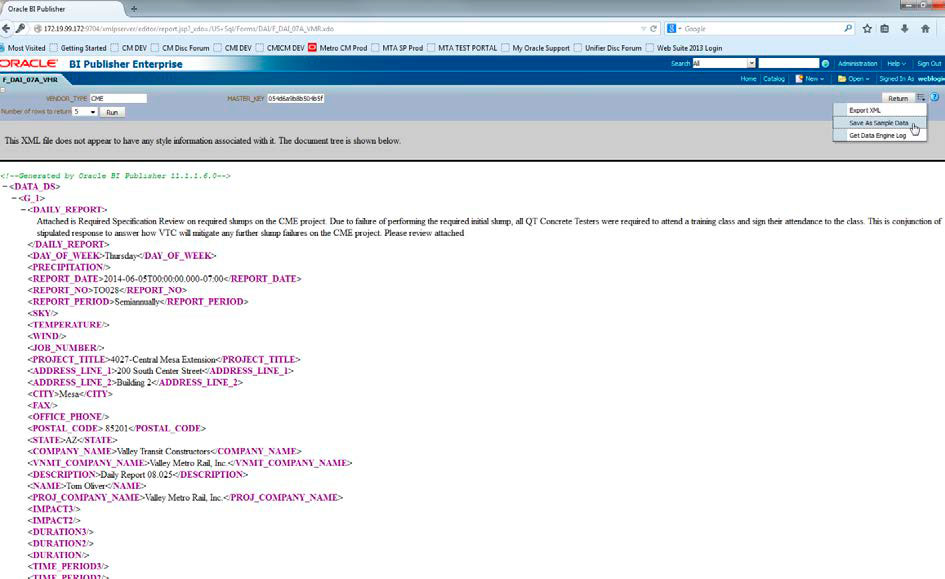
- Click on the Actions dropdown and select “Save as Sample Data.” (see page 4)
- Click on “XML” icon, re-enter the retrieval arguments and click “Run.”
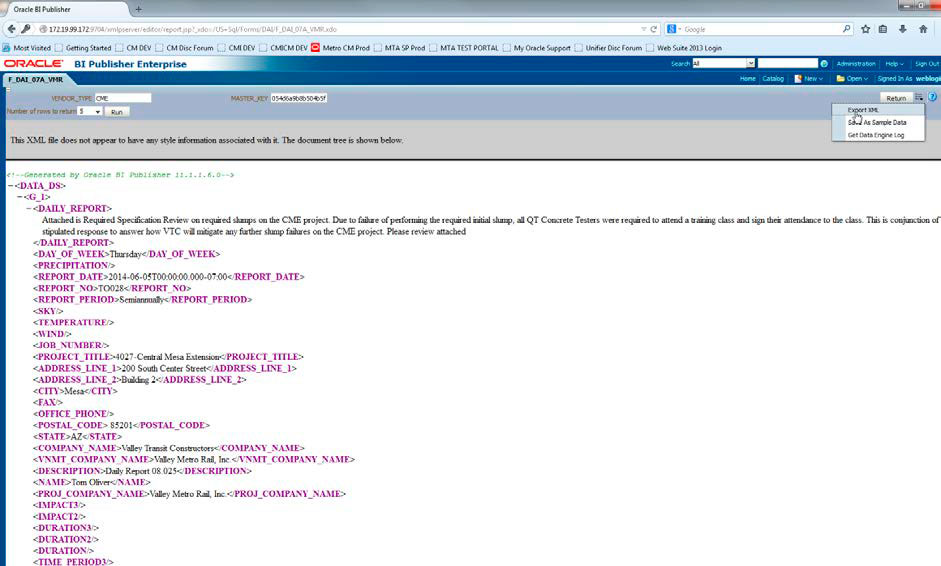
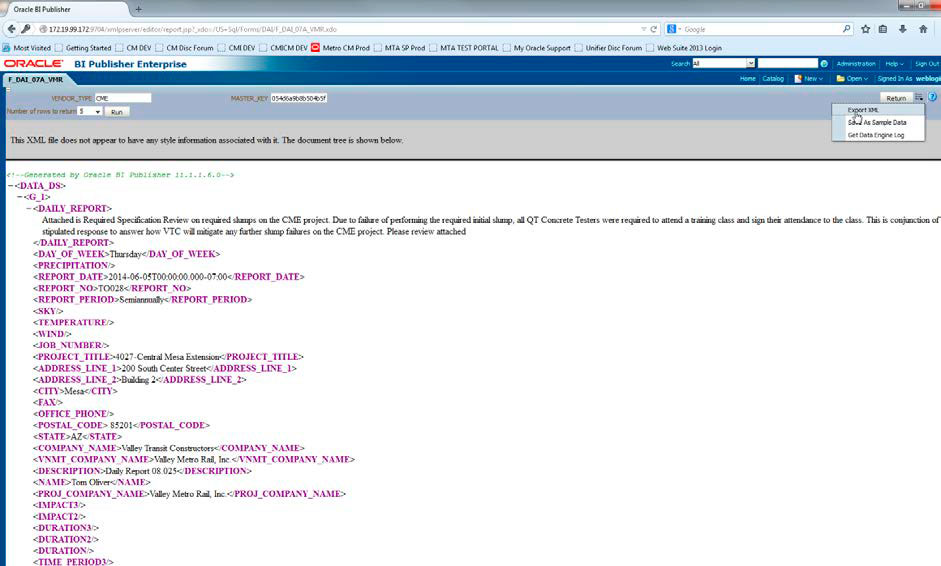
- Click on the Actions dropdown and select “Export XML” and save file to your local computer. (see page 4)
- This is the XML file you will use when modifying the RTF layout.
Using PCM to retrieve new sample data:
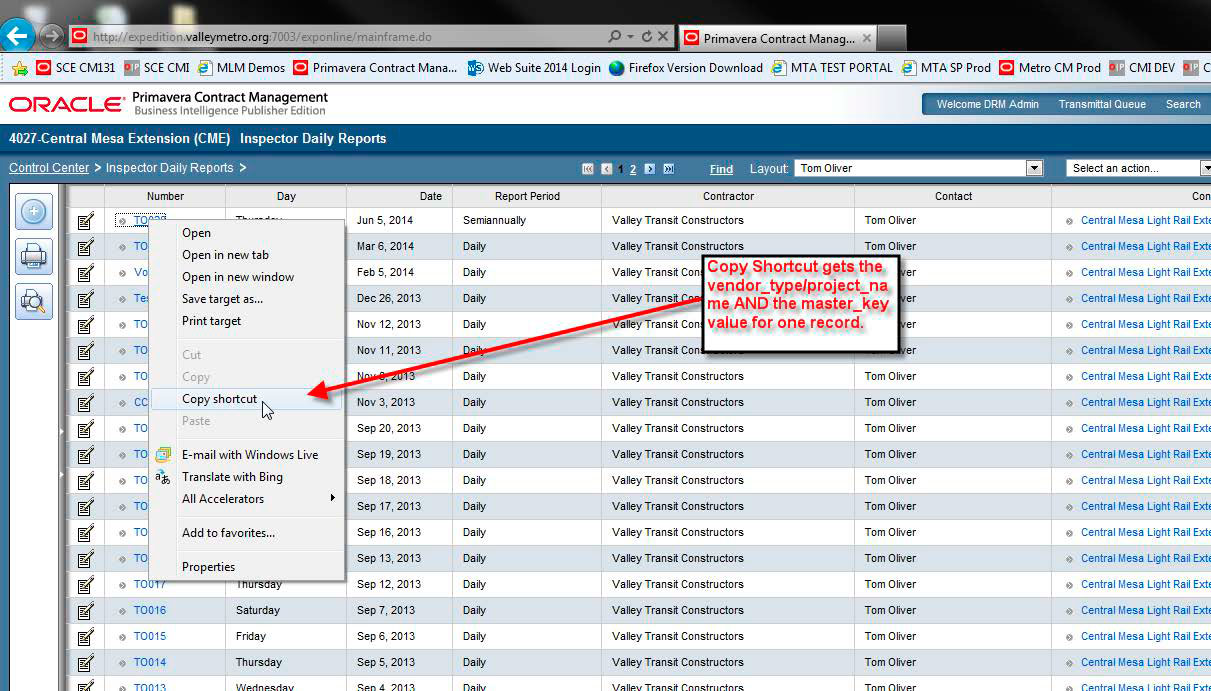
- In PCM, open the appropriate log for the records, and right click on one record and select “Copy Shortcut.” (see below)
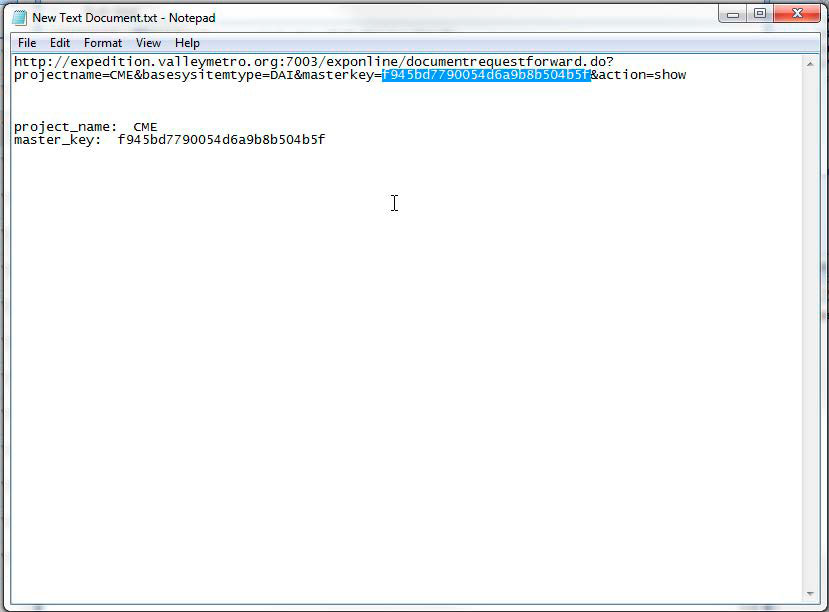
- Paste this shortcut into Notepad or a text editor.
- You can extract the master_key and project_name/vendor_type arguments from this URL. (see page 6)
- Open the Data Model in BI web.
- Next, in the Data Model click the “XML” icon.
- Enter your retrieval arguments, and then click “Run.”
- Click on the Actions dropdown and select “Save as Sample Data.” (see page 7)
- Click on “XML” icon, re-enter the retrieval arguments and click “Run.”
- Click on the Actions dropdown and select “Export XML” and save file to your local computer. (see page 7)
- This is the XML file you will use when modifying the RTF layout.
Retrieving the RTF layout
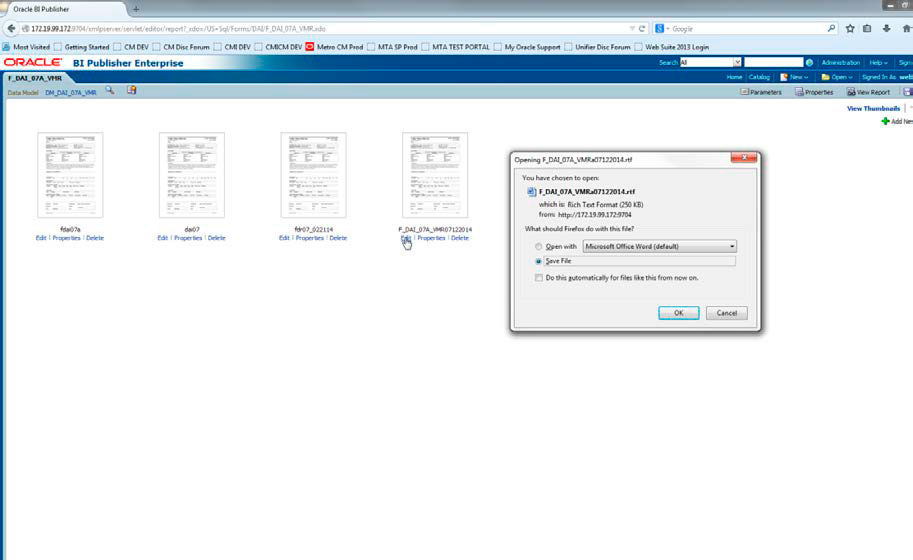
- In BI Web, open the form/report in question and click “Edit” on the layout.
- Save the RTF to your local computer.
Working with the RTF Layout
- Open the RTF layout in Word, and on the BI toolbar click “Sample XML” in the Load Data, browse to the XML you saved and click ok.
- Make changes to your layout and Save.
- NOTE: be sure to keep the layout as RTF—do NOT save as DOC or DOCX.
- Best practice is to rename the layout using the date of change.
Upload the new RTF Layout to BI
- Open BI Web and navigate to the form/report you modified.
- Click “Add New Layout” and select the “Upload” to find the RTF you just modified.
- Once uploaded, click on “View a List” in the BI Web screen, and assign the new RTF file as the “Default Layout” and uncheck the “Active” and “View Online” on the other, older layouts.
- SAVE the form/report.

