Unifier’s Custom Print has a very powerful feature called “External Data Model”. Different from the Internal Data Model with Unifier BP itself as the data source, the external data model is using the data schemas defined at BI Publisher level, via the data connections established in the BI Publisher. Therefore, you can create the Custom Print by consolidating multiple data sources, not just limited to the data from one single Unifier’s BP.
To build the Custom Print with the External Data Model, the following steps need to be followed:
- Create Data Model in BI Publisher
- Create the essential parameters in the data model
- Create the essential group filters in the data model
- Generate and save the sample data in BI Publisher before saving the data model.
- Export the Data Model from BI Publisher.
- Load the sample schema into MS Word to build the RTF template.
- Create Unifier Custom Print using External Data Model.
- Upload External Data Model and RTF template into Unifier.
- Publish and run the Unifier Custom Print.
Below is the illustration to walk through the entire process.
Create Data Model in BI Publisher
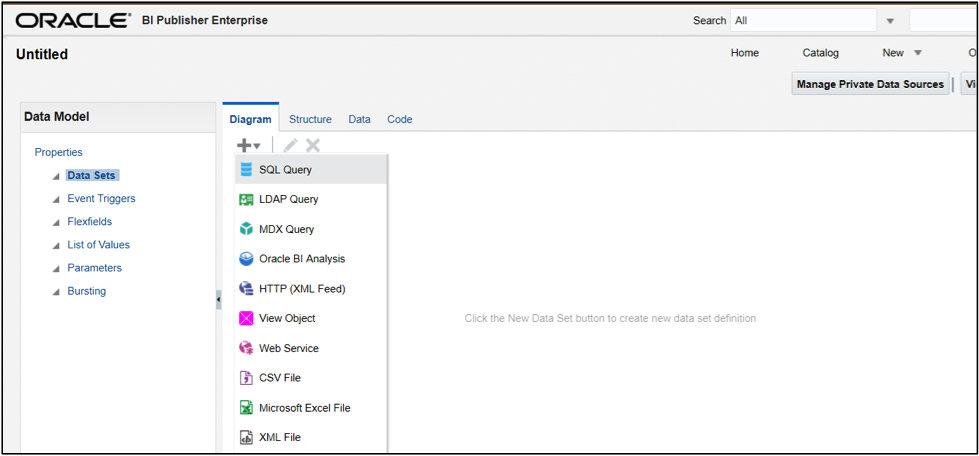
Go to BI Publisher, select New > Data Model, then Diagram > SQL Query, as shown below:
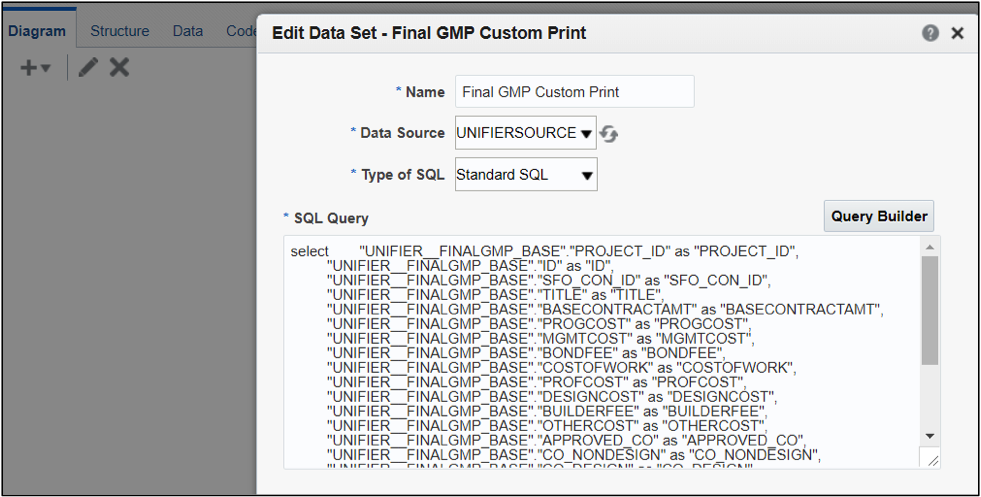
Use the next form to develop the SQL Query directly or use Query Builder for assistance to develop the Data Set(s). The query may consist of multiple tables, even from multiple data sources, depending the information requirement. However, the following two fields are required in the Data Set for the Custom Print development: Project_ID as Unifier’s Project ID, and ID: as Unifier’s BP Record ID. For further detail, please reference Unifier’s ER View.
If use the Query Builder, the fully qualified SQL statement will be generated as shown below.
Create the Essential Parameters in the Data Model
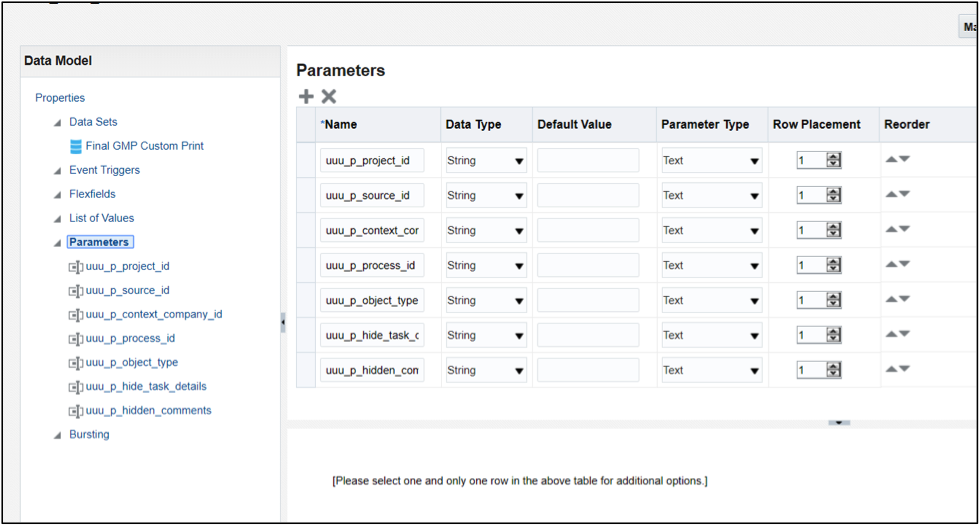
After the Data Set(s) is created, the following default parameters need to be added, so Unifier can pass the runtime messages to BI Publisher.
- uuu_p_project_id : Project ID
- uuu_p_context_company_id : Company ID
- uuu_p_process_id: Workflow process ID
- uuu_p_source_id: Business process record ID
- uuu_p_object_type: Business process id as in uDesigner
- uuu_p_hide_task_details: To hide the task status if the user does not have permission. The value of 0 is passed if the user does not have permission to view the task statuses
- uuu_p_hidden_comments: To view the hidden comments, if the user has the permission. The value of 1 is passed if the user has the permission to view hidden comments
For more detail, please reference: https://docs.oracle.com/cd/E80979_01/help/en/helpmain.htm?toc.htm?10287131.htm
Create the Essential Group Filters in the Data Model
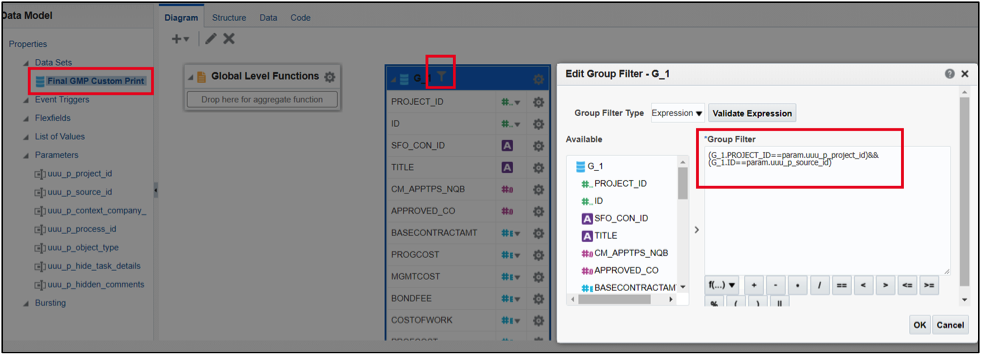
For Custom print generation, two parameters: uuu_p_project_id and uuu_p_source_id are required to link to Project_ID and ID respectively as group filters in BI Publisher’s Data Model. To build the group filters, go to the target Data Set, click the Funnel symbol, and enter the Group Filter Expression like this:
- (G_1.PROJECT_ID==param.uuu_p_project_id)&&(G_1.ID==param.uuu_p_source_id)
Where G_1 is the name of the parent group
Generate and Save the Sample Data in BI Publisher Before Saving the Data Model
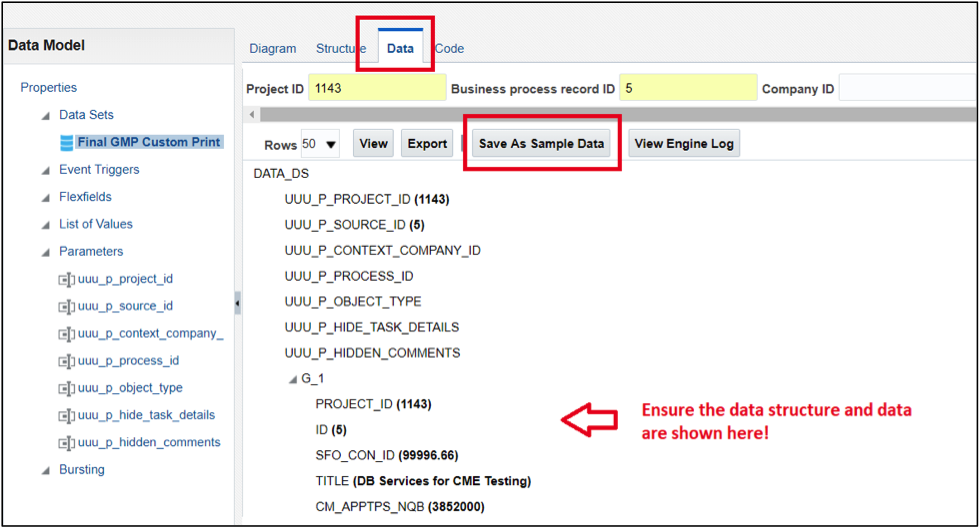
Click OK and go to the Data tab. Enter the Project ID and record ID in the parameter fields, then click View. If the data structure and data are shown successfully, click Save As Sample Data, so it can be used for RTF template development.
To render the schema correctly, please ensure all fields have data in your sample. Null value in the field may result in the field missing in the sample XML, which impacts the report development.
If everything goes well, save the entire Data Model to finalize the external data model creation.
Export the Data Model from BI Publisher
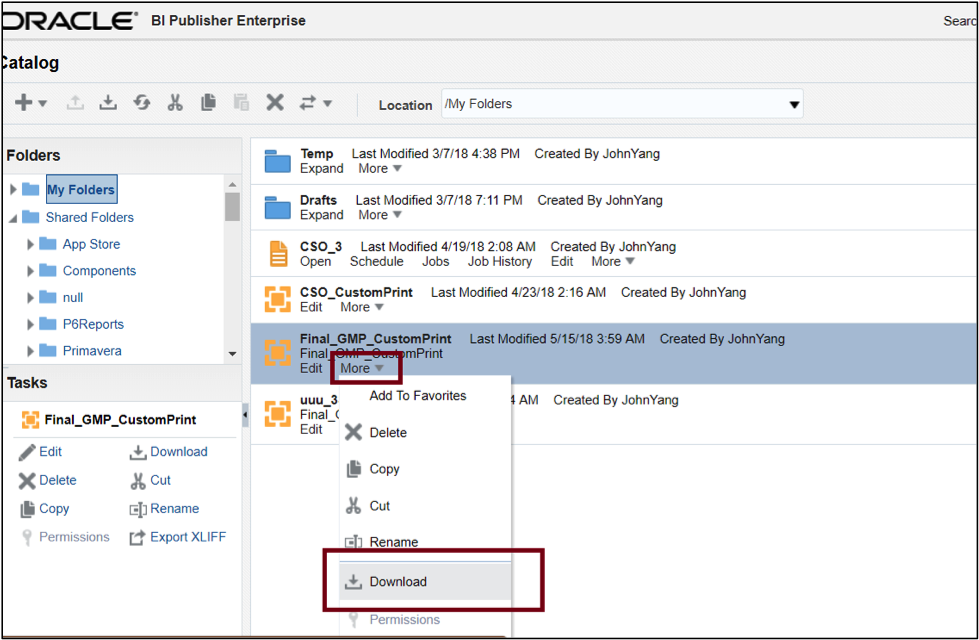
Go back to the Data Model which was just saved. Click “More”> “Download” to get the Data Model file. The file is a compressed file with extension “.XDMZ”. Use the unzip tool such as 7-zip to extract the files. Inside the zip folder, there are two files to be used for Unifier’s Custom Print development:
- xdm : External Data Model to be uploaded into Unifier
- xml: XML schema to be loaded into BI Publisher plugin for RTF template development
You may rename the files to fit the naming convention or other purpose, but the file extension (xdm, xml) should remain the same.
Load the Sample Schema into MS Word to Build the RTF Template.
Load Sample.xml into MS Word, then use the same method as developing the RTF template with the Internal Data Model.
Create Unifier Custom Print using External Data Model.
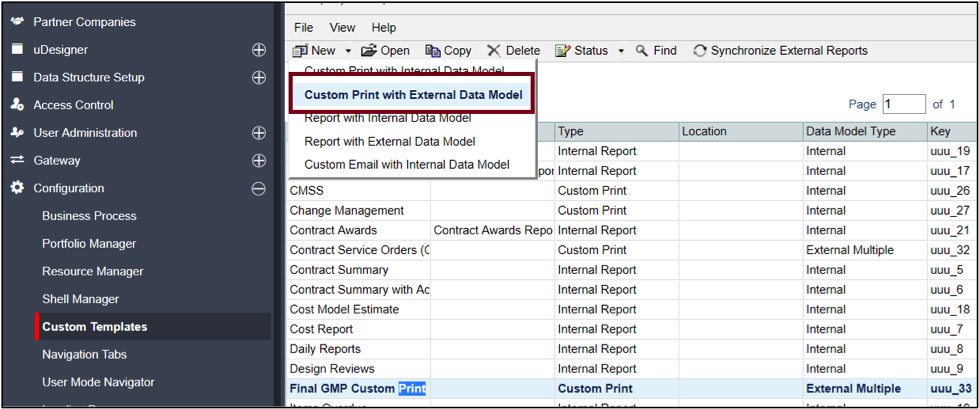
Go to Unifier’s Configuration page under Company Workspace > Admin mode> Configuration > Custom Templates. Create a Custom Print with external Data Model, as shown below.
Upload External Data Model and RTF Template into Unifier.
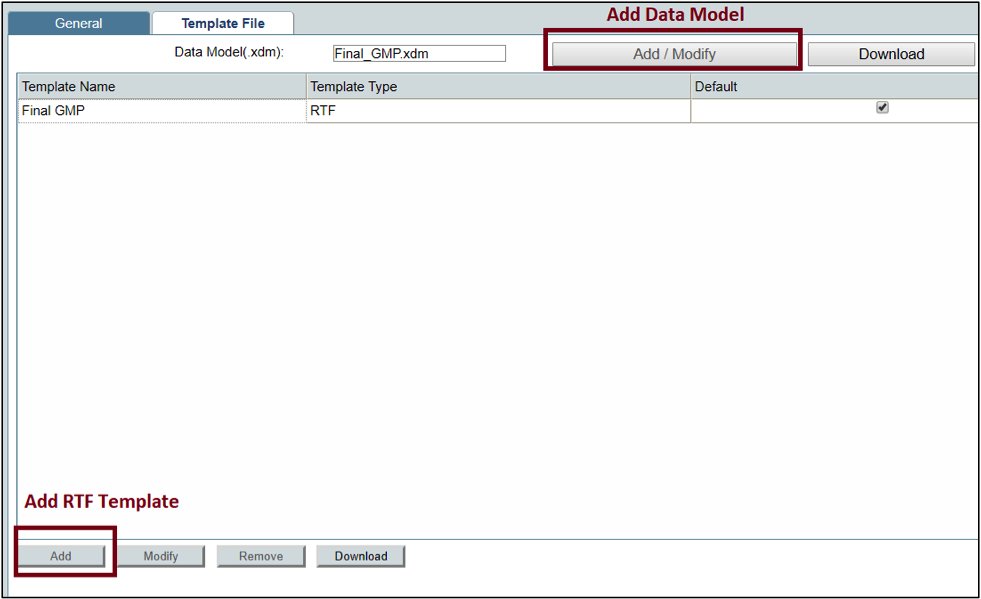
On the next page, enter the name and pick the BP for the Custom Print. After clicking Apply or OK, you will see additional tab “Template File”. Now we can add the Data Model (_datamodel.xdm) and the RTF template respectively.
Publish and Run the Unifier Custom Print.
After uploading the 2 files successfully, go back to the Configuration > Custom Templates Page to publish the Custom Print, then it will be ready to run the Custom Print after opening the BP record.
Summary
Custom Print with External Data Model extends the data reporting capability beyond Unifier’s data schema. Even within Unifier itself, it can stride across multiple BPs to enrich the report content and break the boundary which Internal Data Model has. A tech lead or architect may find it very useful as part of the enterprise reporting solutions.
