ORACLE PRIMAVERA P6 and PCM 14
DOWNLOAD THE PDF HERE
Logos may be inserted in BI Forms and Reports in either the web-based layouts OR the RTF layouts. Images can be GIF, JPG, PNG and BMP. The process is similar in either. Inserting logos can be done in three ways:
- Insert of a logo file directly into the layout.
- Insert of a URL to a logo file.
- Reference to a field in the database containing an image URL.
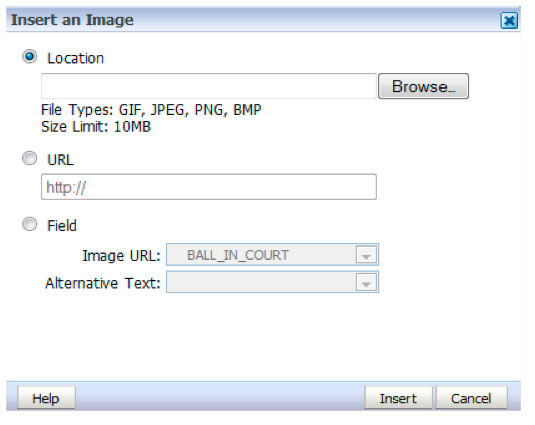
The steps to insert are slightly different for the two layout methods, and both are outlined here.
STEPS FOR WEB-BASED LAYOUTS
- Open BI Web tool and open/edit the layout to receive the logo.
- Make room/position for the logo (in this case replacing the “Company Name” in the header) by adding a grid section or using an existing grid section.
- In this example, we’ve removed the Company Name from the layout.
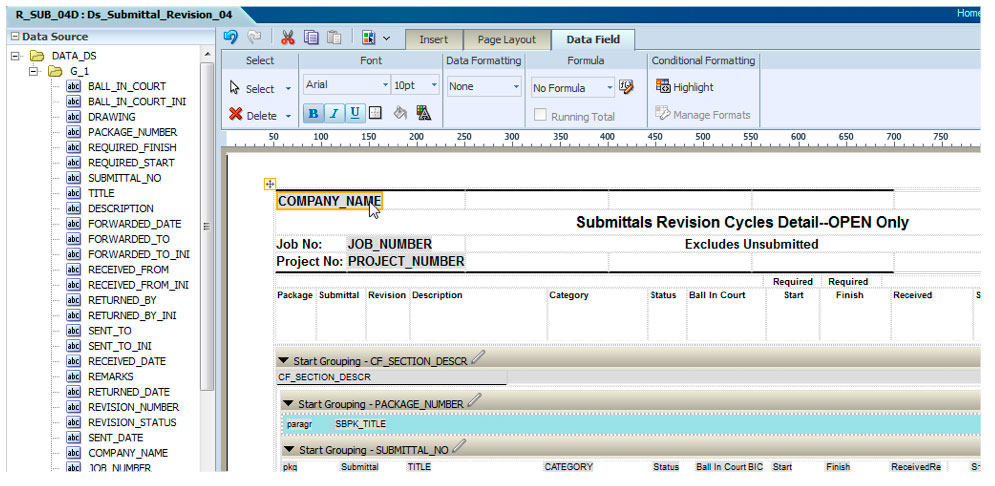
- Highlight the grid section you want the logo to be inserted into.
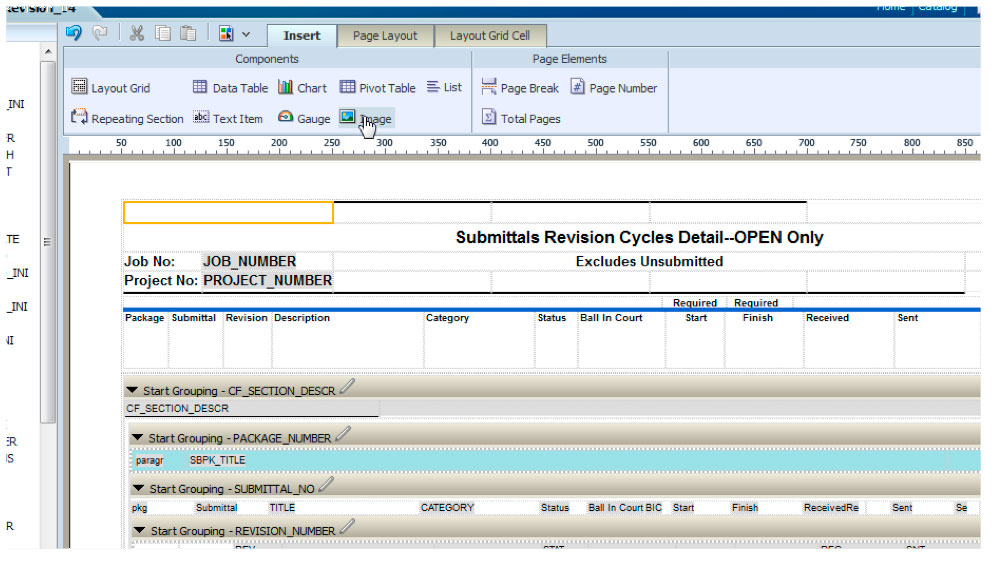
- Click on Insert, Image, and then browse to the file you want to insert.
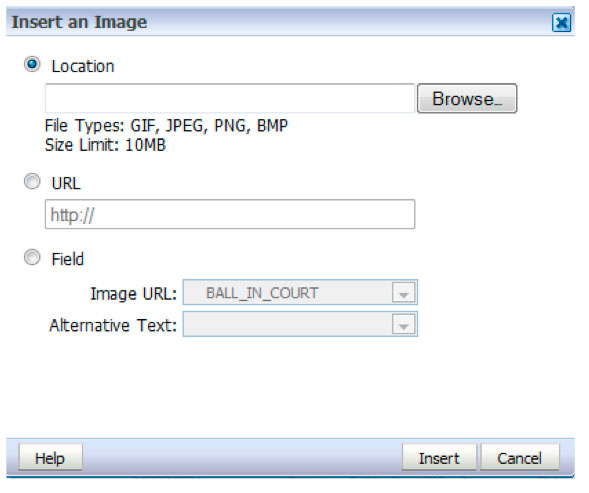
- Click insert, and this will insert the logo in the position selected. Resize display using Properties or click/drag bottom right of image.
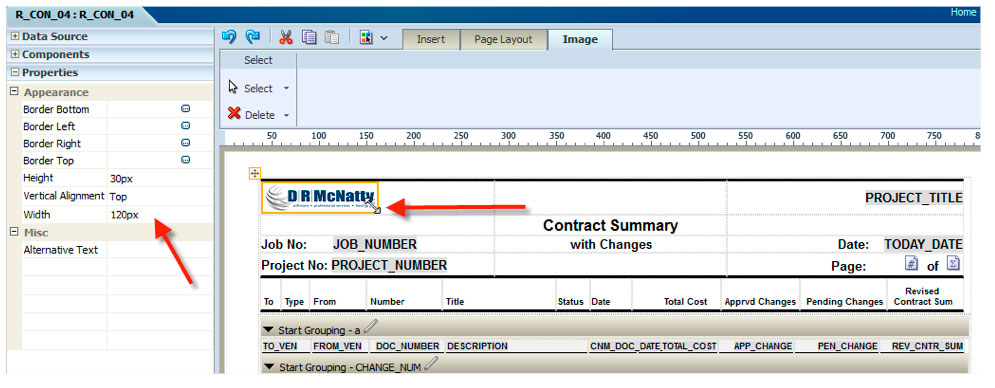
- Save the report—you’re done!
- Follow the same steps as above for URL or Field references, and then select appropriate option in the “Insert an Image” pop up window.
Notes:
- Images can be up to 10MB, but remember that the larger the image, the longer the print preview will take. Best practice is to select a relatively small image.
a. On certain earlier versions of BI, the file size limit for logos is 500k. - In some cases, you may receive an error that the layout grid is not large enough for the logo file. In those cases, best action would be to reduce the image file size; alternately, increase the size of the layout grid.
- Once inserted, you can use the Properties tab to change the image height/width. If changing, take care to maintain the same aspect ratio of the image to avoid distorting the logo. You can also click/drag from the bottom right of the image to resize the image.
STEPS FOR RTF LAYOUTS (BI PUBLISHER TOOL IN WORD)
- Open the RTF Layout in Word. If you are making changes that involve the data model, click on the BI Publisher tab and load the sample XML.
- Set your cursor where you want to insert the logo, then select Insert, Picture and browse to select your image.
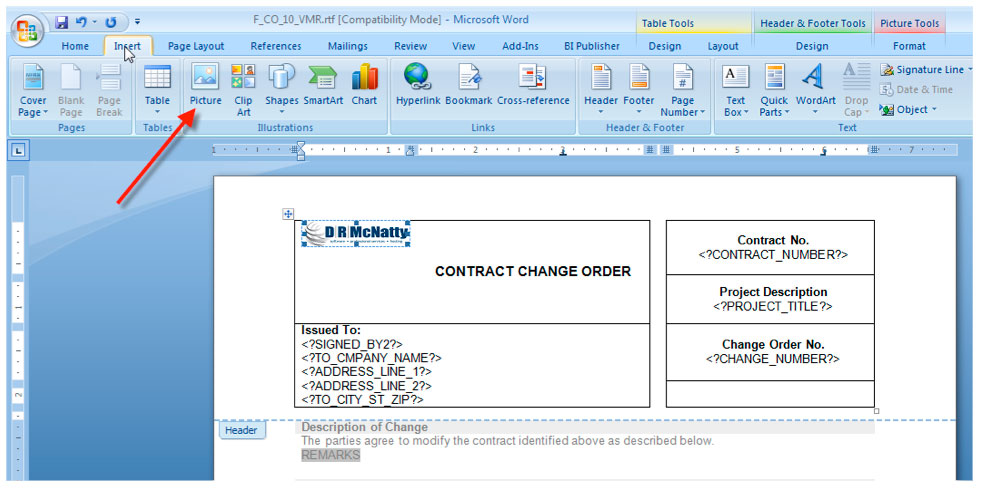
- Use the Word “Picture Tools” to position and resize the image.
- Click SAVE to save the RTF layout.
- Open BI Web tool and upload the RTF layout.
Notes:
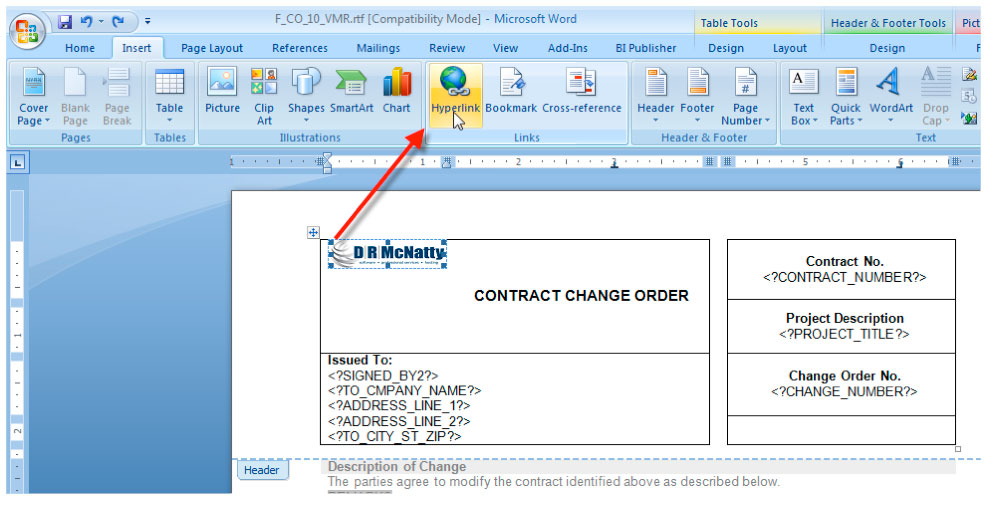
- For inserting a URL to an image, follow same steps as above except select Insert, Hyperlink and select the URL to be used.
- For inserting a FIELD reference, click on BI Publisher tab, Field, and then select the field in the pick list where the URL of the image exists.
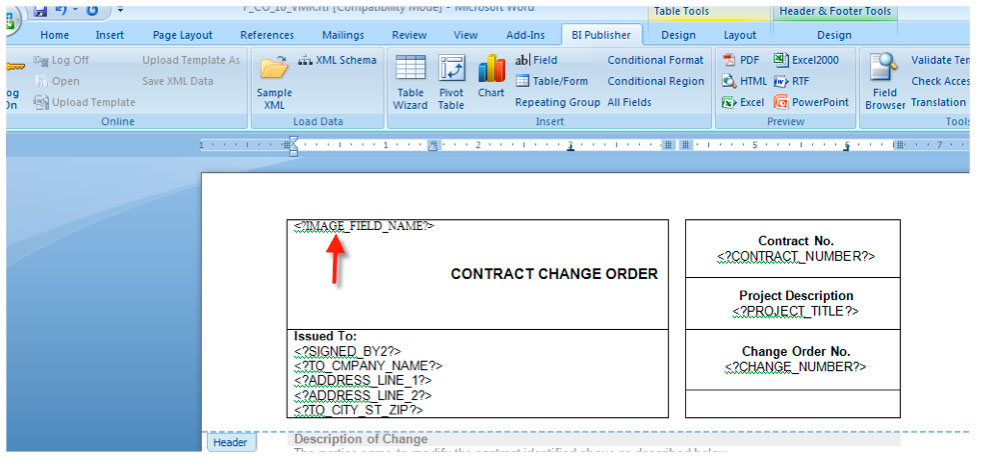
- NOTE: If you are inserting this in a Header/Footer section, you will need to use the BI code rather than using the Field option. Format: <?FIELD_NAME?>
Adding FIELD reference in body
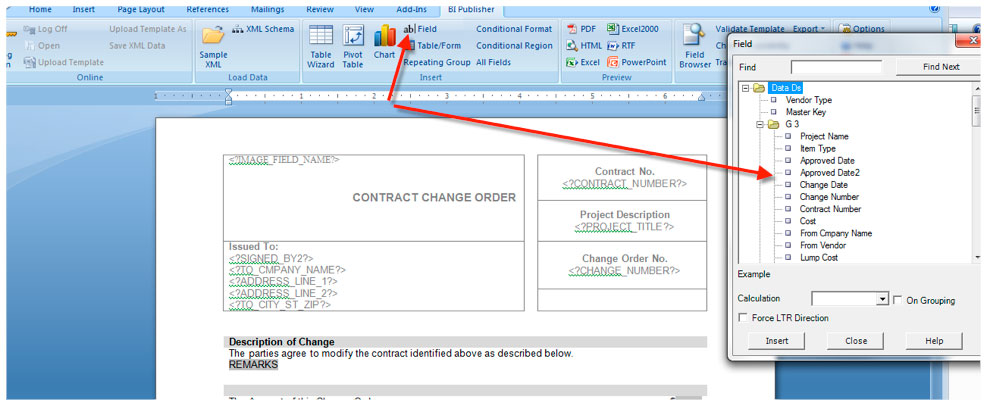
Adding FIELD reference in Header/Footer
Additional Comments
- Multiple Logos
If you have multiple logos, the typical method here would be to create different layouts for each logo type. This will result in multiple print options in CM. For the web tool, there are no conditional properties on the image, so you cannot use an “if” statement to select which image/logo to display. In the RTF tool, you may be able to add custom coding to create conditional properties for multiple logos. Doing this would potentially allow you to have ONE form with different logos displayed. In the Web tool layouts, you’d have to have multiple layouts (one for each logo.) This coding is a more advanced function, and not included in this Tech Tip. - Previous Bitmap() Function and Printing/Display of Attachments
The bitmap() function that existed in Infomaker does NOT exist here, so you cannot convert any field value into a bitmap and display. This applies to the third image option, where the field MUST contain an accessible URL (https://…) and not just a file reference. For this reason, you cannot display or print images that are Attachments in Contract Management as you could in older versions. Also, if you are using a Field reference, care must be taken to ensure:- Your field includes a URL reference and not a file reference.
- If there are one-to-many considerations, make sure that the data model retrieves the field correctly as you want it displayed on the form/report.
