JUNE 2015

PRIMAVERA CONTRACT MANAGEMENT v14x and earlier

CUSTOMIZING TEXT AND LABELS IN PRIMAVERA CONTRACT MANAGEMENT

DOWNLOAD THE PDF HERE


Overview

As part of Contract Management implementations, it’s often desired to modify the interface to match the terms and identifiers used by your organization.  There are several levels that can be modified to suite your needs.  The goal with these changes is to make it simpler for users to understand the use of a module (‘This is where I put my subcontracts’) or the purpose of a particular field data entry (‘This is where I enter the originator of the document’).

Note that these changes are global across the database, so these are not something you can change just in “one project”.

There are three primary areas open to customization:

  1. Elements in project tree
  2. Document types/acronyms
  3. Text/labels associated with input fields

We’ll cover each of these below:

Elements in Project Tree

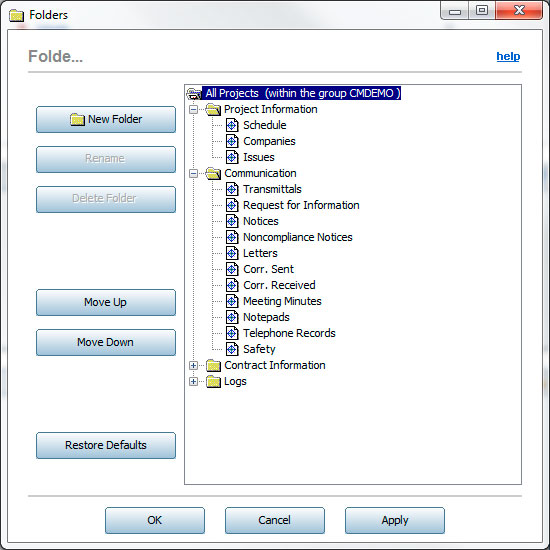
  1. Right click all projects, select “Folders”
  2. Rename a log
    1. For example: “Request for Information” to “RFI”
    2. Highlight then click “Rename”
  3. Create or Rename a Folder
    1. Highlight existing folder, or click “New Folder”
    2. Enter the new description.
    3. Use the Move Up and Move Down to organize
    4. Delete Folder—only works if Folder is empty
  4. Other considerations
    1. Use Move up/Move down to re-order or move modules into different folders.
    2. Example:
      1. You want to have a “Field Inspector” folder with Daily Reports,
        Notices and Safety.
      2. Create the new folder and move it to the position you want
      3. Move the modules listed into this folder.
  1. Modules not used
    1. A common solution is to create a folder “DO NOT USE” and then move those modules you don’t use in there.
    2. Another solution to that is to modify the USER access templates to exclude those modules.
  2. When done, click Apply and OK to close.
  3. If you want to go back, use the “Restore Defaults.”

Document Types/Acronyms

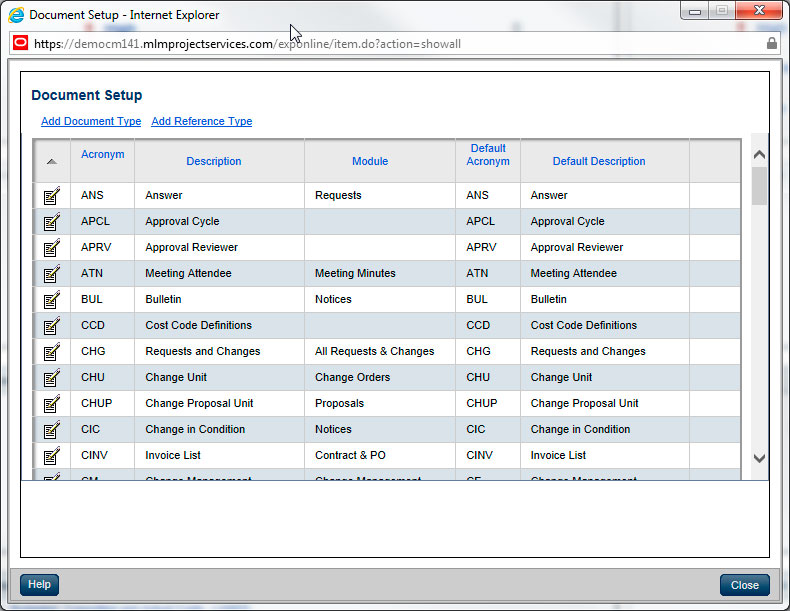
  1. Right click on all projects and select “Document Setup”
  2. Options:
    1. Modify an existing document
    2. Add a new document type
  3. Modify:
    1. Find the document type you want to change and click the EDIT icon.
    2. Example:
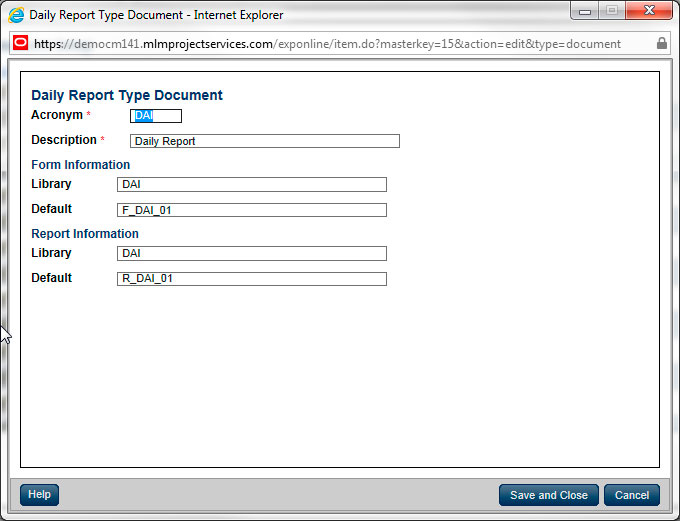
      1. DAI (Daily Reports)—you want this to be DAI (“Inspector Reports”)
      2. Find DAI in the list and click EDIT
      3. Change “Daily Reports” description to “Inspector Reports”
      4. Click Save and Close.
  4. Add a new Document type:
    1. You want to create a NEW document type
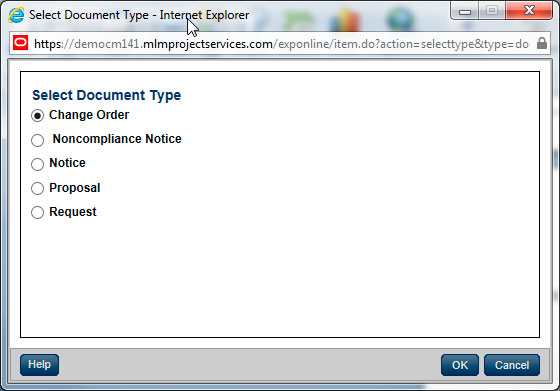
    2. Note only document types you can add to are:
      1. Change Order
      2. Noncompliance Notice
      3. Notice
      4. Proposal
      5. Request
    3. Example:
      1. You want RFI log to have two types (RFI and RFC—request for change)
      2. Add a “Request” Type
      3. Acronym: RFC
      4. Title “Request for Change”
      5. Form/Report libraries
        1. Modify these if you want to set the default form for this new type.
  5. Deleting a Document Type
    1. For new types created, you may have the option to delete them, but many of the system types do not allow you delete.
  6. Hiding Document Types
    1. In some logs where there are multiple document types you have the option to hide types from users.
    2. Example:
      1. RFI’s—there is RFI and ANS (Answer) by default.
      2. If you want to hide ANS, click the edit and then check the “Hide this document type” checkbox.

Text/labels associated with input fields

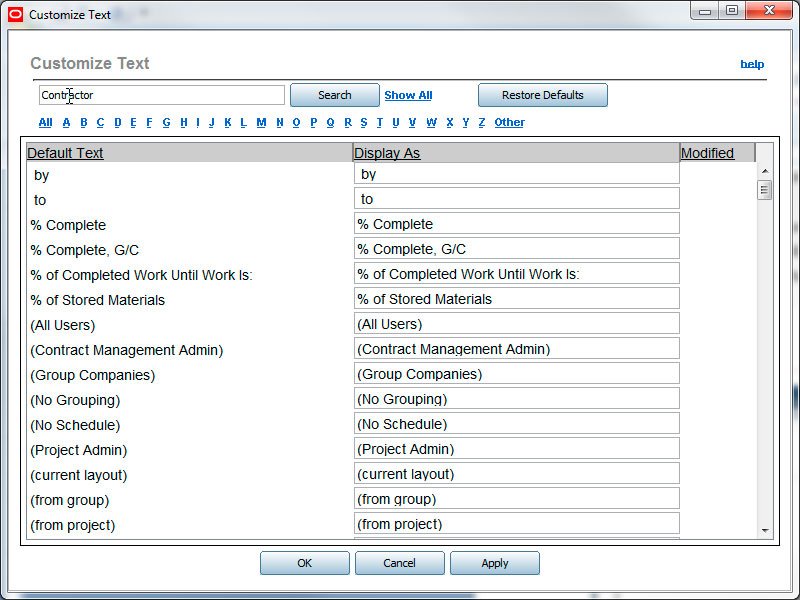
  1. Right click all projects, Customize Text
  2. Use Search to look for current text or scroll through list.
  3. Type in new value that you want
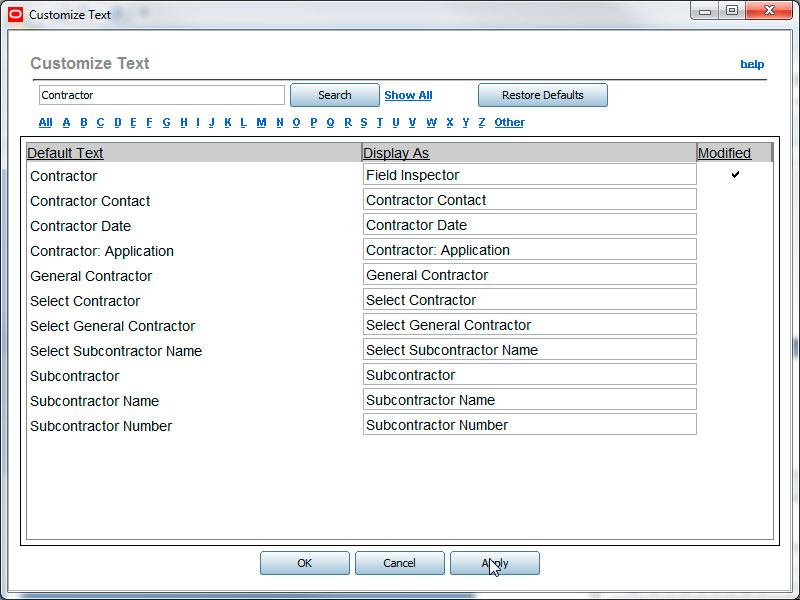
  4. Click Apply and OK to close.
  5. Example:
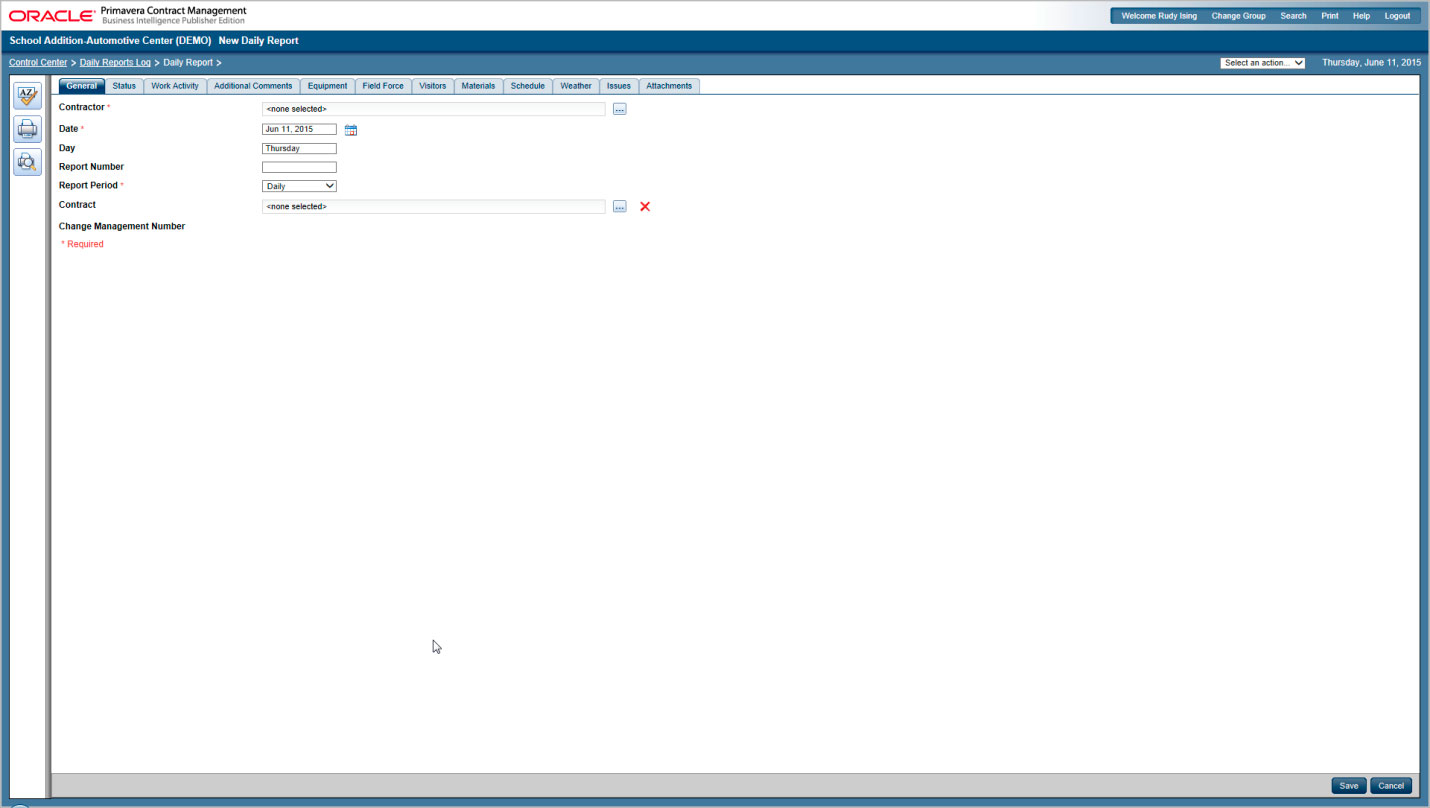
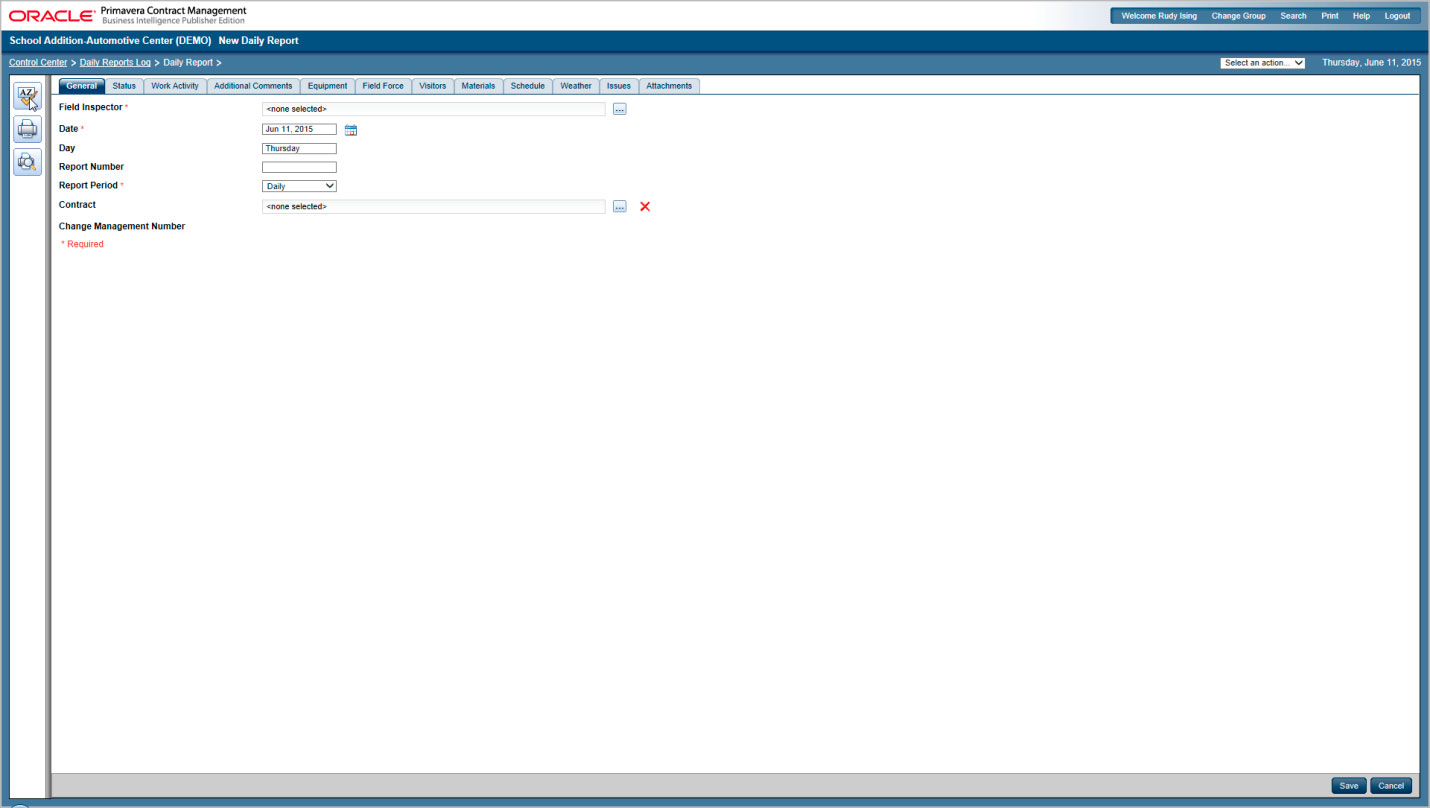
    1. In Daily Reports, the primary field is “Contractor”. This is the person creating the report.  In your instance this is the Field Inspector, so to void confusion you want to change this.
    2. Look for “Contractor” in list
    3. Type in “Field Inspector” in box then close.
    4. Once you return to your document (Daily Reports, Add document) you’ll see the new value there.
  6. Cautions:
    1. Some values may be used in multiple locations (for example “Specification”, “Cost Code”)
    2. If you mess everything up, you can undo by clicking “Restore Defaults”